
Sauces & Condiments
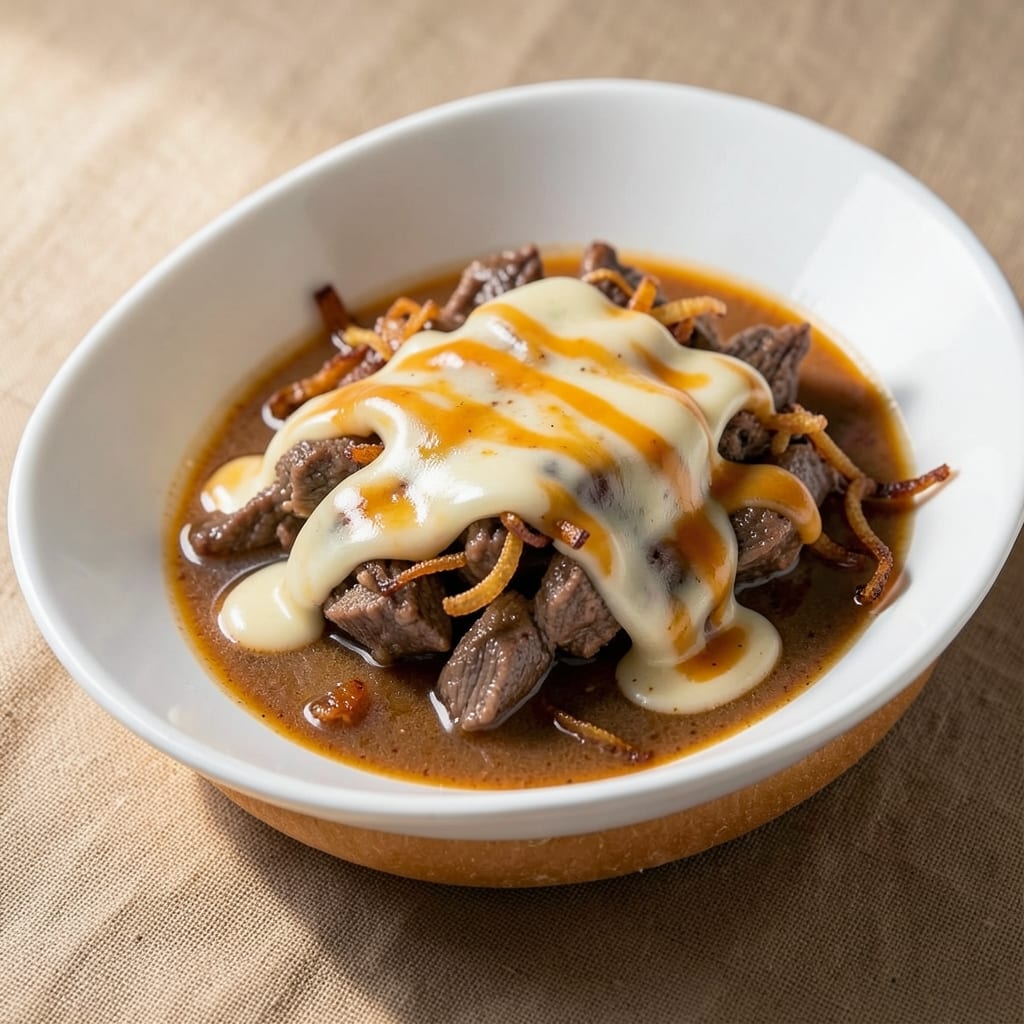
That rich, velvety Arby's beef and cheddar cheese sauce is easier to recreate at home than you'd think—and it transforms any sandwich into a restaurant-quality meal. 💛 The secret lies in melting sharp cheddar with butter and beef broth until silky smooth, then blending until every bite feels like a warm hug. I've perfected this version after countless batches, ensuring the perfect balance of tangy cheddar and savory beef notes that make it irresistible.
What sets this sauce apart is its thick, drizzle-worthy consistency that clings beautifully to fries, sandwiches, or even mac and cheese. No lumps, no separation—just a creamy, velvety sauce that delivers that iconic Arby's flavor without the mystery ingredients. The process is simpler than you'd imagine, requiring just a few pantry staples and a blender to achieve that signature smoothness.
By the time you're done, you'll have a rich, golden sauce that's perfect for dipping, drizzling, or smothering. It's the kind of sauce that makes every bite feel like a trip to your favorite fast-food spot, but with the quality and freshness of homemade. The best part? This recipe is foolproof, so you can focus on enjoying the results rather than worrying about mistakes.
Whether you're craving that classic Arby's experience or just want to elevate your next meal, this sauce delivers. It's versatile enough for game day, movie nights, or even as a creamy pasta topping. Let's get started on recreating that iconic flavor at home!
Ingredients for arby's beef and cheddar cheese sauce
Eight simple ingredients transform into that iconic Arby's sauce—creamy, tangy, and impossible to resist.
| Ingredient | Amount | Notes |
|---|---|---|
| Sharp Cheddar Cheese 🧀 | 1 ½ cups | Shredded, block preferred |
| Unsalted Butter 🧈 | ½ cup | Cold, cubed for even melting |
| Beef Broth 🍲 | 1 cup | Low-sodium preferred |
| All-Purpose Flour 🌾 | 1 tbsp | For thickening, optional |
| Garlic Powder 🧄 | ½ tsp | For depth of flavor |
| Onion Powder 🧅 | ½ tsp | Enhances savory notes |
| Ground Black Pepper 🌶️ | ¼ tsp | Freshly ground preferred |
| Worcestershire Sauce 🍶 | 1 tbsp | For umami depth |
The cheddar is non-negotiable here—sharp, block-style is a must for that authentic tang. I always grab Kraft 2% Milk Sharp Cheddar from the store (it's the closest to Arby's), but any sharp cheddar works. The butter? Use unsalted—salted can make the sauce too salty. For the beef broth, low-sodium is key unless you're okay with adjusting later. The secret weapon? Worcestershire sauce—it brings that unmistakable umami kick that fast-food sauce has. If you're missing any of these, don't stress—I've got swaps below!
No sharp cheddar? Pepper Jack or a mix of mild and sharp cheddar works in a pinch. Butter out? Olive oil or coconut oil (butter gives the best flavor). Skip the Worcestershire? A splash of soy sauce or a pinch of MSG adds that savory punch. The flour is optional—only use it if your sauce needs thickening, but trust me, the original recipe doesn't need it. For the powders, garlic and onion are essential, but if you're out, a pinch of salt and a dash of paprika can mimic the flavor. Pro tip: If your sauce separates, just blend it again—it'll come together!
This sauce is a dream to store—keeps for up to 5 days in the fridge, and it actually tastes better the next day as the flavors meld. For leftovers, cover with a thin layer of broth or water before sealing to keep it creamy. Freezes beautifully for up to 3 months—just thaw in the fridge overnight. I always make a double batch because it disappears faster than you'd think. Perfect for dipping fries, smothering sandwiches, or even turning into loaded mac and cheese. Trust me, once you try it, you'll never buy the fast-food version again!
Why You'll Love This Recipe
- Five-Ingredient Magic: I swear, this sauce comes together with five things from your pantry. Melt butter, whisk in flour, add broth—boom. The sharp cheddar melts into a velvety blanket of flavor while the garlic powder sneaks in that just-right savory punch. No fancy techniques, no stress.
- Sauce That Sticks: That perfect balance of cheddar’s tang and beef broth’s depth? It clings to everything—mashed potatoes, burgers, even roasted veggies like it’s been glued on. I’ve used it to turn plain grilled chicken into a restaurant-worthy dish in three minutes. The flour roux thickens it just enough to coat without turning gluey.
- Game for Any Meal: Keep a jar in the fridge for lazy nights—dump it over hot dogs, stir it into mac and cheese, or drizzle it on tacos. Honestly, I’ve even used it as a dip for fries when I’m out of ranch. It’s the kind of sauce that makes you wonder why you didn’t think of it sooner.
- Budget Booster: Sharp cheddar’s cheap, flour’s a staple, and beef broth lasts forever. A single batch feeds four meals, and the leftovers? Even better the next day. I make a double batch on Sundays, freeze half, and thank myself every time I pull it out for a quick, satisfying dinner. No takeout needed.
Step-by-step instructions for Arby's-style beef and cheddar cheese sauce
Let's make this iconic sauce that's creamy, rich, and packed with umami flavor.
🍳 Step 1: Melt the Butter and Bloom the Flour
In a medium saucepan, melt the 0.5 cup unsalted butter over medium heat until it's completely liquid and starts to foam. Here's the thing—don't walk away. Butter burns fast, and you want to preserve that nutty flavor.
Once the butter is melted, reduce the heat to medium-low and whisk in the 1 tablespoon all-purpose flour. Let it cook for 1-2 minutes, stirring constantly, until it forms a smooth paste. This step, called "blooming," helps remove the raw flour taste and creates a better thickening agent. You'll see the mixture turn slightly darker and smell toasty—this is your signal it's ready for the next step.
🍳 Step 2: Add Aromatics and Broth
With the flour-butter mixture still on medium-low heat, add the 0.5 teaspoon garlic powder, 0.5 teaspoon onion powder, and 0.25 teaspoon ground black pepper. Stir for 30 seconds to toast the spices and wake up their flavors—this makes a huge difference in the final taste.
Now pour in the 1 cup beef broth all at once. Stir well to combine and bring the mixture to a gentle simmer. Let it cook for 3-4 minutes until it thickens slightly. You're looking for a consistency similar to heavy cream—it should coat the back of a spoon but still be pourable. If it thickens too quickly, just add a splash of water to loosen it up.
🥘 Step 3: Build the Cheesy Base
Reduce the heat to low and gradually add the 1.5 cups sharp cheddar cheese, stirring constantly. The cheese will start to melt almost immediately, but keep stirring until it's completely smooth. This step is where the magic happens—you'll see the sauce transform from a simple broth into a rich, velvety cheese sauce.
Once the cheese is fully melted, stir in the 1 tablespoon Worcestershire sauce. This is what gives the sauce that unmistakable Arby's flavor—deep, savory, and slightly tangy. Taste it now and adjust the seasoning if needed. You might want to add a pinch more salt or pepper to match your preference, but be careful—the Worcestershire sauce is already salty.
⏰ Step 4: Simmer for Maximum Creaminess
Return the sauce to a gentle simmer and let it cook for 5-7 minutes on low heat. This final cooking step is crucial—it helps the sauce develop its signature smooth texture and ensures all the flavors meld together perfectly. Stir occasionally to prevent any cheese from sticking to the bottom.
You'll know it's ready when the sauce is thick, glossy, and coats the back of a spoon without being gluey. If it's too thick, whisk in a few tablespoons of warm water or milk to reach your desired consistency. The sauce should be velvety smooth with no lumps—if you see any, strain it through a fine-mesh sieve for that ultra-smooth Arby's texture.
🍽️ Step 5: Keep Warm and Serve
Transfer the sauce to a clean saucepan or slow cooker and keep it warm on low heat—this sauce tastes best when served warm. For the creamiest results, stir occasionally to prevent a skin from forming. This sauce is perfect for dipping fries, topping burgers, or drizzling over roasted potatoes.
Real talk: This sauce keeps well in the fridge for up to 5 days in an airtight container. To reheat, warm it gently on the stove over low heat, stirring constantly until smooth. If it thickens too much, just add a splash of warm water or milk to loosen it up. Enjoy your homemade version of that iconic Arby's cheese sauce!
Pro Tips For Making Arby'S Beef And Cheddar Cheese Sauce
- Melt Cheese Slowly: If you dump shredded cheddar into hot liquid, you’ll end up with a greasy mess. Instead, lower the heat to medium-low once the roux is smooth, then sprinkle cheese in small batches while stirring constantly—it’ll blend like silk, not separate like a sad science experiment. ---
- Use Cold Butter: I used to melt the butter first, and the sauce always tasted flat. Now I cut the unsalted butter into small cubes and add it to the flour while stirring—this creates a better roux faster and keeps the sauce from tasting buttery rather than rich. ---
- Bloom the Flour: Whisk the all-purpose flour into the butter before adding broth—this step (called blooming) cooks off the raw flour taste and thickens the sauce more effectively. Skip it, and you’ll be left with a thin, floury aftertaste. ---
- Simmer, Don’t Boil: Once the cheese is melted, keep the sauce at a gentle simmer—boiling will cause it to split and turn grainy. A low, steady heat (barely bubbling) keeps it smooth and lets the garlic powder infuse properly without burning.
Best sauces and condiments for arby's beef and cheddar cheese sauce
Sauce Consistency Secrets
The key to that perfect Arby's sauce texture is all about balance. Start with low and slow heat when melting the cheese—rushing it causes lumps. For extra silkiness, I blend the finished sauce for 10-15 seconds with an immersion blender. If it's too thick, whisk in 1 tablespoon warm water or milk at a time until it reaches that ideal drizzle consistency. 💛
Flavor Boosters
For an extra umami kick, add ½ teaspoon smoked paprika when toasting the spices. A splash of hot sauce (like Frank's RedHot) at the end gives that signature tangy heat. If you're feeling adventurous, stir in 1 teaspoon mustard powder with the garlic and onion powders—it mimics the secret fast-food flavor.
Equipment Essentials
You don't need fancy tools, but a medium saucepan with sloped sides helps prevent cheese from sticking. A whisk with a long handle makes stirring easier, and a fine-mesh sieve is perfect for straining out any lumps. For melting cheese, I swear by a double boiler setup—it keeps the heat gentle and prevents scorching.
Sauce Variations
Want to try a spicy version? Add 1 teaspoon cayenne pepper with the Worcestershire sauce. For a lighter take, replace half the cheddar with Monterey Jack cheese. The original recipe works perfectly for game day fries, but I also love drizzling it over loaded baked potatoes or using it as a pasta sauce base.
Storage Hacks
This sauce freezes beautifully—portion it into ice cube trays for easy single-use servings. For fridge storage, keep it in an airtight container with a layer of plastic wrap pressed directly on the surface to prevent a skin from forming. When reheating, always warm it over low heat and stir constantly to maintain that creamy texture. ❄️
Serving Suggestions
Drizzle this sauce over Arby's-style curly fries for a restaurant-quality dip. It's also perfect for smothering chicken tenders or sliders. For a hearty meal, mix it with mashed potatoes or use it as a creamy filling for stuffed peppers. The possibilities are endless—just keep it warm and ready to serve! 🍽️
Nutrition facts
Frequently asked questions
Can I make this sauce without Worcestershire sauce?
Yes! If you're missing Worcestershire, try 1 teaspoon soy sauce or ½ teaspoon MSG for that deep umami flavor. You can also boost the garlic and onion powders to 1 teaspoon each for extra savory depth. The sauce will still taste delicious—just slightly different in complexity.
Why did my sauce get grainy or separate?
This usually happens when cheese melts too quickly or heat is too high. Always use low heat when melting cheese and stir constantly. For extra silkiness, blend the finished sauce with an immersion blender for 10-15 seconds. If it separates, whisk in 1 tablespoon warm water and reheat gently until smooth.
How can I use this sauce beyond dipping fries?
This versatile sauce works as a creamy pasta topping, mac and cheese upgrade, or even a dip for veggies! Try drizzling it over loaded baked potatoes or using it as a sandwich spread. For extra richness, mix it with ½ cup sour cream before serving. The possibilities are endless—just keep it warm for best flavor!
Can I make this sauce dairy-free?
Swap the cheddar for dairy-free sharp cheddar shreds (like Violife) and use vegetable broth instead of beef. For extra creaminess, stir in 2 tablespoons nutritional yeast when melting the cheese. The texture will be slightly different but still delicious—perfect for vegan versions of Arby's favorites!
How do I keep the sauce from getting too thick when reheating?
When reheating, always use low heat and stir constantly. If it thickens too much, whisk in 1 tablespoon warm water or milk at a time until you reach your desired consistency. For storage, keep it in an airtight container with a thin layer of water or broth on top to maintain creaminess. Never microwave—it causes separation!