
Main Courses
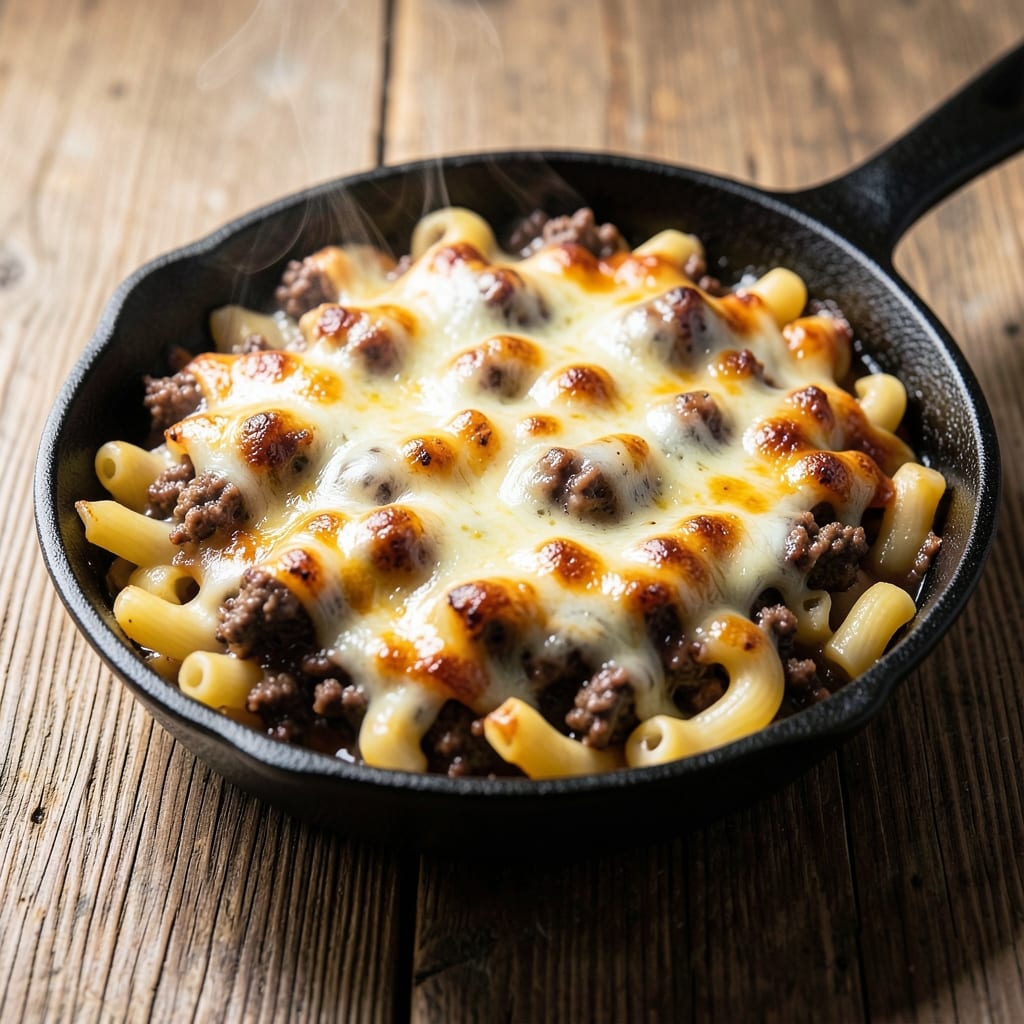
This baked mac and cheese with ground beef recipe transforms a classic comfort food into a hearty, one-pan masterpiece that combines rich cheddar with savory beef. The secret lies in browning the ground beef first—this creates deep, caramelized flavors that infuse the entire dish, elevating it beyond ordinary mac and cheese. With just 30 minutes of prep and 25 minutes in the oven, you'll have a bubbling, golden-topped casserole that's impossible to resist.
The beauty of this recipe is its simplicity: one pan, minimal cleanup, and a dish that delivers restaurant-quality results. Ground beef adds protein and heartiness, while a blend of sharp cheddar and cream cheese creates that signature velvety texture we all love. The breadcrumb topping adds a satisfying crunch that contrasts perfectly with the creamy filling.
What you'll end up with is a dish that's equal parts comforting and indulgent—creamy, cheesy layers topped with crispy breadcrumbs, all infused with the rich, meaty flavor of perfectly browned ground beef. It's the kind of meal that disappears faster than you can say "second helping," making it ideal for family dinners, game days, or whenever you need a satisfying, crowd-pleasing dish.
Serve it straight from the oven with a side of steamed vegetables or a crisp green salad to balance the richness. The leftovers reheat beautifully, too, so you can enjoy this cheesy beef melt magic all week long. Let's get started!
Ingredients for baked mac and cheese with ground beef
Pantry staples meet restaurant-quality cheesesteak flavors in this one-pan masterpiece.
| Ingredient | Amount | Notes |
|---|---|---|
| Elbow Macaroni 🍝 | 2 cups | Uncooked, dry pasta |
| Ground Beef (80/20) 🥩 | 1 ½ lb | Finely ground for even cooking |
| Sharp Cheddar Cheese 🧀 | 3 cups | Shredded, block preferred |
| Cream Cheese 🧈 | 8 oz | Full-fat for creaminess |
| Whole Milk 🥛 | 1 ½ cups | Warmed for smooth sauce |
| Butter 🧈 | ½ cup | Unsalted, melted |
| All-Purpose Flour 🌾 | ¼ cup | For roux thickening |
| Yellow Onion 🧅 | 1 whole | Diced, medium size |
| Garlic Cloves 🧄 | 4 cloves | Minced, fresh preferred |
| Panko Breadcrumbs 🍞 | ½ cup | For crispy topping |
| Dried Mustard 🌶️ | 1 tsp | Adds depth of flavor |
| Ground Black Pepper 🌶️ | ½ tsp | Freshly cracked |
| Salt 🧂 | 1 ½ tsp | Diamond Crystal preferred |
The ground beef is where the magic starts. 80/20 fat ratio is key—it browns beautifully and adds richness that cuts through the cheese. Kroger or Costco usually have the best prices for fine-ground beef, and it's worth the extra few cents for that even texture. If you're using pre-shredded cheddar, shake the bag—it's packed with anti-caking agents that make the cheese clump. For the best flavor, grab a wedge of sharp cheddar and shred it yourself. The onion and garlic? Yellow onions add sweetness, but red works too if that's what you've got. Just make sure they're finely diced—no big chunks in this creamy dish.
No panko? Regular breadcrumbs toasted with butter work just as well. Running low on cream cheese? Substitute with an extra cup of cheddar plus 2 tbsp milk—it won't be identical, but it'll still be delicious. The mustard is non-negotiable though—it's what gives this dish that subtle tang that makes it taste homemade. If you're making a big batch, double the cheeses and adjust the milk to maintain consistency. And trust me on the full-fat milk and butter—low-fat versions make the sauce separate, and nobody wants that.
This reheats like a dream—5 minutes at 350°F and it's back to golden perfection. For make-ahead meals, assemble everything except the breadcrumb topping, cover with foil, and refrigerate for up to 24 hours. The breadcrumbs can go on right before baking. Leftovers? Portion into containers with a sprinkle of extra cheese on top—they'll stay fresh for 4 days in the fridge. Freezing works too, but the texture gets a little grainy after thawing. Worth it for the convenience, though.
Why You'll Love This Recipe
- One-Pan Magic: I swear by this recipe because it’s a single sheet pan, no fuss. Brown the beef right in the same dish you’ll bake the mac in—no extra pots, no extra cleanup. Just dump, stir, bake, and boom, dinner’s ready.
- Rich, Savory Kick: That 80/20 ground beef adds a deep, meaty punch, while the sharp cheddar and cream cheese melt into a gooey, tangy blanket. Honestly, the first bite makes me wonder why I ever skipped the beef in my mac.
- Weeknight Workhorse: Between us, this is my go-to when I’m exhausted but still need to feed everyone. It’s hearty enough for a family dinner but easy enough to throw together after soccer practice. (Yes, even on a Tuesday night.)
- Budget-Friendly Leftovers: A pound of beef and a block of cheese stretch this into three solid meals—no sad, wilted leftovers here. My kids actually ask for the seconds, and I get to save money while doing it. Win-win.
Step-by-step instructions for one-pan cheesy beef melt magic
Here's how to create the ultimate cheesy, meaty comfort food with minimal cleanup.
🍳 Step 1: Cook the Ground Beef and Sauté Aromatics
In a large oven-safe skillet, heat the 1.5 lb ground beef (80/20) over medium-high heat until browned, breaking it apart with a wooden spoon. You'll know it's ready when the meat loses its raw color and develops a golden crust—this usually takes about 5-6 minutes. Drain any excess fat, leaving about 1 tablespoon in the pan for flavor.
Add the 1 whole yellow onion (diced) and 4 cloves garlic (minced) to the skillet, stirring for 3-4 minutes until the onion becomes translucent and the garlic releases its fragrant aroma. This step builds the flavor foundation for your dish—don't rush it. The onions should soften completely while the garlic lightly browns without burning.
👨🍳 Step 2: Create the Cheesy Sauce Mixture
Lower the heat to medium and add the 0.5 cup butter and 0.25 cup all-purpose flour to the skillet, stirring constantly for 1-2 minutes until a smooth roux forms. This creates the thickening base for your sauce—you'll see it go from grainy to creamy as it cooks. If the mixture smells nutty, that's perfect.
Gradually whisk in the 1.5 cups whole milk until smooth, then stir in the 3 cups sharp cheddar cheese and 8 oz cream cheese until fully melted and creamy. I like to use a wooden spoon for this step—it helps scrape up any browned bits from the bottom of the pan. The sauce should thicken noticeably as the cheeses melt, creating a velvety texture. If it's too thick, add a splash of milk to reach your desired consistency.
🍳 Step 3: Cook the Pasta and Combine
Add the 2 cups elbow macaroni to the skillet, stirring to coat each noodle in the cheesy sauce. Pour in 2 cups water (just enough to cover the pasta) and bring to a gentle boil. Cook for 8-10 minutes, stirring occasionally, until the pasta is tender but still has a slight bite—this ensures it doesn't turn mushy when baked later. The pasta should absorb most of the water, leaving you with a thick, creamy mixture.
Season with the 1 tsp dried mustard, 0.5 tsp ground black pepper, and 1.5 tsp salt, stirring well to distribute the flavors evenly. Taste and adjust seasoning if needed—this is your chance to balance the flavors before baking. The mustard adds a subtle tang that complements the richness of the cheeses perfectly.
🔥 Step 4: Assemble and Bake to Golden Perfection
Transfer the skillet to a 375°F preheated oven and bake for 15-20 minutes until the top begins to bubble and turn golden brown. This is where the magic happens—the cheese melts completely, creating a bubbly, golden crust while keeping the interior creamy and gooey. If the top browns too quickly, tent loosely with foil to prevent over-browning.
Remove from the oven and sprinkle the 0.5 cup panko breadcrumbs evenly over the top. Return to the oven for 3-5 minutes until the breadcrumbs turn golden and crispy. Here's the thing—this crispy topping adds texture contrast that makes the dish irresistible. Let it rest for 5 minutes before serving to allow the layers to set slightly.
Pro Tips For Making Baked Mac And Cheese With Ground Beef
- CRISPY THE PASTA FIRST: Drain your elbow macaroni, rinse it hard under cold water, then toss it in a cold skillet with a drizzle of oil—just enough to coat. Cook on medium heat for 2-3 minutes until it’s dry and slightly crispy. That texture change makes all the difference when it hits the oven, especially with the beef’s moisture.
- DON’T OVERMIX THE CHEESE SAUCE: Once you melt the cheddar and cream cheese together, stir just until smooth—no need to go full purée. Lumps disappear faster than you think, and overworking it turns the sauce greasy. I learned this the hard way after making a batch that looked like a cheese volcano.
- BROWN THE BEEF FULLY: Skip the quick sear and let that 80/20 ground beef cook low and slow until it’s actually browned, not just pink. Break it up with a wooden spoon as it cooks, and resist the urge to speed it up—this builds flavor that won’t get drowned by the cheese. (Yes, even if you’re impatient like me.)
- ADD A SPLASH OF MILK TO THE BEEF: Before mixing the cooked beef into the cheese sauce, stir in ¼ cup of whole milk. It cuts the richness and keeps the sauce from curdling when it hits the oven. Sounds weird, but it works—my grandmother swore by this, and she was right.
Serving suggestions for this baked mac and cheese with ground beef
Classic Pairings
Serve this cheesy beef masterpiece with a simple side salad using crisp romaine, cherry tomatoes, and a light vinaigrette. The acidity cuts through the richness beautifully. I love adding crispy bacon bits to the salad for extra protein and crunch. 🥗
A steamed vegetable medley of broccoli, carrots, and green beans adds color and nutrients without overpowering the main dish. Toss them in a little olive oil and lemon juice before serving to keep them vibrant. For a heartier option, try roasted Brussels sprouts with a sprinkle of balsamic glaze—the sweetness balances the savory mac and cheese perfectly.
Bread Basket Essentials
No cheesy casserole is complete without warm, crusty bread. Sourdough loaves or garlic bread are my go-to choices—their sturdy texture can handle the creamy filling. For a fun twist, serve with cheese pull-apart bread (like a mini version of a cheese pull-apart appetizer) for dipping. 🍞
If you're serving a crowd, set out a bread basket with a variety of options: baguette slices, pretzel rolls, and cornbread muffins. The corn muffins add a Southern touch that pairs wonderfully with the beefy mac and cheese. Keep the bread warm in a 200°F oven until serving.
Dipping Sauces
Offer a small bowl of marinara sauce or spicy ketchup on the side for guests who want to dip their bread. I like using Rao's Homemade Marinara—it's rich but not too heavy. For a smoky kick, try a chipotle ranch dip made with Greek yogurt, chipotle powder, and a touch of honey. 🌶️
For a tangy contrast, blend 1 cup sour cream, 1 tbsp Dijon mustard, and 1 tsp garlic powder for a quick garlic sour cream dip. This adds a cool, creamy element that complements the warm, cheesy main dish. Serve in small ramekins for easy dipping.
Game Day Upgrades
Turn this into a game-day spread by adding pickled jalapeños and extra-sharp cheddar cheese for topping. The heat from the jalapeños cuts through the richness, while the extra cheese adds a satisfying crunch. Set out mini cast-iron skillets for individual servings—guests will love the portion control. 🏈
Pair with cold beer like a Mexican lager (think Modelo Especial or Pacifico) to cleanse the palate between bites. For non-alcoholic options, sparkling apple cider or ginger ale adds a refreshing contrast. Keep drinks chilled in a bucket of ice for easy serving.
Nutrition facts
Frequently asked questions
Can I use ground turkey or chicken instead of beef?
Ground turkey (especially lean) or chicken work well, but you'll want to add 1 tablespoon olive oil to the pan to prevent drying out. For extra flavor, season the poultry with 1 tsp smoked paprika or ½ tsp garlic powder before cooking. The texture will be slightly lighter, but the cheesy sauce will still shine.
Why did my mac and cheese get watery after baking?
This usually happens when the pasta absorbs too much water or the cheese-to-milk ratio is off. For next time, use 1 cup less water when cooking the pasta in the skillet, and reduce milk to 1 cup instead of 1.5 cups. Also ensure your oven isn't too hot—375°F is perfect for even baking.
How can I make this dish vegetarian?
Swap the ground beef for 1 cup cooked lentils or ½ cup crumbled tempeh (pan-fried for texture). For extra richness, add ¼ cup nutritional yeast to the cheese sauce—it gives that umami depth. The mustard and garlic will still work perfectly to balance flavors.
Can I make this ahead of time for a party?
Yes! Assemble everything except the breadcrumbs up to 24 hours ahead, cover tightly, and refrigerate. Bake straight from cold at 375°F for 30-35 minutes (add 5-10 minutes if it's extra cold). For large crowds, bake in two 9x13-inch pans—just double the breadcrumbs for crispy tops on both.
What's the best way to reheat leftovers?
Cover with foil and reheat at 350°F for 10-15 minutes until bubbly. For extra crispiness, broil for 2-3 minutes** at the end. The breadcrumbs may soften slightly, but the cheesy filling stays creamy. Avoid microwaving—it makes the pasta mushy and the cheese greasy.