
Soups & Stews
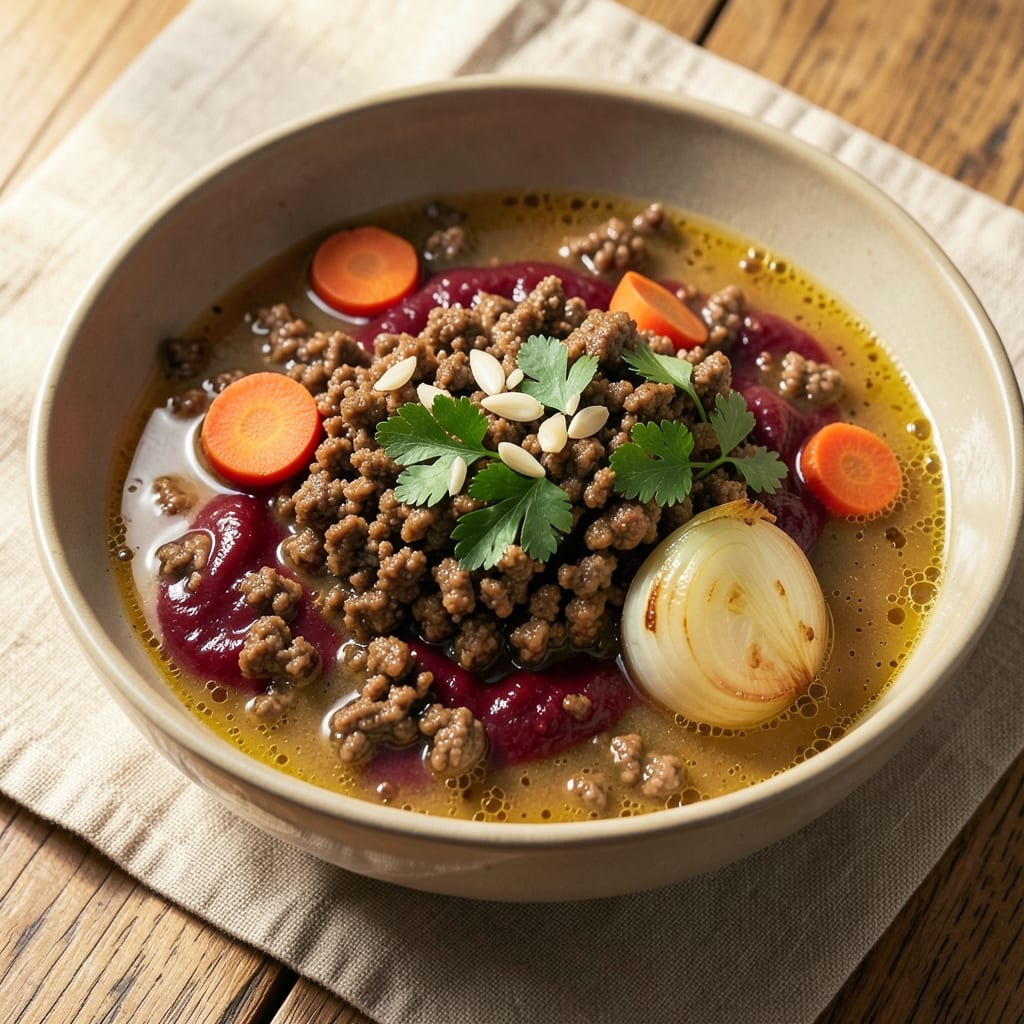
This ground beef chicken broth recipe transforms simple ingredients into a deeply flavorful, one-pot meal that feels like a restaurant-quality dish. The secret lies in browning the beef to develop rich, caramelized flavors before simmering it in aromatic broth until tender and infused with umami. I developed this recipe during a particularly busy week when I needed a hearty, satisfying dinner that required minimal effort but maximum flavor—it became an instant family favorite.
What makes this recipe special is its balance of simplicity and depth. You start with ground beef, which releases its natural juices as it browns in the pan, creating a flavorful base that forms the foundation of the dish. The chicken broth adds depth and richness, while aromatics like garlic, onions, and herbs elevate the flavor profile without overwhelming the dish. The result is a tender, savory beef mixture that's perfect for serving over rice or with crusty bread to soak up every last drop of that aromatic broth.
The beauty of this recipe is its versatility—it's hearty enough to stand alone as a main dish but also works beautifully as a filling for tacos, stuffed peppers, or even a quick pasta sauce. The beef stays tender and flavorful, while the broth reduces slightly to create a sauce that coats every bite. It's the kind of dish that feels comforting and satisfying, perfect for a weeknight dinner or a cozy meal with friends. The technique is straightforward, but the results are anything but basic.
Once you try this recipe, you'll find yourself reaching for ground beef and chicken broth more often—it's that good. The method is foolproof, and the flavors are hard to resist. Whether you're feeding a crowd or just looking for a simple yet impressive meal, this recipe delivers. Let's get started on creating something truly special.
Ingredients for ground beef chicken broth
Simple pantry staples create a deeply flavorful one-pot meal with restaurant-quality depth.
| Ingredient | Amount | Notes |
|---|---|---|
| Ground Beef 🥩 | 1 ½ lb | 85% lean for best flavor |
| Chicken Broth 💧 | 3 cups | Low-sodium preferred |
| Yellow Onion 🧅 | 1 whole | Diced into 1/4-inch pieces |
| Garlic Cloves 🧄 | 4 cloves | Minced for aromatic base |
| Carrots 🥕 | 2 medium | Peeled and sliced into rounds |
| Tomato Paste 🍅 | 2 tbsp | Smooth texture preferred |
| All-Purpose Flour 🌾 | 1 tbsp | For thickening sauce |
| Dried Thyme 🌿 | 1 tsp | Or 1 tbsp fresh |
| Ground Black Pepper 🌶️ | ½ tsp | Freshly ground preferred |
| Kosher Salt 🧂 | 1 tsp | Adjust to taste |
| Olive Oil 🫒 | 1 tbsp | For browning beef |
| Fresh Parsley 🌿 | ¼ cup | Chopped for garnish |
The ground beef is your flavor foundation—85% lean gives you that perfect balance of meatiness and fat for browning. Look for packages labeled 'ground chuck' at Costco or your local butcher for the best marbling. If you're using pre-ground beef from the store, check the sell-by date—freshness matters for that rich, caramelized flavor. The chicken broth should be low-sodium (like Swanson or Pacific Foods) so you control the seasoning, not the packet. For extra depth, make your own broth with chicken backs and necks—it's worth the effort if you're a broth lover.
No fresh thyme? Dried works perfectly at one-third the amount. The tomato paste can be swapped for crushed tomatoes at half the volume if you prefer. Carrots can be baby carrots or regular ones—just adjust the slices to even thickness. If you're short on time, pre-diced onions from the freezer section save minutes. For the parsley, frozen works in a pinch (thaw and drain first), but fresh adds that bright finish that makes the dish feel special. The flour is just for thickening—don't skip it if you want that velvety sauce, but if you're gluten-free, cornstarch works too**.
This dish reheats beautifully—better the next day when flavors meld. Store in an airtight container in the fridge for up to 5 days, or freeze portions for 3 months. I double the recipe and freeze half immediately—perfect for busy nights. The sauce thickens as it cools, so add a splash of broth when reheating if it's too thick. Garnish with fresh parsley right before serving to keep it vibrant.
Why You'll Love This Recipe
- One-Pot Magic: I swear by this recipe because it’s literally one pot—no chopping boards, no extra pans, just brown the beef, toss in the veggies, and let it simmer. The onions caramelize right in the broth, and the carrots soften perfectly without falling apart.
- Umami Bomb: That ground beef? It’s the star—browned just enough to lock in deep flavor, then simmered until it’s tender but still holds its shape. The chicken broth adds richness, while the garlic and onions build layers of savory warmth that make this taste like a hug in a bowl.
- Leftovers That Don’t Suck: Between us, most broth-based dishes turn into sad, watery leftovers. Not this one. The beef stays juicy, the carrots hold their bite, and it reheats like a dream—perfect for lunchboxes or a quick dinner when you’re running late.
- Budget Meal, Big Payoff: I make this when I need to feed the family without breaking the bank. Ground beef is cheap, broth is cheap, and a single onion and a few cloves of garlic stretch the flavor so far you’ll forget you’re eating something simple. Honestly, it’s my go-to for when I’m tired of takeout but don’t want to spend hours cooking.
Step-by-step instructions for umami-packed ground beef base
This one-pot method builds deep, savory flavor through careful layering and timing.
Brown the Ground Beef Thoroughly
Heat the 1 tablespoon olive oil in a large Dutch oven over medium-high heat until shimmering. Add the 1.5 lb ground beef, breaking it apart with a wooden spoon as it cooks. Let it brown undisturbed for 3-4 minutes—this creates a rich, caramelized crust that forms the flavor foundation.
Once the beef begins to release from the pan easily (around 4-5 minutes total), stir and continue cooking until it loses its raw color. The beef should be deep brown with no pink remaining. Avoid overcrowding the pan—cook in batches if needed to prevent steaming. Drain excess fat if necessary, leaving about 1 tablespoon for flavor.
Sauté Aromatics for Maximum Flavor Extraction
Reduce heat to medium and add the diced yellow onion and minced garlic cloves. Cook for 3-4 minutes until the onions soften and turn translucent. You'll smell the garlic releasing its aroma—this is when the base starts building its complex profile.
Add the peeled and sliced carrots and cook for another 4-5 minutes until they begin to soften slightly. The vegetables should be tender but still hold their shape. Sprinkle in the 1 teaspoon dried thyme, 0.5 teaspoon ground black pepper, and 1 teaspoon kosher salt, stirring to coat everything evenly. This step ensures every bite carries the layered flavors.
Build Depth with Tomato Paste and Flour
Stir in the 2 tablespoons tomato paste and cook for 1-2 minutes until it darkens slightly and loses its raw taste. This step deepens the umami without overpowering the dish. Immediately sprinkle the 1 tablespoon all-purpose flour over the mixture and stir vigorously for 30 seconds to remove any lumps.
Slowly pour in the 3 cups chicken broth, scraping up any browned bits from the bottom of the pot. These bits—called fond—are packed with concentrated flavor. Bring the mixture to a gentle simmer and let it cook uncovered for 15 minutes, stirring occasionally, until slightly thickened.
Simmer to Develop Rich, Complex Flavor
Reduce heat to low and let the broth simmer uncovered for 20-25 minutes, stirring every 5 minutes to prevent sticking. The liquid should reduce by about one-third, creating a velvety consistency. Taste and adjust seasoning—add more salt or pepper if needed.
In the final 5 minutes of cooking, stir in the 0.25 cup chopped fresh parsley. This adds brightness and freshness to cut through the richness. The base should coat the back of a spoon and have a deep, savory aroma. Remove from heat and let it sit for 5 minutes before using—this resting period allows flavors to meld completely.
Pro Tips For Making Ground Beef Chicken Broth
- Brown the Beef Slow: Don’t rush the browning—this isn’t a race. Cook the ground beef in batches on medium-low heat instead of blistering it fast, or it’ll steam instead of develop that rich, caramelized crust. I learned this the hard way when my broth turned gray instead of golden.
- Chop Carrots Small: Cut those carrots into ¼-inch pieces or smaller. Big chunks take forever to soften and leave you with a mushy, uneven texture. If you’re impatient, use a food processor for the base—just don’t skip the onions and garlic; they need proper cooking time.
- Deglaze with Broth: After browning the beef, don’t just splash in water—use half your chicken broth right away. The leftover bits (fond) stuck to the pan dissolve into flavor gold when you scrape and deglaze. Skipping this step means missing out on the deepest taste in your broth.
- Simmer, Don’t Boil: Keep the heat low enough that you see tiny bubbles, not a rolling boil. Boiling burns the broth and makes it bitter. If it’s too hot, pull it off the heat for a minute—your future self will notice the difference in clarity and richness.
Storing and reheating your ground beef chicken broth
Refrigerator Storage
Let your ground beef and broth mixture cool completely before transferring to an airtight container—I use glass Pyrex with snap-on lids for best results. Store in the fridge at 40°F or below for up to 5 days. The flavors actually deepen overnight as the spices meld, making leftovers even more delicious. I always taste before storing to adjust seasoning—sometimes it needs a pinch more salt after cooling. 💫
Freezer Prep Tips
For long-term storage, portion the mixture into quart-sized freezer bags or glass containers, leaving 1-inch headspace for expansion. Seal tightly to prevent freezer burn and label with the date. This dish freezes beautifully for up to 3 months without losing texture or flavor. I double the recipe specifically for freezing—perfect for busy weeknights when I don't have time to cook from scratch. 🧊
Stovetop Reheating
My preferred method is stovetop because it maintains the best texture. Pour the chilled mixture into a heavy-bottomed pot and add ¼ cup chicken broth to prevent sticking. Heat over medium-low heat for 10-15 minutes, stirring occasionally. If the sauce thickens too much, add another splash of broth. Always taste before serving—reheating can concentrate flavors, so adjust salt or pepper as needed. 🔥
Microwave Shortcuts
For quick meals, transfer a single portion to a microwave-safe bowl and cover with a damp paper towel. Heat on 70% power for 2-3 minutes, stir, then continue in 30-second intervals until reaching 165°F. The damp towel prevents splattering and helps distribute heat evenly. If the mixture looks dry, add 1-2 tablespoons of broth before reheating. 💡
Garnish Before Serving
Fresh herbs make all the difference after reheating. Sprinkle with chopped parsley or green onions just before serving to brighten the dish. For extra richness, drizzle with 1 teaspoon olive oil or a dash of hot sauce. The contrast between the warm, savory beef and fresh garnishes elevates the leftovers to restaurant quality. 🌿
Nutrition facts
Frequently asked questions
Can I substitute beef with another protein in this recipe?
For a lighter option, use lean ground turkey or chicken thighs (diced small). If you prefer plant-based, mushrooms or lentils work well—they absorb the broth beautifully. Just adjust cooking time: turkey/chicken needs 5-7 minutes less than beef, while mushrooms/lentils should simmer 10 minutes longer.
How do I make this dish extra hearty for a crowd?
Double the beef to 3 lbs and add 1 cup diced potatoes or 1 cup chopped bell peppers with the carrots. For extra richness, stir in ½ cup heavy cream or 1 cup cooked rice at the end. Serve with crusty bread or tortillas for a satisfying meal. The broth will stretch further with these additions.
Why does my beef turn out dry or tough?
Overcooking is the #1 cause! Keep the heat at low during the final 20-25 minutes of simmering, and never let the broth boil vigorously. For extra moisture, add ½ cup more broth if the mixture looks dry. Also, avoid overcrowding the pan when browning—cook in batches if needed. The beef should be tender but still juicy.
Can I make this recipe in an Instant Pot or slow cooker?
Yes! For the Instant Pot: Sauté beef and aromatics as directed, then add broth and cook on high pressure for 8 minutes, followed by a 10-minute natural release. For slow cooker: Combine all ingredients (except parsley) and cook on low for 6-7 hours or high for 3-4 hours. Stir in parsley at the end. Both methods work well—just reduce cooking time by 15-20 minutes compared to stovetop.
What are the best sides to serve with this dish?
This rich beef base pairs perfectly with steamed white rice, crusty bread, or roasted potatoes. For a lighter option, try quinoa or a fresh green salad with lemon vinaigrette. The umami flavors also complement cornbread or warm tortillas for tacos. Garnish with fresh herbs to balance the richness.