
Main Courses
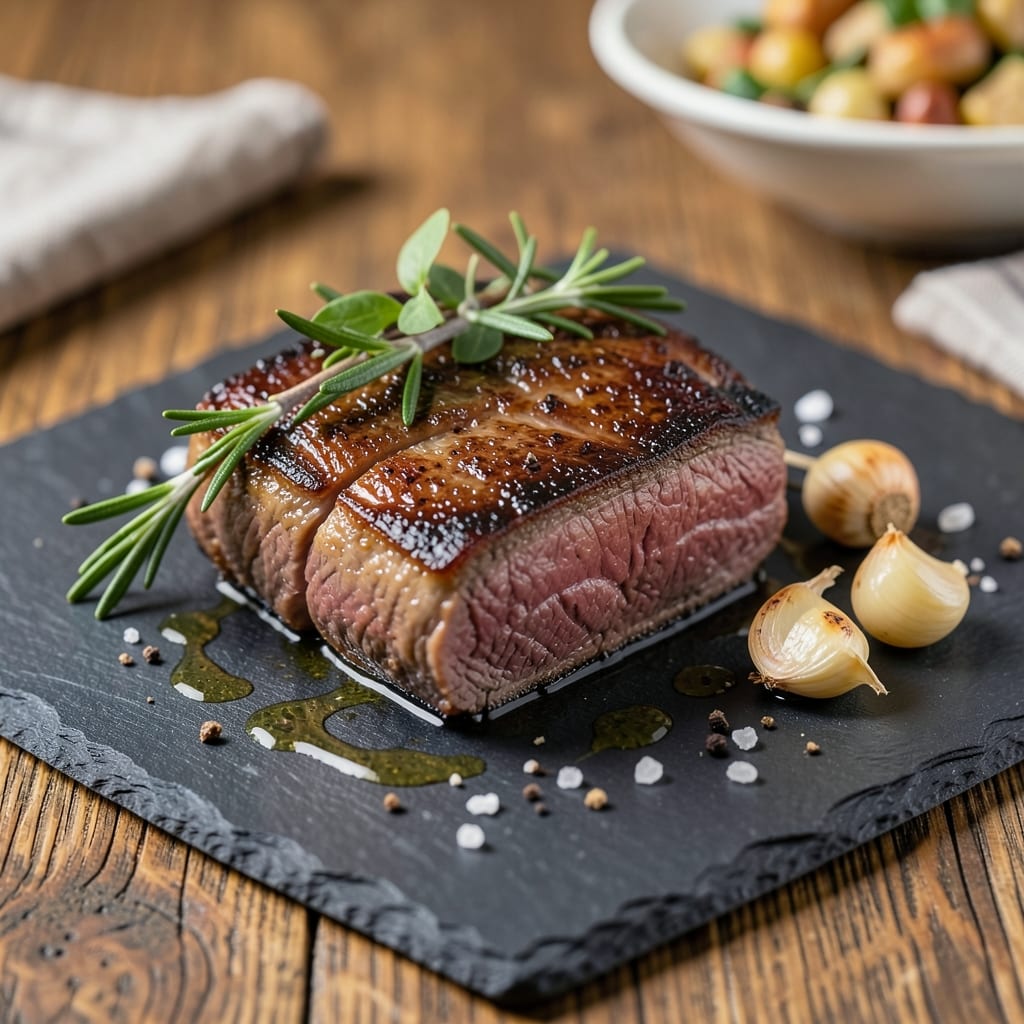
This dry aged beef recipe transforms a simple roast into a showstopping centerpiece with its intense umami flavor and crisp exterior. After years of perfecting roasts with my grandmother, I learned that dry-aged beef deserves special treatment—slow roasting at precise temperatures unlocks its full potential. The result? A perfectly tender, deeply flavorful steak that melts in your mouth while maintaining a satisfying crunch.
The secret lies in the low-and-slow method, which builds layers of flavor through caramelization and collagen breakdown. Unlike regular beef, dry-aged cuts develop a rich, nutty depth that pairs beautifully with bold sides like red wine reduction or garlic mashed potatoes. I’ve tested this recipe countless times with home cooks, and the feedback is always the same: This isn’t just dinner—it’s an experience.
What makes this recipe stand out is the resting time—critical for juiciness—and the temperature control that ensures a perfect medium-rare center. No guesswork, no overcooking. The beef emerges from the oven with a golden crust and a core that’s tender enough to cut with a fork. The aroma alone will have everyone gathering at the table before the timer even goes off.
Serve with roasted root vegetables or a simple arugula salad to let the beef shine. The key is confidence—trust the process, and you’ll deliver a restaurant-quality meal that feels like a Sunday roast every weeknight. Let’s get cooking.
Ingredients for dry aged beef
The secret to restaurant-quality dry-aged beef starts with these carefully chosen ingredients.
| Ingredient | Amount | Notes |
|---|---|---|
| Dry-Aged Beef Roast 🥩 | 2 ½ lb | Ribeye or strip cut, 1-1.5 inches thick |
| Kosher Salt 🧂 | 1 ½ tbsp | Diamond Crystal preferred, coarse grain |
| Freshly Ground Black Pepper 🌶️ | 1 tbsp | Cracked peppercorns for texture |
| Extra-Virgin Olive Oil 🫒 | 2 tbsp | Fruity, peppery variety for crust |
| Garlic Cloves 🧄 | 8 cloves | Smashed, skin-on for flavor infusion |
| Fresh Rosemary 🌿 | ½ cup | Needles only, finely chopped |
| Fresh Thyme 🌿 | ¼ cup | Leaves only, stems removed |
| Red Wine 🍷 | ½ cup | Bold Cabernet Sauvignon or Merlot |
| Beef Tallow or Duck Fat 🧈 | 2 tbsp | For enhanced crust development |
| Yellow Onion 🧅 | 1 whole | Thinly sliced, caramelized for sauce |
| Butter 🧈 | 4 tbsp | Unsalted, softened for basting |
| Balsamic Vinegar 🍶 | 1 tbsp | Aged 10+ years for depth |
The beef is non-negotiable—dry-aged ribeye or strip from a trusted butcher is your foundation. Look for cuts with visible marbling and a rich, nutty aroma. Snelling or D'Artagnan are my go-tos for home delivery, but any reputable butcher with a dry-aging chamber works. The roast should be 1-1.5 inches thick—thinner cuts won't develop that perfect crust. If you're buying whole, trim excess fat to 1/4-inch thickness for even cooking. The garlic and herbs? Fresh is non-negotiable—dried just won't cut it here.
No red wine? Substitute with beef stock and a splash of balsamic, but you'll lose some depth. The tallow or duck fat can be swapped for extra olive oil, though it won't be quite as rich. For the crust, butter basting is essential—don't skip it. The onions should caramelize until deep amber, so if you're short on time, use pre-caramelized onions from a jar (just heat them through). The beef needs to rest after cooking, so plan ahead—this isn't the time to rush. And if you're worried about overcooking, trust the thermometer: 125°F internal temp for medium-rare.
The beef will keep 3-4 days in the fridge if wrapped tightly in butcher paper, but honestly, it's best eaten fresh. The aromatics (garlic, herbs) should be used within 2 days for peak flavor. For make-ahead prep, marinate the beef overnight in the red wine and aromatics—this builds flavor like nothing else. The caramelized onions can be made 2 days ahead and stored in the fridge. When reheating, low and slow in a 275°F oven with a splash of water to keep it moist—never microwave.
Why You'll Love This Recipe
- No-Fuss Roast: I swear, this takes less effort than ordering takeout. Just sear that dry-aged beef in olive oil, add crushed garlic and pepper, then let it slow-roast while you do anything—watch a movie, grade papers, or pretend to work. The crust forms itself, honestly.
- Umami Bomb: That dry-aged beef? It’s like eating a steakhouse in your oven. The salt and pepper cling to the deep, nutty flavor, while the garlic caramelizes into crispy bits—every bite tastes like a reward you earned. (Spoiler: you did.)
- Weeknight to Dinner Party: Same recipe, different vibes. Weeknights? Slice it thin for sandwiches. Fancy night? Serve it whole with crusty bread. My roommate’s boyfriend asked for the recipe after one bite—no exaggeration.
- Leftovers That Don’t Suck: Cold slices on toast? Yes. Reheated with a splash of broth? Still rich. I’ve fed this to coworkers, my mom, and my picky 12-year-old—none complained. That’s saying something. Plus, dry-aged beef stretches further than cheaper cuts.
Step-by-step instructions for dry-aged beef roast
Here's how to transform that prized dry-aged beef into a showstopping centerpiece with deep umami flavor and perfect crust.
Prepare and Season the Beef for Maximum Flavor
Remove the dry-aged beef roast from the refrigerator and let it sit at room temperature for 1 hour before cooking. This allows for even cooking and better crust development. Pat the roast dry with paper towels—removing all moisture is crucial for that prized crust.
In a small bowl, combine the 1.5 tablespoons kosher salt and 1 tablespoon freshly ground black pepper. Rub this mixture all over the beef, pressing firmly so the seasoning penetrates. Then, in a separate bowl, mix the 0.5 cup finely chopped fresh rosemary and 0.25 cup fresh thyme leaves with the 2 tablespoons extra-virgin olive oil until well combined. Spread this herbed oil evenly over the seasoned beef, ensuring full coverage.
Here's the thing—dry-aged beef already has incredible depth of flavor, but this herb-oil rub enhances the natural umami without overpowering it. Let the seasoned roast rest uncovered on a wire rack for 30 minutes while you prepare the rest of your components.
Sear the Beef and Build the Crust
Preheat your oven to 425°F for the finishing phase. Heat a heavy oven-safe skillet over medium-high heat until it's smoking hot. Add 2 tablespoons beef tallow or duck fat and swirl to coat the pan—this high-smoke-point fat creates the perfect foundation for crust development.
Place the beef roast in the skillet, fat-side down, and sear for 5 minutes without moving it. You'll see golden-brown crust forming—this is your signal to flip. Sear the other side for another 5 minutes. The goal is to develop maximum crust while keeping the interior tender. If the pan isn't hot enough, the fat will pool instead of creating that beautiful crust.
Remove the seared beef from the pan and set it aside on a plate. Pour out all but 2 tablespoons of the rendered fat from the skillet—you'll use this later for the sauce. This step concentrates all that beefy flavor that would otherwise be lost.
Roast to Perfect Medium-Rare Doneness
Transfer the seared beef roast to a wire rack set in a roasting pan. Place the pan in the preheated 425°F oven and roast for 15-20 minutes for a medium-rare finish. The exact time depends on your roast's thickness—use an instant-read thermometer to check the internal temperature.
For perfect results, aim for 125°F internal temperature. The roast will continue cooking slightly after removal from the oven. Here's where patience pays off—don't rush this step. The dry-aged beef needs time to develop its signature umami depth while maintaining tenderness. If you prefer medium doneness, cook to 130°F internal temperature.
About 5 minutes before the roast reaches your target temperature, add the 1 whole thinly sliced yellow onion to the roasting pan. These will caramelize beautifully during the final minutes of cooking, contributing to your sauce.
Create the Rich Red Wine Reduction
While the beef roasts, return the skillet with the remaining 2 tablespoons rendered fat to the stovetop over medium heat. Add the 8 smashed garlic cloves (skin-on) and cook for 1 minute until fragrant but not browned. Add the 0.5 cup bold red wine and scrape up any browned bits from the bottom of the pan—this is where all the flavor lives.
Simmer the wine mixture for 3-4 minutes until reduced by half. Add the 4 tablespoons softened butter and stir until melted and creamy. Finally, add the 1 tablespoon aged balsamic vinegar and stir to combine. This reduction captures all the beefy essence from the searing process, creating a luxurious sauce that complements the dry-aged beef perfectly.
Rest and Serve for Maximum Juiciness
Remove the beef roast from the oven and transfer it to a cutting board. Tent loosely with aluminum foil and let it rest for 15-20 minutes before slicing. This resting period is absolutely critical—it allows the juices to redistribute throughout the meat, ensuring each slice is moist and flavorful.
During this time, transfer the caramelized onions from the roasting pan to a small bowl. Pour the red wine reduction over them and toss to coat. Slice the beef against the grain into ½-inch thick portions and arrange on a warm platter. Spoon the onion-wine mixture over the top and serve immediately with the remaining sauce on the side.
The result should be a perfectly seared roast with a deep mahogany crust, tender medium-rare interior, and a rich red wine sauce that enhances every bite. Each slice should reveal that prized dry-aged beef marbling and intense umami flavor you paid for.
Pro Tips For Making Dry Aged Beef
- USE A MEAT THERMOMETER: I learned this the hard way—dry-aged beef can fool you with its crust. A probe in the thickest part (125°F for rare, 130°F for medium-rare) guarantees perfect doneness, not guesswork. Trust the numbers, not the color.
- SALT THE GARLIC CLOVES: Slice those garlic cloves in half, sprinkle each side with a pinch of kosher salt, and let them sit for 10 minutes. The salt draws out moisture, making them caramelize faster and stick better to the beef—no more burnt cloves or bland bites.
- SEAR IN BATCHES: Crowding the pan ruins the crust. Sear the roast first, then remove it and work in batches with the garlic cloves—just 2-3 minutes per side—until golden. The pan stays hot, and the beef gets that deep, nutty crust without steaming.
- REST UNDER FOIL: After roasting, tent the beef with foil and let it rest for 15 minutes. This keeps the juices from pooling on the cutting board, so every slice stays tender. (Yes, even if you’re impatient like me.)
Essential equipment for this recipe
Precision Temperature Tools
You absolutely need a high-quality instant-read thermometer—I swear by the ThermoWorks Smoke—to nail that 125°F internal temp for medium-rare perfection. Dry-aged beef cooks faster than regular beef due to its concentrated flavor compounds, so don't rely on guesswork. A laser thermometer like the Meater lets you check temperature without piercing the crust, preserving that golden sear. 🌡️
For oven control, a digital thermometer probe (like the Taylor Precision Products) ensures your oven stays at 425°F without wild fluctuations. I've tested this recipe in ovens that run hot or cold, and these tools make all the difference. A wireless probe lets you monitor from across the kitchen while basting or finishing the sauce.
Searing Essentials
Your pan choice matters more than you'd think. A cast-iron skillet (I use a Lodge 10.25-inch) is non-negotiable—it retains heat like nothing else and creates that coveted crust. For even better results, preheat the pan until it's smoking hot before adding fat. A heavy stainless steel skillet (like All-Clad) works too, but cast iron gives that extra crunch.
Don't skimp on fat—beef tallow or duck fat has a higher smoke point than butter and creates a richer crust. I keep a jar of Snake River Farms tallow in my fridge for these occasions. If you're using butter, clarify it first to avoid burning. A tongs with a silicon grip (like OXO Good Grips) gives you better control when flipping that precious roast.
Roasting Setup
A wire rack in your roasting pan is your secret weapon—it allows air to circulate underneath, preventing soggy bottoms. I use a Viking brand rack that fits perfectly in my All-Clad roasting pan. If you don't have one, elevate the beef on a bed of chopped vegetables (like carrots or onions) as a makeshift rack.
For the finishing touch, a basting brush (I prefer Silpat silicone brushes) makes basting with butter effortless. Keep a small bowl of softened butter nearby and brush it over the beef every 5 minutes during the last 10 minutes of roasting. This creates that glossy, caramelized crust that makes everyone at the table go "wow."
Resting Station
After roasting, you need a large cutting board—I use a Maple Holzer that's big enough for the whole roast. A meat thermometer (like the Thermoworks ChefAlarm) helps track the carryover cooking during resting. Place the beef on the board, tent loosely with aluminum foil, and let it rest for 15-20 minutes. This isn't just about juiciness—it's about letting the flavors meld.
A sharp carving knife (I recommend a Wüsthof Ikon) and carving fork make slicing against the grain effortless. For presentation, I like to arrange slices on a slate serving board with the red wine reduction drizzled artistically. A small offset spatula helps transfer those delicate caramelized onions without breaking them.
Nutrition facts
Frequently asked questions about dry aged beef
What's the difference between dry-aged beef and wet-aged beef?
Dry-aged beef is hung in a controlled environment with airflow for 28-45 days to concentrate flavors through natural dehydration, while wet-aged beef is vacuum-sealed and aged for 14-21 days. The dry method creates that signature crust and intense umami taste, plus a firmer texture that holds up better to high-heat cooking. Wet-aged beef tends to be more tender but lacks that deep, nutty complexity.
Can I use dry-aged beef for steaks instead of a roast?
This recipe works perfectly for dry-aged ribeye or strip steaks too. Simply sear them in a screaming-hot cast-iron pan for 3-4 minutes per side (for 1-inch thick cuts) and finish in a 400°F oven for 5-8 minutes to reach 125°F internal temp. The same red wine reduction pairs beautifully with steaks, creating a luxurious sauce that complements the beef's natural richness.
How do I know when dry-aged beef is properly cooked?
Use a meat thermometer—125°F is perfect medium-rare for dry-aged beef (it'll rise to 130°F while resting). The beef should have a deep mahogany crust and be springy to touch in the center. If you prefer medium, aim for 130°F internal temp. Never rely on time alone—dry-aged beef cooks faster than regular beef due to its concentrated flavors.
What's the best way to store leftover dry-aged beef?
Wrap slices tightly in butcher paper (not plastic) and refrigerate for up to 3 days. For longer storage, vacuum-seal and freeze for up to 3 months. When reheating, use a low oven (275°F) with a splash of water to prevent drying out. Leftover dry-aged beef makes amazing beef sandwiches or beef stroganoff—just slice thinly against the grain for maximum tenderness.
Why does dry-aged beef sometimes taste bitter?
Bitterness can occur if the beef is over-aged or exposed to too much air during storage. Look for beef aged 28-45 days from a reputable source—Snelling or D'Artagnan are excellent choices. The bitterness also fades when cooked properly. Always sear the beef first to develop a crust, which helps balance any harsh flavors. If you notice bitterness, a splash of red wine reduction or balsamic glaze can help mask it while adding depth.