
Soups & Stews
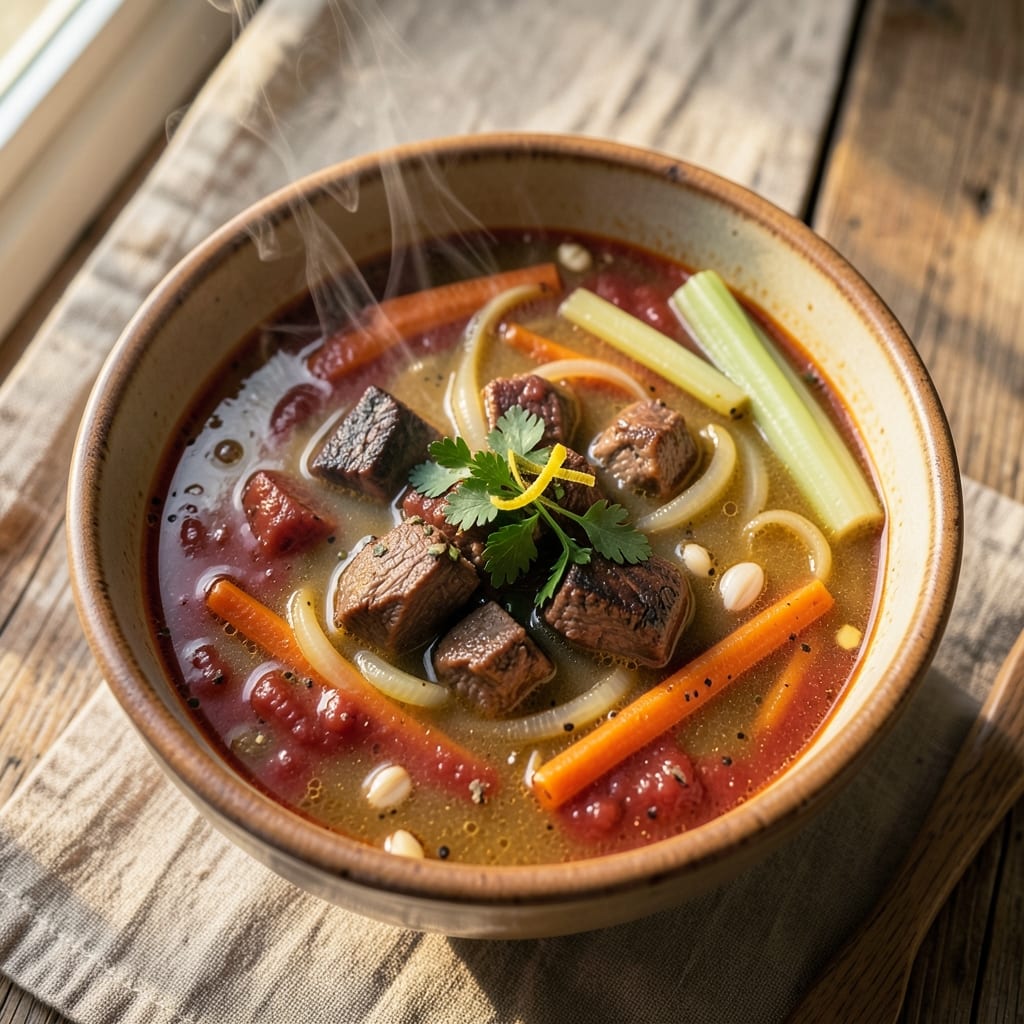
Bob Evans' vegetable beef soup recipe delivers the kind of slow-simmered comfort that turns weeknight dinners into cozy traditions. ⚡ I've recreated their signature version—the one that balances tender beef, hearty vegetables, and rich broth into a single, soul-warming bowl. The secret lies in building layers of flavor through careful seasoning and proper simmering time, which transforms tough cuts into melt-in-your-mouth perfection.
What makes this recipe special is the umami depth from caramelized onions and garlic, combined with fresh herbs that brighten the dish without overpowering. Unlike many restaurant versions, this method uses real beef chunks instead of ground meat, creating a satisfying texture that holds up through multiple spoonfuls. The vegetables stay tender-crisp, absorbing just enough flavor to become part of the broth's character.
By the time you're done, you'll have a steaming bowl of soup with golden-brown edges on the beef, vibrant green herbs floating on top, and a broth so flavorful it coats every spoonful. The aroma alone will have everyone gathering around your table—this is the kind of soup that disappears faster than you can say "second helping." I've included both stovetop and pressure cooker methods so you can choose what works best for your schedule.
Serve with crusty bread or a side salad to soak up every last drop of that rich, savory broth. The best part? This recipe scales perfectly for meal prep or feeding a crowd, making it equally at home on busy weeknights or holiday gatherings. Let's get cooking—your kitchen will smell like home before the first bite.
Ingredients for bob evans vegetable beef soup
Six hearty ingredients and a few pantry staples create Bob Evans' signature slow-simmered beef soup.
| Ingredient | Amount | Notes |
|---|---|---|
| Chuck Roast 🥩 | 2 lb | Cut into 1-inch cubes, trimmed of fat |
| Yellow Onions 🧅 | 2 whole | Medium size, thinly sliced |
| Carrots 🥕 | 4 whole | Medium size, peeled, cut into chunks |
| Celery Stalks 🌿 | 4 whole | Cut into 1-inch pieces |
| Garlic Cloves 🧄 | 6 cloves | Peeled, minced |
| Tomato Paste 🍅 | ½ cup | Squeeze tube preferred |
| Beef Broth 💧 | 6 cups | Low-sodium preferred, homemade or store-bought |
| Red Wine 🍷 | ½ cup | Dry red like Cabernet Sauvignon |
| Fresh Parsley 🌿 | ¼ cup | Chopped, for garnish |
| Fresh Thyme 🌿 | 1 tbsp | Leaves only, stems removed |
| Bay Leaves 🌿 | 2 whole | Dried, for infusion |
| Salt 🧂 | 1 ½ tsp | Diamond Crystal kosher salt |
| Black Peppercorns 🌶️ | 1 tsp | Freshly cracked |
| Olive Oil 🫒 | 2 tbsp | Extra-virgin, for searing |
| Potatoes 🥔 | 2 lb | Yukon gold, cut into 1-inch cubes |
The beef is where this soup earns its restaurant reputation. Chuck roast is non-negotiable—it's the only cut with enough fat and connective tissue to become tender during the long simmer. Grab it from the butcher counter if possible, or the pre-cubed version from Costco saves time. Look for pieces with good marbling—they'll stay juicy even after hours of cooking. The onions, celery, and carrots form the classic mirepoix, but here they're cooked until caramelized for that deep, sweet base flavor. Trader Joe's sells pre-sliced mirepoix mix if you're short on time, but fresh always tastes better.
No red wine? Substitute beef broth with 1 tbsp balsamic vinegar for similar depth. Fresh thyme is ideal, but dried thyme at half the amount works in a pinch. The tomato paste might seem like a small amount, but it's the secret to that rich, umami-packed broth. Rao's or Muir Glen brands are my go-tos for consistency. For the potatoes, Yukon golds hold their shape while soaking up flavor—Russets get too starchy. And if you're using a pressure cooker, add the potatoes with the beef so they don't turn to mush.
This soup tastes even better the next day as flavors meld. Store in the fridge for up to 5 days—the broth thickens nicely overnight. For freezing, portion into 2-cup containers and reheat with a splash of water. The beef stays tender when reheated gently, so avoid boiling. Make a double batch—it disappears fast, especially with crusty bread on the side. The fresh herbs can be added right before serving, so you won't need to store them with the soup.
Why You'll Love This Recipe
- Slow-Cooker Simplicity: I swear by this recipe because it’s literally set-it-and-forget-it. Toss the chuck roast, onions, carrots, and celery into a slow cooker with broth and spices, and walk away—no chopping like a maniac or stirring every five minutes. By dinner, the beef is fork-tender and the veggies melt into the broth like they’ve been simmering all day.
- Umami Bomb: That chuck roast? It’s the star. When it’s braised low and slow with garlic and onions, it turns into something ridiculously rich—deep, savory, and just a little sweet. The carrots and celery don’t just sit there; they soak up all that flavor and become part of the magic. Honestly, I’ll take this over takeout any day.
- Meal Prep MVP: This soup is my lazy Sunday secret weapon. Make a big batch, and you’ve got lunches for the week—just reheat and enjoy. It’s also the kind of dish that tastes even better the next day, so I never feel bad about making extra. (Yes, even on a Tuesday night.)
- Budget-Friendly Powerhouse: Chuck roast and seasonal veggies won’t break the bank, and a single pot feeds four or more. I’ll be real: this is the kind of recipe that makes me feel like I’m feeding a crowd without stressing over the grocery bill. Plus, the leftovers? Still amazing. Still cheap. Still me, winning.
Step-by-step instructions for slow-simmered vegetable beef soup
Here's how to build Bob Evans-style richness with tender beef and hearty vegetables.
🔥 Step 1: Sear the Chuck Roast for Deep Flavor
Heat a large Dutch oven over medium-high heat and add the 2 tablespoons olive oil. Working in batches if needed, add the 2 lb chuck roast cut into 1-inch cubes. Sear undisturbed for 3-4 minutes per side until deeply browned—this creates the flavor foundation. You'll see the meat release easily when properly seared.
Remove the roast and set aside. Here's the thing—don't crowd the pan. Searing works best when you give each piece space to develop that golden crust. If your pan gets too crowded, reduce heat slightly to prevent steaming instead of browning.
👨🍳 Step 2: Sauté the Vegetable Base
In the same Dutch oven, add the 2 whole yellow onions, 4 whole carrots, and 4 whole celery stalks cut into 1-inch pieces. Cook for 5-6 minutes until the vegetables soften slightly and begin to release their natural sweetness. Stir occasionally to prevent burning.
Add the 6 cloves minced garlic and cook for 30 seconds until fragrant. This quick cooking prevents the garlic from burning, which would make the soup bitter. The vegetables should be tender but still hold their shape—you want them to continue cooking in the broth, not pre-cook completely.
🍳 Step 3: Build the Rich Broth Base
Stir in the 0.5 cup tomato paste and cook for 1 minute to deepen its flavor. Pour in the 0.5 cup red wine and scrape up any browned bits from the bottom of the pot—this is where all the flavor hides. Let it simmer for 2 minutes until the wine reduces by half.
Return the seared beef to the pot. Add the 6 cups beef broth, 2 whole bay leaves, 1.5 teaspoons salt, and 1 teaspoon freshly cracked black peppercorns. Bring to a gentle boil, then reduce heat to low and cover partially. The broth should bubble gently—this is your signal for the long simmer ahead.
⏰ Step 4: Slow-Simmer for Tender Perfection
Simmer uncovered for 1.5 hours until the beef is fork-tender. Here's where patience pays off—the longer the beef cooks, the more it breaks down into rich, melt-in-your-mouth pieces. Check occasionally and add ½ cup water if the liquid reduces too much, but don't over-dilute.
After 1 hour, add the 2 lb Yukon gold potatoes cut into 1-inch cubes. They'll absorb some of the cooking time and finish perfectly tender. The soup should have a thick, velvety consistency with the vegetables just tender enough to pierce easily with a fork.
🥘 Step 5: Finish with Herbs and Garnish
Remove the 2 whole bay leaves and stir in the 1 tablespoon fresh thyme leaves. Let the soup simmer for another 10 minutes to allow the thyme to infuse its earthy aroma. Taste and adjust seasoning—you might need a pinch more salt or pepper depending on your broth.
Ladle the hot soup into bowls and garnish with ¼ cup chopped fresh parsley. The parsley adds a fresh contrast to the rich, savory broth. Serve immediately with crusty bread to soak up every last drop of that comforting vegetable beef goodness.
Pro Tips For Making Bob Evans Vegetable Beef Soup
- SEAR THE ROAST FIRST: I learned this the hard way—skipping the sear means flavorless beef. Pat the chuck roast dry, then hit it with a hot pan (no oil needed) until deep brown on all sides. That crust locks in juices and builds the base flavor for the whole soup.
- CHOP VEGETABLES UNIFORM: Bob Evans’ version relies on tender, even-cooked veggies. Cut carrots and celery into ¼-inch slices (not chunks) and dice onions to ⅛-inch pieces—this ensures they all finish cooking at the same time without mushiness. (Yes, even if it takes a minute longer.)
- DON’T BOIL THE GARLIC: Raw garlic cloves in soup? Bitter, harsh mess. Instead, smash them lightly with the flat side of a knife before adding them to the pot—this releases their flavor without burning. Add them in the last 10 minutes of cooking so they stay sweet, not bitter.
- SALT THE WATER LIKE THE OCEAN: This isn’t just soup—it’s a flavor bomb. When simmering the beef and veggies, add 1½ teaspoons of salt per quart of water (or more if your broth is weak). Underseasoned soup is the fastest way to ruin a good recipe. Taste early, adjust often.
Perfect pairings for this dish
Crusty Bread Pairing
This soup is designed to be served with a crusty baguette or sourdough that can soak up every last drop of that rich, savory broth. I love grabbing a freshly baked loaf from my local Italian deli—the crust should be thick enough to handle the soup's heartiness without falling apart. For a quick version, toast slices of Eataly brand Italian bread until golden and crisp.
Pro tip: Warm the bread in the oven at 375°F for 5 minutes before serving. The residual heat keeps it soft enough to sop up the soup while maintaining that perfect crunch. I often make a double batch of soup just because it disappears so fast when paired with good bread. 🥖
Simple Side Salad
A bright arugula salad with lemon vinaigrette cuts through the soup's richness beautifully. Toss 4 cups baby arugula with 2 tbsp olive oil, 1 tbsp fresh lemon juice, 1 tsp Dijon mustard, 1 tbsp shaved Parmesan, and a pinch of salt. The peppery bite provides a refreshing contrast to the warm, savory soup.
For extra protein, add ½ cup grilled chicken breast or crumbled feta cheese. I find this salad works best when served at room temperature, so assemble it just before bringing the soup to the table. The acidity in the dressing also helps cleanse your palate between spoonfuls. 🥗
Wine Pairings
A medium-bodied red wine like Pinot Noir or Cabernet Sauvignon complements the soup's rich flavors beautifully. The Pinot Noir from Oregon's Willamette Valley has enough acidity to balance the beef's richness, while a Cabernet Sauvignon from Napa adds depth that mirrors the soup's complexity.
For white wine lovers, a Chardonnay with moderate oak works surprisingly well. I recommend a California Chardonnay with notes of apple and vanilla—it won't overpower the soup but enhances its savory notes. Always serve wine slightly cooler than room temperature (55-60°F) for the best experience. 🍷
Beer Options
A light lager or pilsner cleanses the palate between spoonfuls without competing with the soup's flavors. Peroni or Heineken are classic choices that pair perfectly with the soup's hearty profile. The crisp, clean finish helps balance the richness.
For craft beer enthusiasts, a Belgian witbier with its citrus and coriander notes adds an interesting contrast. I particularly enjoy Hoegaarden—the slight sweetness and effervescence complement the soup's savory depth. Serve beers at 45-50°F for the best flavor experience. 🍺
Garnish Upgrades
While the recipe calls for fresh parsley, I often experiment with other garnishes to add visual appeal and extra flavor. A sprinkle of grated Parmesan cheese adds umami depth, while crispy fried shallots bring a delightful crunch. For a pop of color, try microgreens or thinly sliced radishes.
My personal favorite is a mix of crumbled blue cheese and toasted walnuts—the tangy, creamy blue cheese pairs wonderfully with the beef, while the walnuts add texture. Add these garnishes right before serving so they maintain their freshness and crunch. 💫
Nutrition facts
Frequently asked questions
Can I use ground beef instead of chuck roast?
The recipe specifically calls for chuck roast because its fat and connective tissue break down during the long simmer, creating that signature tender, melt-in-your-mouth texture. Ground beef would cook too quickly and result in a much thinner, less flavorful broth. If you must substitute, try using stew meat or brisket cut into similar-sized pieces.
How do I make this soup in a pressure cooker?
Sear the beef and vegetables as directed, then transfer everything to your pressure cooker. Add all remaining ingredients (broth, wine, spices) and pressure cook on high pressure for 30 minutes. Quick-release the pressure, then add the potatoes and cook for another 5 minutes on high pressure. The final simmer with thyme can be done on the stovetop after releasing pressure. You'll save about 1 hour of cooking time!
Why does my soup taste too salty? This usually happens when using high-sodium broth. Always choose low-sodium beef broth and taste as you go—you can adjust seasoning at the end with a splash of water or milk to dilute. The red wine also adds subtle saltiness, so if you're using a salt-free broth, you might need up to 2 teaspoons of salt instead of 1.5.
Can I prepare this soup ahead of time?
This soup tastes even better the next day as flavors meld. Store in the fridge for up to 5 days in an airtight container. For freezing, portion into 2-cup containers and freeze for up to 3 months. Thaw overnight in the fridge and reheat gently on the stove with a splash of water to restore the broth's consistency. Never microwave directly from frozen.
What if I don't have red wine?
No problem! Substitute with ½ cup beef broth plus 1 tablespoon balsamic vinegar for similar depth. For extra richness, add ½ teaspoon Worcestershire sauce to the broth. The wine's main purpose is to deglaze the pan and add a touch of acidity, so these substitutes work well in a pinch. Avoid using white wine—it won't provide the same flavor profile.