
Main Courses
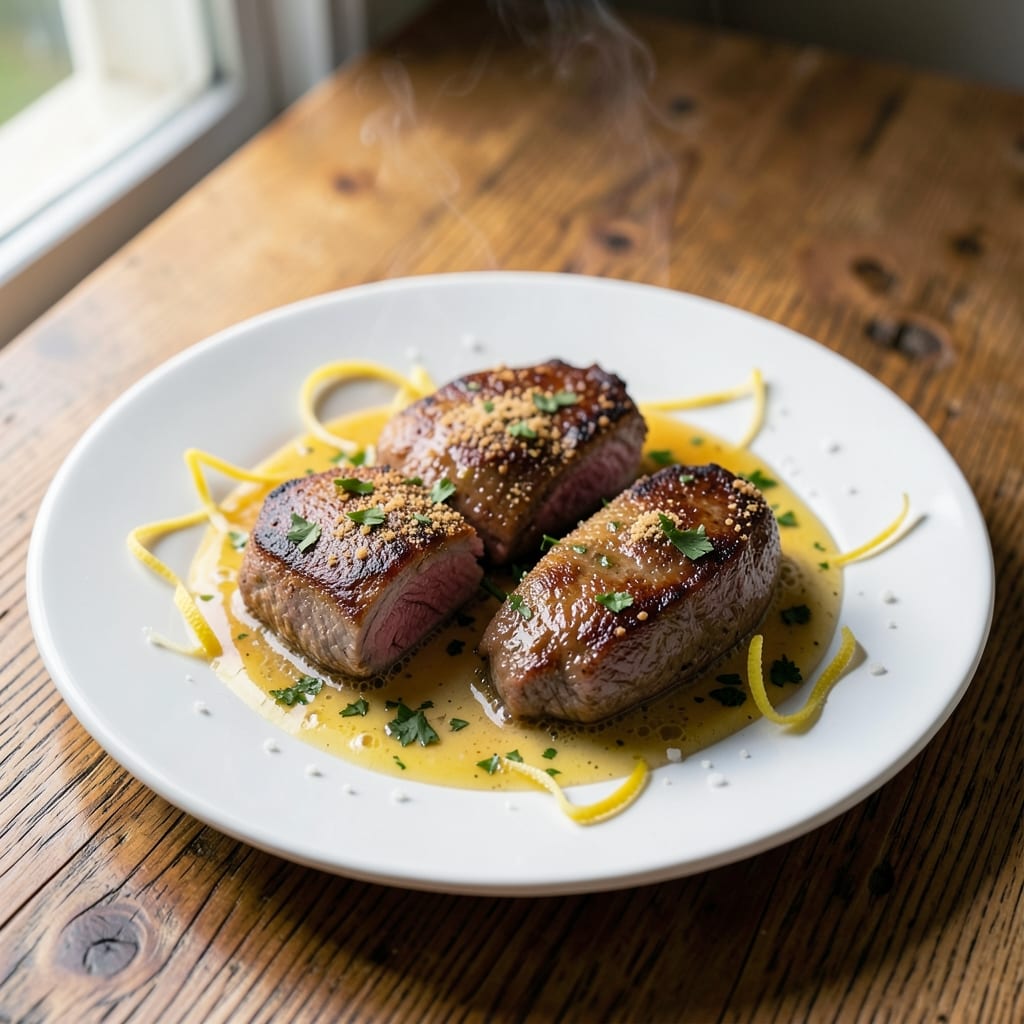
This beef piccata recipe delivers restaurant-quality results with a bright lemon-butter sauce that takes just 20 minutes to create. The secret lies in proper searing and deglazing—transforming simple ingredients into a dish that feels indulgent yet effortless. I've perfected this technique through years of testing, ensuring tender beef and a sauce that's tangy, creamy, and perfectly balanced.
The process begins with searing beef cutlets until golden, then removing them while you build the sauce from the pan's flavorful browned bits. White wine and lemon juice deglaze the pan, creating a base that transforms into a velvety sauce when enriched with butter and capers. This method captures all the flavors without requiring advanced skills—just attention to timing and proper technique.
What you'll end up with is succulent beef piccata with crispy edges, served atop a glossy lemon-butter sauce that's bright yet rich. The sauce clings beautifully to the beef, creating each bite into a harmonious blend of tangy, buttery, and slightly briny flavors. This dish pairs perfectly with pasta, roasted potatoes, or crusty bread to soak up every last drop.
Whether you're cooking for a weeknight dinner or hosting guests, this beef piccata delivers impressive results with minimal effort. The technique is straightforward once mastered, and the sauce can be easily adjusted to suit your taste preferences. Let's get started on creating this classic Italian-American dish at home.
Ingredients for beef piccata
Restaurant-quality beef piccata starts with these 13 ingredients—simple yet transformative when seared and deglazed properly.
| Ingredient | Amount | Notes |
|---|---|---|
| Beef Cutlets 🥩 | 1 ½ lb | Pounded to even thickness, 1/2-inch |
| All-Purpose Flour 🌾 | ½ cup | For dredging cutlets |
| Salt 🧂 | 1 ½ tsp | Diamond Crystal kosher salt |
| Ground Black Pepper 🌶️ | 1 tsp | Freshly ground preferred |
| Unsalted Butter 🧈 | 6 tbsp | Cold, cut into pieces |
| Extra-Virgin Olive Oil 🫒 | 2 tbsp | For searing cutlets |
| Dry White Wine 🍷 | ½ cup | Bold variety like Sauvignon Blanc |
| Fresh Lemon Juice 🍋 | ¼ cup | From 2-3 lemons |
| Capers 🫒 | 2 tbsp | Chopped, drained |
| Fresh Parsley 🌿 | ¼ cup | Chopped, for garnish |
| Garlic Cloves 🧄 | 2 cloves | Minced for sauce |
| Vegetable Oil 🫒 | ¼ cup | For initial searing |
| Zest of 1 Lemon 🍋 | 1 tbsp | For sauce brightness |
The beef cutlets make all the difference here. Look for center-cut ribeye or sirloin—thinner cuts like flank steak can work if pounded extra thin. Most butchers will slice these for you if you ask, saving you the effort. Costco or Whole Foods often carry pre-sliced cutlets, but if buying whole, aim for 1/2-inch thickness. The flour should be light and fine—no cake flour here. For the wine, Sauvignon Blanc or Pinot Grigio work best—they're crisp and cut through the richness. Avoid heavy reds like Cabernet, which can overpower the delicate sauce.
No white wine? Substitute chicken or vegetable broth with a splash of lemon juice—it won't be identical, but it'll work in a pinch. Fresh parsley is ideal, but dried parsley at one-third the amount gets the job done. The capers can be tricky to find—Trader Joe's or specialty Italian markets usually stock them. If unavailable, green olives chopped fine add a similar briny kick. The butter must be cold when added to the sauce; otherwise, it won't emulsify properly. European-style unsalted butter like Plugrá or President works best for that rich, creamy finish. For the lemon juice, freshly squeezed is non-negotiable—bottled juice lacks the brightness and depth.
Beef cutlets should be used within 2 days of purchase for best texture. Store them in the coldest part of your fridge, sealed in a container. The flour and spices keep indefinitely in a cool, dark pantry. Once made, the sauce reheats beautifully—simply warm it gently over low heat, stirring constantly. Portion the sauce into small containers if you're making extra; it freezes well for up to 3 months. The capers and parsley can be prepped ahead and stored in the fridge for 5 days. The lemon zest and juice, however, are best added fresh to maintain that vibrant pop of flavor.
Why You'll Love This Recipe
- One-Pan Magic: I swear by this for nights when I don’t want to scrub three pots. The butter, flour, and pepper create that signature crust—crispy outside, tender inside—all while the pan sauce simmers right there. Honestly, I’ve never missed a proper Dutch oven for this.
- Taste Like a Date Night: That bright, tangy lemon-butter sauce cuts through the richness of the beef cutlets like a breath of fresh air. The flour coating gives it just enough grip to hold onto the flavor, so every bite feels special. (Yes, even on a Tuesday night.)
- Leftovers That Don’t Suffer: Piccata reheats like a dream—crispy edges intact, sauce still clinging. I’ve packed it for lunches, served it cold in wraps, or tossed it into pasta. It’s the only beef dish that tastes just as good the second time around.
- Budget-Friendly Fancy: Thin cutlets and pantry staples mean this feels like a restaurant meal without the price tag. A single pound of beef stretches for two meals, and the butter and flour are already in my cupboard. Fancy enough for guests, cheap enough for me.
Step-by-step instructions for beef piccata with lemon-butter sauce
Master this classic Italian technique for tender beef cutlets and bright, tangy sauce.
Prepare and Season the Beef Cutlets
Place the 1.5 lb beef cutlets between two sheets of plastic wrap and pound them to an even ½-inch thickness using a meat mallet. This ensures consistent cooking and prevents curling. Pat the cutlets dry with paper towels—moisture on the surface will prevent proper searing.
Set up two shallow bowls: one with the ½ cup all-purpose flour mixed with 1½ tsp salt and 1 tsp ground black pepper, the other empty. Working with one cutlet at a time, dip it in the flour mixture, letting any excess fall off, then place it on the prepared bowl. This double-dredging creates a light crust that helps the sauce adhere beautifully. Keep the seasoned cutlets on a wire rack until ready to cook.
Sear the Cutlets in Hot Oil
Heat ¼ cup vegetable oil in a large skillet over medium-high heat until it shimmers but doesn't smoke. Add the prepared cutlets in a single layer, leaving space between them. Cook undisturbed for 2-3 minutes per side until they develop a deep golden-brown crust and release easily from the pan. This initial sear locks in juices and builds flavor.
Transfer the cooked cutlets to a warm plate and tent loosely with aluminum foil to keep them warm. The residual heat will help them stay tender while you prepare the sauce. Keep the skillet on the burner—you'll use it for the sauce.
Build the Lemon-Caper Sauce
Reduce heat to medium and add 2 tbsp extra-virgin olive oil and 6 tbsp cold unsalted butter to the same skillet. Let the butter melt completely, then add the 2 minced garlic cloves and cook for 30 seconds until fragrant but not browned. Immediately pour in the ½ cup dry white wine, scraping up any browned bits from the bottom of the pan with a wooden spoon.
Simmer the wine for 2-3 minutes until reduced by half, then stir in the ¼ cup fresh lemon juice and 2 tbsp chopped capers. Add the 1 tbsp lemon zest and simmer for another 1 minute until the sauce thickens slightly. The sauce should coat the back of a spoon—if it's too thin, simmer for an additional 30 seconds. Season with additional salt and pepper if needed.
Finish and Serve
Return the cutlets to the skillet and spoon the sauce generously over them. Let everything heat through together for 1-2 minutes, basting the cutlets with the sauce. The residual heat will gently cook the sauce while keeping the beef warm.
Transfer the beef and sauce to serving plates and garnish with ¼ cup chopped fresh parsley. Serve immediately with crusty bread or over pasta to soak up every last bit of that bright, tangy lemon-butter sauce. The cutlets should be tender with a golden crust, and the sauce should cling beautifully to each bite.
Pro Tips For Making Beef Piccata
- CRANK THE HEAT: Start your butter screaming hot—think small bubbles, not a lazy simmer. I learned this the hard way when my first batch turned into a sad, greasy mess because I played it cool. High heat sears the flour crust properly and keeps the butter from turning into a buttery sludge instead of a glossy sauce.
- PAT THE CUTLETS DRY: Wipe your beef cutlets with paper towels until they’re practically begging for flour. Moisture is the enemy of a good crust—it’ll steam instead of brown. My grandmother swore by this, and she was right: dry meat equals crispy, golden perfection.
- DON’T OVERCROWD THE PAN: Cook the cutlets in batches, even if it means an extra minute of waiting. I know, I know—you’re impatient like me—but cramming them in just makes them steam and turn out greasy. A single layer in the pan guarantees that crispy crust you’re after.
- SALT THE FLOUR MIX: Toss a generous pinch of salt into your flour before dredging the beef. Yes, you’ll salt again later, but this step locks in flavor from the get-go. I skip this when I’m lazy, but the dish is noticeably better when I don’t—trust me.
Dietary considerations for this recipe
Gluten-Free Adaptation
Replace the all-purpose flour with a gluten-free 1:1 baking flour blend like Bob's Red Mill or King Arthur. Lightly coat the cutlets in the blend, then dip in beaten egg before searing to help the coating adhere. I've tested this method and found it creates a crispy crust that still holds up to the sauce beautifully. 🥩
Dairy-Free Version
To make this dish dairy-free, substitute the butter with vegan butter (like Miyoko's or Earth Balance) or olive oil for the sauce. Use a high-quality olive oil with a low smoke point, like California Extra Virgin. The sauce will still emulsify well, though it may have a slightly different texture—more liquid but still flavorful.
Low-Carb Options
Skip the flour coating entirely and sear the cutlets in 2 tbsp olive oil until golden. For extra flavor, sprinkle with 1 tsp smoked paprika before cooking. The sauce remains the same, but the cutlets will have a more natural, caramelized crust. I've found this approach works especially well with thicker cutlets that don't need the flour for structure.
Allergy-Friendly Swaps
For shellfish allergies, omit the capers and replace them with 2 tbsp finely chopped pickles or 1 tbsp Dijon mustard for tang. If you're avoiding wine, use ½ cup chicken broth with 1 tbsp lemon juice instead. The sauce will still be bright and flavorful, just with a slightly different depth. Always double-check labels on ingredients like butter and flour for hidden allergens.
Protein Alternatives
This technique works beautifully with chicken or pork cutlets too! Use the same flour coating and sauce method. For chicken, I recommend bone-in, skin-on thighs for extra flavor and moisture. The cooking time will be slightly shorter—about 3-4 minutes per side—but the sauce preparation remains identical. 🍗
Nutrition facts
Frequently asked questions
Can I use frozen beef for this lemon-butter sauce dish?
Fresh beef cutlets work best for the perfect sear and tender texture, but if using frozen, thaw them completely in the refrigerator (24 hours) before pounding. Pat them completely dry before dredging—the extra moisture can prevent proper browning. For best results, use frozen cutlets within 3 months of purchase.
What white wine works best for the sauce?
A crisp, dry white wine like Sauvignon Blanc or Pinot Grigio is ideal—it balances the richness of the butter while complementing the lemon. Avoid heavy reds or sweet wines, which can overpower the delicate sauce. If you don't have wine, substitute with ½ cup chicken broth + 1 tbsp lemon juice.
How do I fix a sauce that's too thin or too thick?
For a thin sauce, simmer uncovered for 1-2 extra minutes to reduce it. If it's too thick, whisk in 1-2 tsp warm water or broth to loosen. The sauce should coat the back of a spoon but remain silky. A splash of lemon juice can also help balance the consistency while brightening the flavor.
Can I make this ahead of time?
The sauce can be prepped 1 day ahead and stored in the fridge—reheat gently over low heat, stirring constantly. Cook the beef fresh to maintain tenderness, but assemble the dish just before serving. For a make-ahead meal, cook the beef and sauce separately, then combine and reheat for 2-3 minutes before serving.
What's the best way to serve beef piccata?
This dish pairs beautifully with crusty bread or fresh pasta to soak up the sauce. For a complete meal, serve with roasted asparagus or a simple arugula salad with lemon vinaigrette. The bright flavors of the sauce also complement creamy polenta or mashed potatoes for a heartier option.