
Main Courses
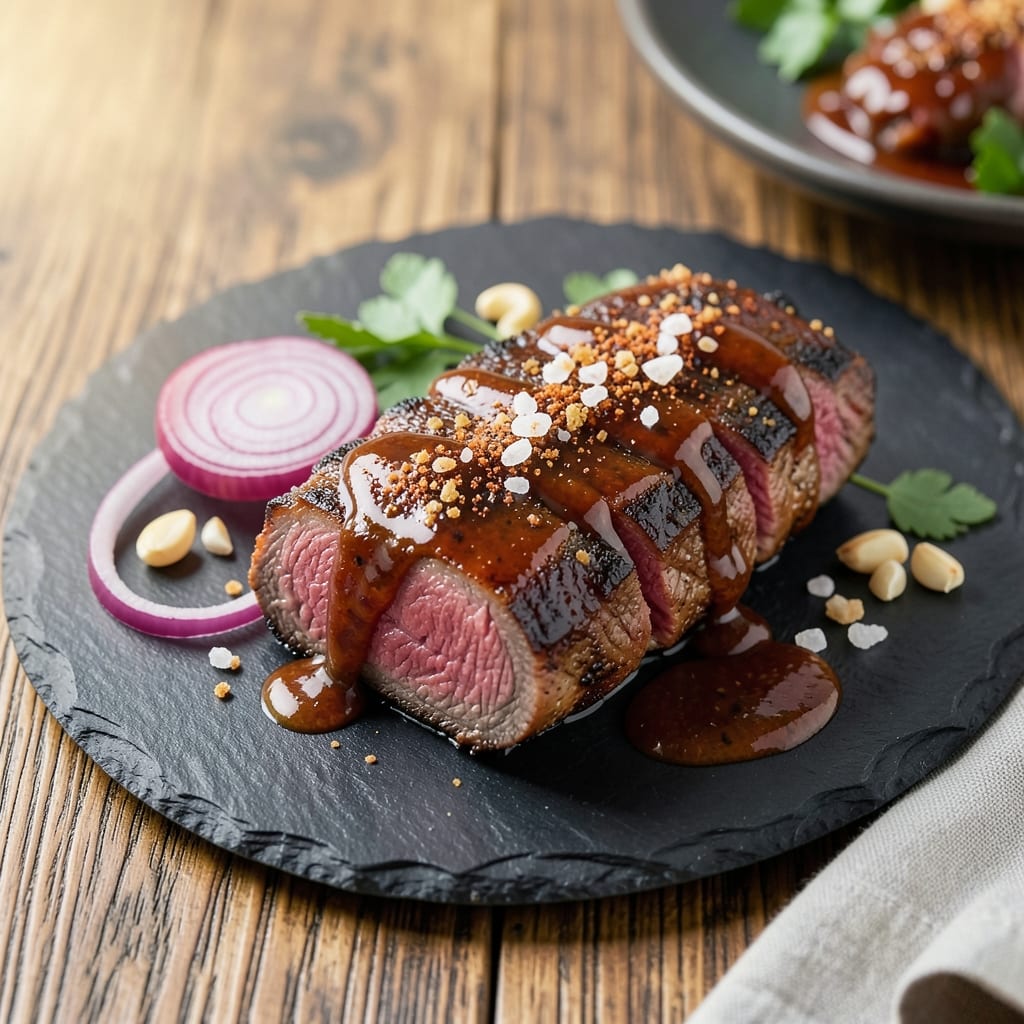
This BBQ beef fillet recipe delivers the perfect balance of smoky-grilled crust and buttery tenderness inside—exactly what transforms a weeknight dinner into a restaurant-worthy meal. 🔥 After years of perfecting my pitmaster techniques, I've developed a method that ensures every bite is juicy, flavorful, and packed with that irresistible char. The secret lies in a dual-stage cooking process that locks in moisture while building a deep, caramelized crust.
The foundation starts with a bold dry rub that blends sweet and smoky spices, giving the fillet its signature bark. I prefer using a reverse sear technique—slow-cooking the meat first to even out the temperature before finishing it over high heat. This method guarantees a perfect tender interior with a crispy exterior, no matter the size of your fillet. What sets this recipe apart is the attention to resting time, which keeps the juices from escaping when you cut into it.
By the time you're done, you'll have a fillet that's rich, smoky, and dripping with flavor—ideal for serving with classic BBQ sides like grilled corn, creamy coleslaw, or a fresh garden salad. The beauty of this recipe is its versatility; it works equally well for a special dinner or a casual cookout. Trust me, once you try this method, you'll never settle for anything less than a perfectly cooked beef fillet.
Ready to elevate your grilling game? The key is patience and precision—two things that pay off in every bite. Let's get started on creating a fillet that'll impress even the most discerning guests.
Ingredients for bbq beef fillet
Pantry spices, premium beef, and a smoky touch—everything you need for restaurant-quality fillets at home.
| Ingredient | Amount | Notes |
|---|---|---|
| Beef Tenderloin Fillet 🥩 | 1 ½ lb | Center-cut, 1.5-inch thick |
| Yellow Onion 🧅 | 1 whole | Sliced into wedges |
| Garlic Cloves 🧄 | 8 cloves | Minced, fresh preferred |
| Kosher Salt 🧂 | 1 ½ tbsp | Diamond Crystal preferred |
| Smoked Paprika 🌶️ | 1 tbsp | For deep smoky flavor |
| Brown Sugar 🍯 | 1 tbsp | Light or dark |
| Ground Black Pepper 🌶️ | 1 tsp | Freshly cracked |
| Dried Thyme 🌿 | 1 tsp | Or 1 tbsp fresh |
| Dried Oregano 🍃 | ½ tsp | Mexican oregano preferred |
| Unsalted Butter 🧈 | 4 tbsp | Cold, cut into cubes |
| Extra-Virgin Olive Oil 🫒 | 2 tbsp | For high-heat searing |
| Apple Cider Vinegar 🍎 | 1 tbsp | For basting |
| Wood Chips (Hickory or Oak) 🌳 | 1 cup | Soaked for 30 minutes |
The beef is non-negotiable here. Center-cut tenderloin is your best bet—it's leaner and more tender than other cuts. I always grab mine from Whole Foods or my local butcher shop, where they can cut it to exactly 1.5 inches thick. Thicker pieces need more time to cook through, and thinner ones can dry out. Look for good marbling—those little fat streaks keep the meat juicy. If you're using a pre-cut fillet, trim any excess fat or silver skin before seasoning. The wood chips? Hickory or oak gives that classic BBQ flavor, but fruitwoods like cherry add a nice twist if you're feeling adventurous.
No smoked paprika? Regular paprika plus a pinch of liquid smoke works in a pinch, though it won't be quite the same. Running out of brown sugar? Maple syrup at half the amount adds moisture and depth. Fresh thyme is ideal, but if you're using dried, measure it by the teaspoon—dried is more concentrated. The butter matters for that buttery tenderness inside. European-style unsalted butter has a higher fat content, which is perfect here. If you're in a hurry, ghee works too. For the wood chips, if you can't find pre-soaked ones, just toss them in water for 30 minutes before using—keeps them from burning too fast.
This fillet is best served immediately after cooking, but if you need to hold it, keep it warm in a 200°F oven for up to 30 minutes. The dry rub keeps well in an airtight container for 2 weeks, so make extra for future grilling sessions. Leftovers? Slice thinly and reheat in a skillet with a splash of beef broth—transforms into delicious sandwiches. The wood chips can be reused once or twice, just soak them again before using. Store them in a sealed container in the fridge for up to 1 month.
Why You'll Love This Recipe
- One-Pan Magic: I swear by this—just slice the beef, toss in onions and garlic, and let the smoky paprika work its charm. No fancy prep, no mess, no stress. The beef practically cooks itself while you sip your drink.
- Smoky-Sweet Perfection: That tenderloin? It’s juicy, caramelized at the edges, and the smoked paprika gives it this deep, savory punch. Honestly, the first time I made it, I took an extra bite just to taste it again.
- Weeknight or Dinner Party: Same recipe, two vibes. Toss it on the grill for a summer BBQ or sear it in a pan for a fancy-ish weeknight meal. The onions caramelize beautifully either way—no extra effort, just different flavors.
- Leftovers That Don’t Suck: Between us, most BBQ beef recipes turn into sad, dry leftovers. Not this one. The tenderloin stays moist, and the smoky rub keeps it interesting. I’ve reheated slices for sandwiches, salads, or just straight-up cold cuts—always a win.
Step-by-step instructions for smoky-grilled beef fillet
Here's how to transform that perfect tenderloin into a showstopper with crispy bark and buttery richness.
🔥 Step 1: Prep the Fillet and Build the Dry Rub
Start by patting the 1.5 lb beef tenderloin fillet completely dry with paper towels—this is non-negotiable for that perfect crust. I like to work with it at room temperature, so let it sit uncovered on your counter for 30 minutes while you prep everything else.
In a small bowl, whisk together the 1.5 tbsp kosher salt, 1 tbsp smoked paprika, 1 tbsp brown sugar, 1 tsp ground black pepper, 1 tsp dried thyme, and 0.5 tsp dried oregano. This blend gives you that perfect balance of smoky, sweet, and savory flavors. Press the rub firmly onto all sides of the fillet, making sure it sticks well—this ensures maximum flavor penetration.
🍳 Step 2: Sear the Fillet for Maximum Flavor
Heat a cast-iron skillet over high heat until it's screaming hot. Add 2 tbsp extra-virgin olive oil and let it shimmer for 30 seconds. Place the fillet in the pan and sear for 2-3 minutes per side, pressing down gently with a spatula during the first minute—this prevents it from curling and ensures even contact with the pan.
You'll know it's ready to flip when you see deep golden-brown color forming. Remove the fillet and set it aside on a plate. Don't clean the pan yet—those browned bits are pure flavor gold. This initial sear locks in juices and builds the foundation for your smoky crust.
🔥 Step 3: Smoke the Fillet Low and Slow
While the fillet rests, set up your smoker with the 1 cup soaked wood chips (hickory or oak) and preheat to 225°F. This low temperature is crucial—it cooks the meat gently while allowing the smoke to penetrate without drying it out. Place the seared fillet on the smoker grate, fat-side up if possible, and close the lid.
Smoke for 1.5-2 hours until the internal temperature reaches 125°F (use a meat thermometer). You'll notice the fillet developing a beautiful pink smoke ring just beneath the surface. Resist the urge to open the smoker—every time you do, you lose heat and potentially dry out the meat. The bark should be dark and crusty, but still tender to the touch.
🍳 Step 4: Finish with Butter and Vinegar Baste
Remove the fillet from the smoker and let it rest for 10 minutes while you melt 4 tbsp cold unsalted butter and 1 tbsp apple cider vinegar in the same cast-iron skillet over medium heat. The butter should foam and bubble, creating a rich, aromatic compound that's perfect for basting.
Once the butter mixture is bubbly but not browned, use a baster or spoon to generously coat the fillet with the butter-vinegar mixture. This step adds incredible richness and helps create that glossy finish. The acidity from the vinegar also cuts through the richness beautifully. Let the fillet rest for another 10 minutes before slicing—this ensures juices redistribute throughout the meat.
🔪 Step 5: Slice and Serve with Confidence
Using a sharp carving knife, slice the fillet against the grain into ½-inch thick pieces. The grain will be visible as slightly darker lines running through the meat. Each slice should be incredibly tender, with that perfect balance of smoky crust and buttery interior.
Serve immediately with any accumulated juices from the resting plate spooned over the top. The fillet should be medium-rare throughout with that beautiful pink center. For extra drama, garnish with the sliced yellow onion wedges and minced garlic cloves you prepped earlier—it adds a pop of color and freshness that complements the rich beef perfectly.
Pro Tips For Making Bbq Beef Fillet
- SEAR IN TWO STAGES: I used to blast the fillet on high heat and end up with a charred crust while the inside stayed cold. Instead, start with medium-high for 2 minutes per side to render fat, then crank to max for the final sear—this guarantees a proper crust without steaming the meat.
- SLICE ONIONS THIN: Thick onion rings won’t caramelize properly in the time you’ll have. Cut them paper-thin (almost translucent) so they soften into the sauce instead of sitting like sad, raw chunks—trust me, your sauce will thank you.
- DON’T RUSH THE REST: I learned this the hard way—cutting into that fillet too soon makes it turn into a sad, juicy brick. Wrap it loosely in foil and let it sit for at least 10 minutes (yes, even if you’re impatient like me). The meat will reabsorb its juices and stay tender.
- UPGRADE THE GARLIC: Freshly minced garlic burns fast and ruins the sauce. Instead, smash 3-4 peeled cloves with the flat side of your knife, then let them sit in the hot oil for 30 seconds before adding anything else—this mellows the flavor without turning bitter.
Flavor customization for bbq beef fillet
Spicy Kick
Crank up the heat by adding 1 tsp cayenne pepper or ½ tsp crushed red pepper flakes to your dry rub. For extra depth, mix in 1 tsp chipotle powder—this gives you that smoky, slightly sweet heat that pairs perfectly with beef. I love finishing with a drizzle of hot honey (mix ¼ cup honey with ½ tsp cayenne and simmer for 5 minutes) right before serving. 🌶️
Sweet and Tangy
Balance the smokiness with a sweet-tangy glaze by brushing the fillet with a mix of 2 tbsp apple cider vinegar, 1 tbsp soy sauce, and 1 tbsp brown sugar during the last 15 minutes of smoking. For a fruitier twist, swap the vinegar for 2 tbsp mango puree—it adds a tropical brightness that cuts through the richness. I often finish with a sprinkle of toasted sesame seeds for texture.
Herb-Infused Variations
Swap out the thyme and oregano for 1 tbsp fresh rosemary and 1 tbsp fresh sage to give your fillet a Mediterranean vibe. For a Southwestern twist, add 1 tsp ground cumin and ½ tsp cinnamon to the rub—trust me, the warmth of the spices elevates the smoky flavor. Garnish with fresh cilantro or parsley for a pop of freshness that brightens every bite.
Umami Boost
Deepening the umami flavor is a game-changer. Add 1 tbsp fish sauce or 1 tsp soy sauce to your dry rub, or brush the fillet with a mix of 1 tbsp Worcestershire sauce and 1 tsp honey during the last 10 minutes of cooking. For an extra punch, sear the fillet with 1 tbsp minced shallots instead of garlic—shallots add a subtle sweetness and complexity that beef lovers adore.
Smoky-Sweet Bark
For a caramelized crust with extra depth, mix 1 tbsp molasses or 1 tbsp maple syrup into your dry rub. The molasses adds a deep, almost coffee-like richness that complements the smokiness beautifully. If you're feeling adventurous, try a 1 tsp liquid smoke boost in the rub—it intensifies the smoky flavor without overpowering the beef. This variation is especially great for those who love a balance of sweet and smoky.
Citrus Zing
Brighten up your fillet with a citrusy twist by adding 1 tbsp orange zest or 1 tbsp lemon juice to the dry rub. For a finishing touch, squeeze fresh orange slices over the top right before serving. The acidity from the citrus helps cut through the richness of the beef, making every bite feel fresh and vibrant. I often pair this with a side of avocado slices for a perfect contrast. 🍊
Nutrition facts
Frequently asked questions about BBQ beef fillet
Can I use a different cut of beef for this recipe?
While this recipe is designed specifically for beef tenderloin (because of its tenderness and leanness), you can adapt it for other cuts like ribeye or sirloin. Just reduce cooking time by 15-20 minutes since these cuts have more fat and connective tissue. For thicker cuts, aim for an internal temp of 120°F before finishing. Never use round or chuck roast—they're too tough for fillet-style cooking.
How do I know when the fillet is done without overcooking?
Use a meat thermometer for precision! For medium-rare, pull the fillet when it hits 125°F internally—it'll rise to 130°F while resting. The reverse sear method makes this foolproof. If you don't have a thermometer, cut into the thickest part: medium-rare should show a pink center with slightly firm edges. Never rely on time alone—thickness and grill heat vary too much.
What's the best way to store leftover beef fillet?
Slice the fillet into ½-inch pieces and store in an airtight container with any accumulated juices. It keeps well in the fridge for 3-4 days or freezes for up to 3 months. For reheating, warm gently in a skillet with 1 tbsp beef broth over medium-low heat—never microwave, as it dries out the meat. Leftover slices make amazing sandwiches or tacos with a quick sear to revive the crust.
Can I make this recipe without a smoker?
Use your grill or oven instead. For the grill, set up indirect heat with wood chips in a smoker box or wrap them in foil with holes poked through. Cook at 225°F until 125°F internal. For the oven, place the fillet on a rack over a baking sheet with 1 cup water + wood chips below, covered with foil. The key is maintaining low heat—a broiler won't work for this method.
Why did my fillet turn out dry?
Most likely, you skipped the resting time or overcooked it. Always let the fillet rest for 10-15 minutes before slicing—this lets juices redistribute. Also check your internal temp: 125°F is perfect for medium-rare. If you used a leaner cut, consider brining it for 30 minutes before cooking. And never cut into it too soon—patience is the secret to juicy beef!