
Main Courses
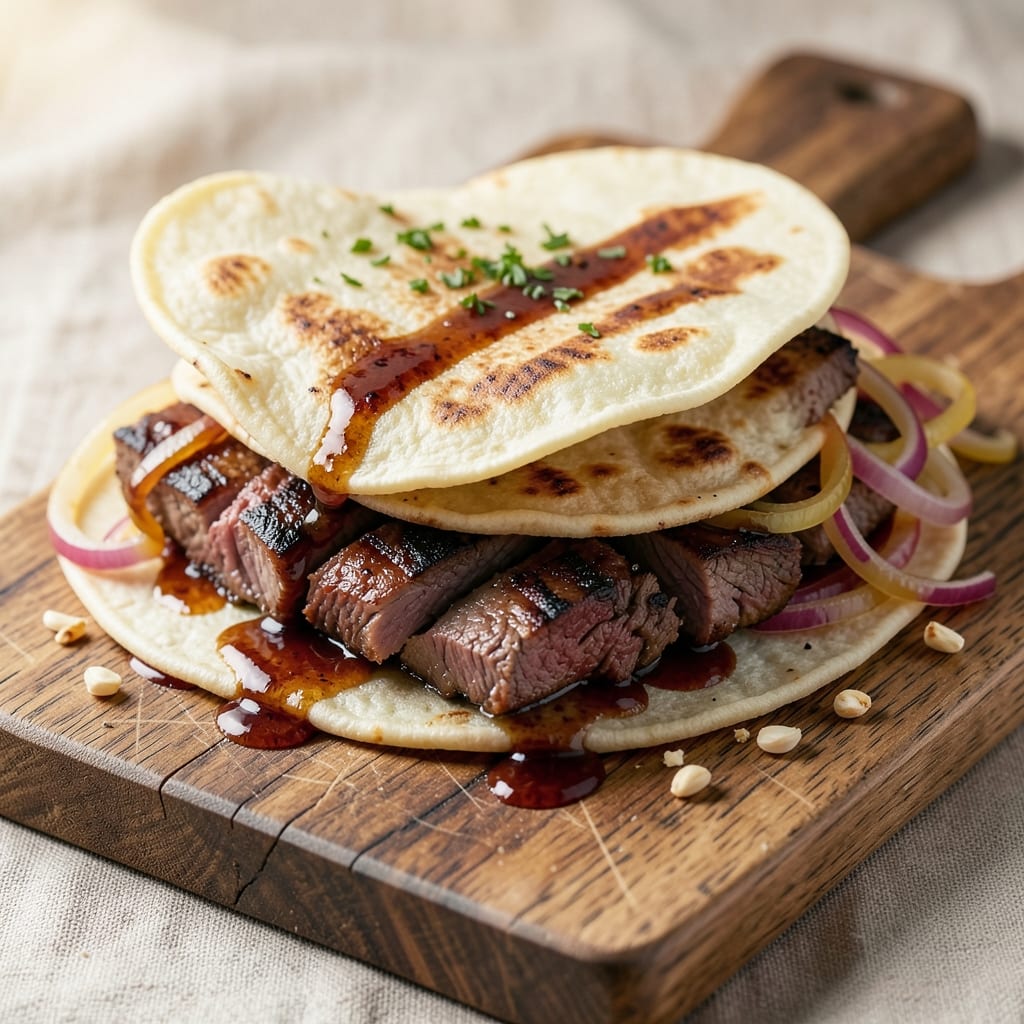
This BBQ beef cups recipe transforms tender beef into handheld, smoky-spiced bites with crispy edges that'll have everyone reaching for seconds. 🔥 I developed this after years of perfecting my pitmaster techniques—where French precision meets bold BBQ flavors. The secret lies in marinating the beef just right and assembling the cups with a crispy shell that holds up to every bite.
The process starts with a foolproof marinade that tenderizes the beef while infusing it with smoky, spiced flavors. You'll grill or pan-sear the beef to medium-rare perfection, then carefully assemble the cups using tortillas or pastry dough. The key is getting that shell golden and crispy while keeping the beef juicy inside—no soggy bites here. This recipe delivers restaurant-quality results without the fuss.
By the time you serve these, you'll have a dish that's equal parts handheld convenience and bold flavor—ideal for game day, potlucks, or a weeknight dinner that feels special. The combination of tender beef, smoky spices, and crispy edges creates a texture and taste experience that's hard to resist. Every bite delivers that perfect balance of smoky, spiced beef with a satisfying crunch.
These BBQ beef cups are versatile enough for any occasion but feel like a true crowd-pleaser at gatherings. Whether you're feeding a hungry football team or just craving something hearty and satisfying, this recipe delivers. Let's get started on creating these smoky-spiced bites that'll have everyone asking for the recipe.
Ingredients for bbq beef cups
Twelve essential ingredients for smoky-spiced beef cups with restaurant-quality crispy edges.
| Ingredient | Amount | Notes |
|---|---|---|
| Top Round Roast Beef 🥩 | 2 lb | Thinly sliced against grain for tenderness |
| Large Flour Tortillas 🌯 | 12 whole | 10-inch size, for crispy shells |
| BBQ Sauce 🍅 | 1 ½ cups | Store-bought or homemade, smoky preferred |
| Yellow Onion 🧅 | 1 whole | Thinly sliced, for marinade |
| Garlic Cloves 🧄 | 8 cloves | Minced, for marinade |
| Apple Cider Vinegar 🍎 | ¼ cup | For tenderizing marinade |
| Smoked Paprika 🌶️ | 2 tbsp | For deep smoky flavor |
| Ground Cumin 🌿 | 1 tbsp | Toasted for warmth |
| Brown Sugar 🍚 | 2 tbsp | For caramelized crust |
| Olive Oil 🫒 | ¼ cup | Light, for searing |
| Kosher Salt 🧂 | 1 ½ tbsp | Diamond Crystal preferred |
| Black Pepper 🌶️ | 1 tbsp | Freshly cracked |
| Butter 🧈 | 2 tbsp | Unsalted, for brushing tortillas |
The beef is non-negotiable—top round roast sliced thin against the grain gives you that melt-in-your-mouth texture. Costco or Whole Foods sell pre-sliced versions, but if you're cutting it yourself, use a sharp knife and angle it at 45 degrees. For the tortillas, Mission brand (the ones with the red packaging) crisps up perfectly without tearing. The marinade needs time—let the beef soak for at least 2 hours, but overnight is ideal. I always double the marinade and use half for the beef, half for basting later.
No smoked paprika? Substitute half with regular paprika and a pinch of liquid smoke—it's a game-changer. Short on apple cider vinegar? Red wine vinegar works too, but the apple adds subtle sweetness that balances the smokiness. The tortillas can be swapped for phyllo dough if you want a more delicate shell, but they won't hold up as well to the juicy filling. For the BBQ sauce, Stubb's Original or Sweet Baby Ray's are my go-tos, but any smoky variety will do. If you're feeling ambitious, make your own with ketchup, molasses, and a dash of hot sauce.
Marinated beef keeps 3 days in the fridge, covered tightly. The tortillas? Store them in a paper bag at room temp—they crisp up better when fresh. Assemble the cups just before serving to keep that perfect crunch. These reheat beautifully—350°F for 10 minutes in the oven with foil over the top to prevent drying. For a crowd, assemble all cups and refrigerate uncooked until ready to bake—400°F for 15 minutes gives you that golden crust. Leftovers? They're even better the next day—packed with flavor.
Why You'll Love This Recipe
- No-Fuss Assembly: I swear, this takes less time than deciding what to watch on TV. Slice the beef, slather on sauce, wrap—boom. Even my picky teenager can handle it without burning the kitchen down.
- Smoky-Sweet Magic: That top round beef? It soaks up BBQ sauce like a sponge, giving you tender, juicy bites with a caramelized crust. The garlic and onion add this just-right punch that makes it feel fancy without the effort.
- Tailgate or Taco Night: Serve these warm with a side of pickles for a game-day vibe, or pack them for lunch—no reheating needed. Honestly, they’re just as good cold as they are hot. (Yes, even on a Tuesday night.)
- Budget Meal, Big Payoff: Top round roast is affordable, and tortillas stretch further than you’d think. Make a double batch, freeze extras, and you’ve got dinner covered for weeks—no takeout guilt, just smoky satisfaction.
Step-by-step instructions for smoky-spiced beef cups
Here's how to transform simple ingredients into crispy, smoky beef bites that disappear faster than you can say "BBQ night."
👨🍳 Step 1: Marinate the Beef for Maximum Tenderness
In a large bowl, combine the thinly sliced top round roast beef with the thinly sliced yellow onion, minced garlic cloves, 0.25 cup apple cider vinegar, 2 tbsp smoked paprika, 1 tbsp toasted ground cumin, 2 tbsp brown sugar, 1.5 tbsp kosher salt, and 1 tbsp black pepper. The vinegar works magic here—it tenderizes the tougher top round while adding brightness that cuts through the richness.
Mix everything thoroughly with your hands, making sure each slice of beef gets coated with the marinade. Let it sit at room temperature for 30 minutes while you prep the tortillas. This brief marinating time prevents the beef from over-absorbing moisture, which keeps those edges crispy when we cook them later. Don't skip this step—it's what transforms tough beef into melt-in-your-mouth bites.
🔥 Step 2: Sear the Beef for Perfect Crispy Edges
Heat 0.25 cup olive oil in a large skillet over medium-high heat until shimmering (about 3 minutes). Working in batches to avoid crowding, add the marinated beef and cook for 2-3 minutes per side until deep golden brown and slightly caramelized. You're looking for that perfect balance—crispy edges that give way to tender beef when you bite in.
As the beef cooks, the marinade will bubble vigorously. This is normal and actually enhances the flavor. If you notice the pan getting too crowded, simply spread the beef out more evenly. Transfer the cooked beef to a paper towel-lined plate to drain excess oil—this prevents soggy tortillas later. Keep the skillet warm for the next step.
🍳 Step 3: Prepare the Crispy Tortilla Cups
While the beef rests, brush each of the 12 whole large flour tortillas lightly with 2 tbsp melted butter. I use a pastry brush for even coverage—don't go overboard with butter or the tortillas will get greasy instead of crispy. Press each tortilla gently into a 6-inch round mold (or use a bowl as a guide) and place on a parchment-lined baking sheet.
Bake at 375°F for 8-10 minutes until the edges are golden brown and crisp. The centers should still be slightly pliable—this ensures they hold their shape when filled. Remove from oven and let cool for 2 minutes before carefully removing from the molds. Here's the thing—if you try to remove them too soon, they'll collapse. Patience pays off with perfect little cups that stand up to the beef filling.
🥘 Step 4: Assemble and Bake to Perfection
Return the skillet to medium heat and add 1.5 cups BBQ sauce, scraping up any browned bits from the bottom. Simmer for 3-4 minutes until slightly thickened. Stir in the seared beef and heat through for 1 minute, coating everything evenly in that smoky sauce. The sauce should cling to the beef rather than pool in the pan—if it's too thin, simmer another minute to reduce.
Spoon the beef mixture into the cooled tortilla cups, pressing down gently to compact the filling. Place on a fresh baking sheet and bake at 350°F for 5-7 minutes until the tortillas are crispy again and the filling is heated through. The key here is the second baking—it crisps up the tortillas that softened slightly during assembly while keeping the beef warm and saucy.
🍽️ Step 5: Serve Immediately with Extra Sauce
Transfer the beef cups to a serving platter and drizzle with any remaining BBQ sauce from the skillet. Here's where it gets fun—garnish with extra minced garlic and a sprinkle of smoked paprika for that restaurant-quality finish. Serve warm with toothpicks for easy handling. The contrast of crispy tortilla cups with tender, saucy beef in every bite makes these irresistibly handheld.
Pro tip: If you're making these ahead, assemble the cups but don't bake them until serving. Reheat in the oven at 350°F for 8-10 minutes to restore that perfect crispy texture. The secret to these beef cups is in the timing—hot, crispy, and ready to be devoured immediately.
Pro Tips For Making Bbq Beef Cups
- Slice Against the Grain: Top round beef is tough when cut with the grain—it’ll fight you. Before slicing, look for the muscle fibers and cut perpendicular to them. Thin, even strips cook faster and stay tender when wrapped in tortillas.
- Preheat the Pan Properly: Cold pans steam the beef instead of searing it. Heat your skillet or grill over medium-high until it’s smoking hot—a quick flick of water should sizzle violently. This crusts the beef in seconds, locking in flavor before the BBQ sauce even touches it.
- Toast the Tortillas First: Stuffing cold tortillas with hot beef makes them soggy. Warm the tortillas dry in the same pan (or over a gas flame) for 10 seconds per side until pliable. They’ll hold up better when wrapped and won’t fall apart when bitten into.
- Balance the Sauce Ratio: Store-bought BBQ sauce can overwhelm the beef if you drown it. Use about 1 tablespoon per 4 ounces of sliced beef—enough to coat but not soak. Save extra sauce for dipping on the side; the beef’s natural flavor shines when it’s not swimming in liquid.
Make-ahead tips for this dish
Marinade Prep Ahead
Make the marinade a day in advance and store it in an airtight container in the fridge. The flavors deepen overnight, and you'll save time on prep day. I like to double the batch—use half for the beef and save the rest for basting later. The acidity from the apple cider vinegar tenderizes the beef beautifully, but if you're short on time, even 30 minutes of marinating makes a difference. 🌶️
Beef Pre-Cooking
Cook the beef completely through and let it cool before assembling the cups. Store it in an airtight container in the fridge for up to 3 days. This step is crucial—it prevents soggy tortillas when you reheat everything later. I often cook the beef the night before so it's ready to assemble when I'm ready to serve. The key is to keep it covered tightly to maintain moisture.
Tortilla Prep
Brush the tortillas with butter and bake them ahead of time, then store in an airtight container at room temperature. They'll stay crisp for about 24 hours if kept away from moisture. I like to assemble the cups without filling them first—this way, you can store them in the fridge for up to 2 days before baking. Just pop them in the oven when you're ready to serve, and they'll crisp up perfectly. 🥩
Assembly Timeline
Assemble the beef cups but don't bake them until serving. Store them in a single layer on a baking sheet, covered with plastic wrap, in the fridge for up to 24 hours. When ready to serve, bake at 350°F for 8-10 minutes to restore that crispy texture. This method keeps everything fresh and ensures the tortillas stay crispy, not rubbery. It's a game-changer for meal prep!
Freezing Options
If you're planning ahead for more than a few days, freeze the assembled (but unbaked) beef cups. Place them in a single layer on a baking sheet, freeze solid, then transfer to an airtight container or freezer bag. They'll keep for up to 3 months. To serve, thaw overnight in the fridge, then bake at 375°F for 12-15 minutes until crispy. The texture holds up surprisingly well after freezing!
Reheating Leftovers
Leftovers reheat best in the oven. Place them on a baking sheet and cover loosely with foil to prevent drying. Bake at 350°F for 10 minutes, then uncover and bake another 2-3 minutes to crisp up the tortillas. Avoid the microwave—it turns the tortillas soggy. I also like to add a splash of water or BBQ sauce when reheating to keep everything juicy. 🔥
Nutrition facts
Frequently asked questions
What cut of beef works best for these cups?
Top round roast is ideal because it's lean yet tender when sliced thin against the grain. For extra tenderness, you could also use sirloin or flank steak. Avoid tougher cuts like chuck—they need longer marinating and won't hold up as nicely in the cups.
Can I make these beef cups ahead of time?
Assemble the cups without baking and refrigerate for up to 24 hours. When ready to serve, bake at 350°F for 8-10 minutes to restore crispiness. For freezing, assemble unbaked cups, freeze solid, then store for 3 months. Thaw overnight before baking at 375°F for 12-15 minutes.
How do I keep the tortilla cups from getting soggy?
The secret is baking them first to create a crisp shell, then assembling and baking again. Use 375°F for 8-10 minutes to pre-bake, then 350°F for 5-7 minutes after adding filling. Keep the beef warm but not steaming hot when assembling—this prevents moisture buildup.
What's the best BBQ sauce to use?
Any smoky BBQ sauce works, but I recommend Stubb's Original or Sweet Baby Ray's for that classic tangy-sweet balance. For extra depth, make your own with ketchup, molasses, and a dash of hot sauce. Avoid watery sauces—they'll make the tortillas soggy.
Can I make these without a grill?
Yes! Use a skillet over medium-high heat to sear the beef until deep golden brown and slightly caramelized. For the tortillas, bake them in the oven at 375°F instead of grilling. The oven method gives you more even cooking and better control over crispiness.