
Main Courses
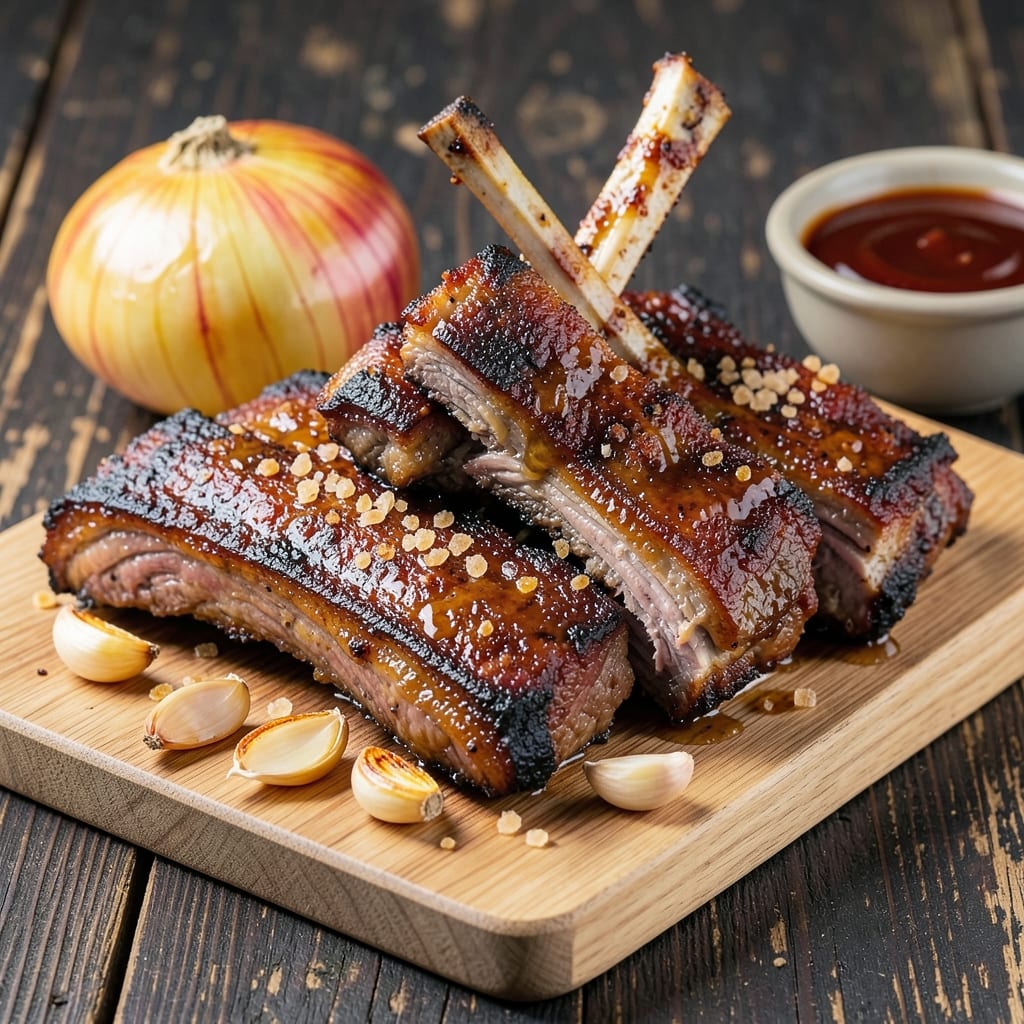
Barbecued beef back ribs transform tough meat into melt-in-your-mouth perfection with just six hours of patience and the right technique. I learned this method from my grandfather, who swore by the 3-2-1 rule—three hours for the bark, two for tenderizing, and one for that final caramelized crust. The secret lies in low-and-slow cooking that renders fat while keeping the meat juicy, something I've perfected over years of backyard cookouts.
The key to restaurant-quality ribs starts with a dry rub that clings to the meat and develops that coveted bark. We'll use a blend of brown sugar, paprika, and spices that create a balance of sweet, smoky, and spicy flavors. The ribs cook at 225°F in a smoker or oven, wrapped in foil halfway through to trap moisture while allowing the bark to form. This method ensures tender meat without drying it out, a common mistake even experienced pitmasters make.
By the time you're done, you'll have ribs with a deep mahogany bark that shatters at the touch, revealing meat so tender it falls off the bone. The aroma alone will have everyone gathering around your table, and each bite delivers that perfect combination of smoky, sweet, and savory flavors. These ribs are worth the wait—trust me, I've tested this recipe countless times, and it never fails to impress.
Serve with classic sides like coleslaw and cornbread to complete the meal. The leftovers reheat beautifully, making this an excellent recipe for feeding a crowd or meal prepping. Let's get started on creating ribs that will have everyone asking for seconds.
Ingredients for barbecued beef back ribs
Six ingredients for the rub, two for the marinade—just enough to create restaurant-quality ribs at home.
| Ingredient | Amount | Notes |
|---|---|---|
| Beef Back Ribs 🥩 | 4 lb | Bone-in, meaty ends included |
| Yellow Onion 🧅 | 1 whole | Chopped for rub base |
| Garlic Cloves 🧄 | 6 cloves | Minced for rub |
| Light Brown Sugar 🍚 | ½ cup | Packed, for sweetness |
| Smoked Paprika 🌶️ | 2 tbsp | For deep smoky flavor |
| Chili Powder 🌶️ | 1 ½ tbsp | Medium heat preferred |
| Ground Black Pepper 🌶️ | 1 tbsp | Freshly ground preferred |
| Kosher Salt 🧂 | 1 tbsp | Diamond Crystal preferred |
| Apple Cider Vinegar 🍎 | 2 tbsp | For tenderizing marinade |
| Yellow Mustard 🥫 | 2 tbsp | For moisture retention |
| Butter 🧈 | ¼ cup | Unsalted, softened |
| Aluminum Foil 📄 | 1 sheet | Heavy-duty for wrapping |
| Wood Chips 🌳 | 2 cups | Hickory or apple preferred |
The ribs themselves are everything. Look for full racks with good meat-to-bone ratio—the meatier ends are where you want the bark. I always grab mine from Costco when they're on sale, but your local butcher shop will have better quality if you're willing to pay a bit more. The difference between store-bought and butcher-cut ribs is like night and day. For the wood chips, hickory gives classic smokiness, while apple adds a touch of sweetness—mix them up if you want both flavors. Soak the chips in water for 30 minutes before using, or they'll burn too fast.
No smoked paprika? Regular paprika plus a pinch of liquid smoke works in a pinch. Short on apple cider vinegar? White vinegar or lemon juice gets you close, though the flavor won't be identical. The mustard is non-negotiable—it helps the rub stick and keeps the meat moist during cooking. For the butter, full-fat is a must—low-fat versions won't give you that rich, tender finish. If you're cooking in an oven instead of a smoker, use a disposable aluminum pan to catch drippings and add extra smoke flavor by placing a small bowl of water with wood chips underneath the rack.
Ribs reheat beautifully—just wrap them in foil with a splash of water and bake at 300°F for 15 minutes. Store cooked ribs in the fridge for up to 4 days, or freeze for 3 months by wrapping tightly in foil and plastic wrap. The bark gets softer when reheated, so I always save a few pieces to serve cold for contrast. Leftovers make amazing sandwiches—just pile them high on a bun with coleslaw and a drizzle of BBQ sauce.
Why You'll Love This Recipe
- I’ll be real: most leftover ribs are dry or sad. Not these. The sugar keeps them tender, and the smoky flavor only gets richer. Wrap them up for lunch or chop them into tacos—no regrets either way.
- No-Fuss Prep: I swear by this one—just a quick rub of brown sugar, paprika, and garlic on raw ribs, then toss them on the grill or in the oven. No brining, no fancy marinating, just hands-off time while you sip something cold.
- Smoky-Sweet Magic: That caramelized brown sugar crust? Pure perfection. The smoked paprika gives it depth, while the onions and garlic melt into the meat, creating layers of flavor that make every bite unforgettable.
- Weeknight or Party Star: Between us, this is my go-to for game days or lazy Sundays. The ribs feed a crowd but stay budget-friendly, and honestly? Leftovers taste even better the next day—if they last that long.
Step-by-step instructions for smoky, juicy beef back ribs
Here's how to transform tough beef ribs into melt-in-your-mouth perfection with a crispy bark.
Prepare the Ribs and Make the Dry Rub
Start by removing the beef back ribs from the package and patting them dry with paper towels. I like to trim any excess fat from the bone side, leaving about ¼-inch thickness - this helps the rub stick better and prevents greasy smoke. Place the ribs meat-side down on a cutting board.
In a medium bowl, combine the chopped yellow onion, minced garlic cloves, light brown sugar, smoked paprika, chili powder, ground black pepper, and kosher salt. I use my fingers to break up any large clumps of brown sugar and paprika, ensuring an even distribution. Rub this mixture all over the ribs, pressing firmly so the spices adhere to every surface. Let the seasoned ribs sit at room temperature for 30 minutes before cooking - this helps the rub penetrate the meat.
Create the Tenderizing Marinade
While the ribs rest, mix the apple cider vinegar and yellow mustard in a small bowl. The acidity in the vinegar helps tenderize the meat, while the mustard adds moisture that prevents drying during the long cook. I like to whisk them together until fully combined - about 1 minute - to create a smooth marinade.
Brush this mixture generously over all sides of the ribs. Don't be shy - you want complete coverage. I use about half the mixture now and reserve the rest for basting later. Let the ribs sit uncovered for another 15 minutes while you prepare your smoking setup. This brief marinating time is enough to start working its magic without making the meat mushy.
Set Up Your Smoker
Fill your smoker with the 2 cups of wood chips and soak them in water for 30 minutes if they're not pre-soaked. This ensures steady, clean smoke rather than thick white vapor. Set your smoker temperature to 225°F - this low-and-slow approach is key to tenderizing the connective tissue in beef ribs.
Let the smoker preheat for 15-20 minutes until you see steady blue smoke. Place a water pan in the smoker to maintain moisture. I always check my thermometer probe to confirm the temperature is stable before adding the ribs. The ribs will cook for about 6 hours total, so plan accordingly - this isn't a quick process, but the results are worth the wait.
Smoke the Ribs Low and Slow
Place the ribs bone-side down on the smoker grates. I like to position them perpendicular to the airflow for even cooking. Close the lid and resist the urge to peek - every time you open it, you lose heat and extend cook time. Smoke the ribs for 3 hours, or until they reach an internal temperature of 170°F.
Here's where the magic happens: at the 3-hour mark, wrap the ribs tightly in aluminum foil with the butter. I place the ribs on the foil, dot them with the softened butter, then fold the foil to completely enclose them. The butter adds moisture and richness, while the foil creates a steam environment that helps break down collagen. Return the wrapped ribs to the smoker and continue cooking for another 3 hours, or until they reach 203°F internally.
Rest and Serve with Confidence
Remove the ribs from the smoker and let them rest on a cutting board for 15-20 minutes. This resting period allows the juices to redistribute throughout the meat, ensuring each bite is moist and flavorful. I like to tent the ribs loosely with foil during this time to keep them warm.
Once rested, slice between the bones to separate the ribs. The meat should pull apart easily with a fork or knife, indicating perfect tenderness. Serve immediately with your favorite sides - I recommend coleslaw and cornbread to complement the rich, smoky flavors. The ribs should have a beautiful mahogany bark on the outside with tender, juicy meat underneath that practically melts in your mouth.
Pro Tips For Making Barbecued Beef Back Ribs
- Trim the Fat First: The membrane on beef ribs is tough and chewy—peel it off before cooking. Use a butter knife to slide it off the bone, then pat the ribs dry with paper towels. Wet hands slip, so keep them dry while working.
- Char the Onions: Sear sliced yellow onions in a hot pan until they’re deep brown and slightly caramelized before adding them to the ribs. This adds a smoky depth that just raw onions can’t match—plus, it cuts down on cooking time later.
- Skip the Sugar Rush: Brown sugar burns fast and turns bitter. Mix it with smoked paprika and garlic after the ribs have seared, not at the start. A light hand here means you won’t end up with a sticky, overcooked mess.
- Rest Before Slicing: Let the ribs sit under foil for 10 minutes after cooking. Cutting into them too soon turns the meat to mush—you want those bones to stay intact so you can pull them apart cleanly. (Yes, even if you’re impatient like me.)
Storing and reheating your barbecued beef back ribs
Refrigerator Storage
Store your cooked ribs in an airtight container for up to 4 days—I use glass containers with tight-sealing lids to maintain freshness. Let them cool completely before refrigerating to prevent condensation from forming. The bark stays crispier this way, though it softens slightly after storage. I always portion them into individual servings for easy reheating. 💫
Freezer Prep Tips
For longer storage, wrap ribs tightly in heavy-duty aluminum foil first, then seal in a freezer bag with all air removed. This prevents freezer burn and preserves texture for up to 3 months. I label bags with the date and cooking method—"Smoked Ribs, 6/15"—so I remember how they were prepared. Thaw overnight in the fridge before reheating. ❄️
Stovetop Reheating
My go-to method is reheating in a heavy-bottomed skillet over medium-low heat for 10-12 minutes with 2 tablespoons of water or apple cider vinegar to restore moisture. Cover with a lid to trap steam, and baste occasionally with the liquid. This keeps the bark intact while warming the meat through. A splash of yellow mustard (from your marinade) adds extra tenderness. 🔥
Oven Refresh
For larger batches, preheat your oven to 300°F and place ribs in a foil-lined baking dish with 1/4 cup beef broth. Cover tightly with foil and bake for 15-20 minutes, checking internal temperature to reach 165°F. The oven method is gentler than the stovetop, making it ideal for ribs with delicate bark. I often use this for feeding a crowd. 🍖
Microwave Shortcut
When you're in a rush, microwave individual portions on 50% power for 2-3 minutes, then let rest for 1 minute before serving. Add 1 teaspoon of water to the plate to prevent drying. While not ideal for bark preservation, it's a lifesaver for quick lunches. I only use this for ribs I didn't wrap tightly in foil before storage. ⏱️
Cold Ribs Hack
Save a few pieces of bark for serving cold—it's perfect in salads or sandwiches. Store these separately in the fridge for up to 3 days. The contrast of crispy bark against cool coleslaw or creamy mac and cheese is my favorite way to enjoy leftovers. I also use them as toppers for loaded baked potatoes. 🥗
Nutrition facts
Frequently asked questions
Why do beef back ribs need such a long cook time?
Beef ribs contain tough connective tissue that requires low-and-slow cooking to break down properly. At 225°F, the collagen melts over time, transforming into gelatin that makes the meat tender and juicy. The 6-hour process ensures perfect texture without drying out the meat. This is why we use the 3-2-1 method—three hours for bark formation, two for tenderization, and one for final crisping.
Can I substitute apple cider vinegar in the marinade?
Yes, but expect slightly different results. White vinegar or lemon juice work in a pinch, though they won't add the same depth of flavor. For best results, use apple cider vinegar—its mild sweetness complements the smoky flavors. If you're short on time, even a splash of red wine can add acidity and complexity. Just remember, the acidity helps tenderize the meat.
What's the best way to tell when beef ribs are done?
Use a meat thermometer for accuracy—beef ribs are done when they reach 203°F internally. The bark should be dark mahogany and crispy, while the meat should pull apart easily with a fork. If you don't have a thermometer, check for tenderness by gently pressing between bones—they should feel very soft. The ribs should also have a rich, smoky aroma.
How do I keep the ribs from drying out during cooking?
Wrapping the ribs in foil with butter after the first 3 hours is key—this traps moisture while allowing the bark to form. The water pan in your smoker also helps maintain humidity. Avoid opening the lid too often, as heat loss can dry out the meat. If cooking in an oven, place a small bowl of water with wood chips underneath the rack for extra smoke and moisture.
Can I use an oven instead of a smoker for this recipe?
Preheat your oven to 225°F and place the ribs on a rack over a disposable aluminum pan. Add 2 cups of water to the pan and place wood chips (soaked in water) underneath the rack for smoke flavor. Follow the same 3-2-1 method, wrapping the ribs in foil with butter after 3 hours. Oven-cooked ribs will have slightly less bark but still be incredibly tender.