
Main Courses
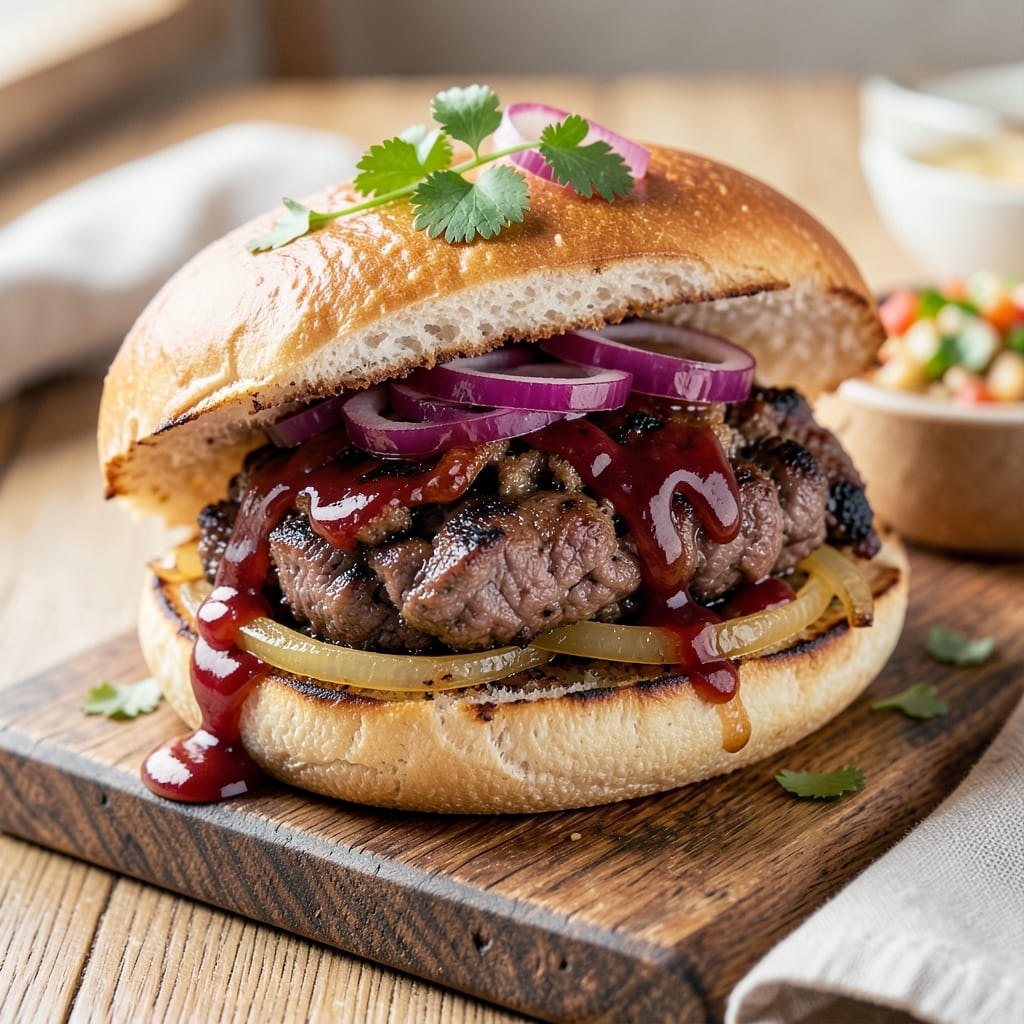
This barbecue beef on a bun recipe delivers the perfect balance of smoky, juicy beef and a soft, melty bun hug that'll make every bite unforgettable. 🔥 As a pitmaster who grew up surrounded by slow-cooked ribs and spicy rubs, I've refined this technique to ensure your beef stays tender and packed with flavor, while the bun soaks up every delicious drop of sauce. The secret lies in the smash method—creating that perfect sear while keeping the inside juicy and succulent.
What sets this recipe apart is the combination of traditional grilling techniques with a modern twist. We'll start with a marinade that tenderizes the beef and infuses it with deep, smoky flavors, then finish it off with a quick sear on the grill or skillet. Meanwhile, the buns get a special treatment—lightly toasted to create that ideal melty texture that holds up perfectly to the juicy beef. This isn't just a burger; it's a full experience that brings the flavors of a backyard cookout to your dinner table.
The result is a juicy, flavorful beef patty with a caramelized crust, nestled in a soft, toasted bun that's just warm enough to soak up all the delicious sauce. The beef stays tender and moist, thanks to the marinade and careful cooking technique, while the bun provides that perfect contrast—crispy outside, soft inside. This recipe is designed to impress whether you're grilling for a crowd or treating yourself to a special meal.
Ready to master this technique? We'll walk you through every step—from marinating the beef to toasting the buns and assembling the perfect bite. Whether you're using a grill, skillet, or even the oven, these instructions will guide you to achieve restaurant-quality results at home. Let's get started on creating a barbecue beef on a bun that's truly unforgettable.
Ingredients for barbecue beef on a bun
Smoky, juicy beef meets melty buns in this pitmaster-approved burger recipe—just 15 ingredients for maximum flavor.
| Ingredient | Amount | Notes |
|---|---|---|
| Ground Chuck Beef 🥩 | 1 ½ lb | 80/20 fat ratio preferred |
| Yellow Onion 🧅 | 1 whole | Medium size, finely chopped |
| Garlic Cloves 🧄 | 6 cloves | Fresh, minced for marinade |
| Ketchup 🍅 | ½ cup | Heinz preferred for consistency |
| Worcestershire Sauce 💧 | 2 tbsp | Original, not vegetarian version |
| Apple Cider Vinegar 🍎 | 1 tbsp | For tangy depth |
| Smoked Paprika 🌶️ | 1 tbsp | For that smoky pitmaster flavor |
| Ground Black Pepper 🌶️ | 1 tsp | Freshly cracked for best flavor |
| Kosher Salt 🧂 | 1 ½ tsp | Diamond Crystal preferred |
| Hamburger Buns 🍞 | 4 whole | Potato-based for melty texture |
| Butter 🧈 | 2 tbsp | Unsalted, softened for toasting |
| Mayonnaise 🥛 | 2 tbsp | Duke's preferred for richness |
| Yellow Mustard 🟡 | 1 tbsp | French's preferred |
| Pickles 🥒 | 4 slices | Dill, thinly sliced |
| Red Leaf Lettuce 🥬 | 4 leaves | Butter lettuce works too |
The beef is everything here. Ground chuck with 80/20 fat ratio gives you that perfect balance of juiciness and sear—leaner cuts won't crisp up the same way. I always grab mine from Costco or the butcher counter at Whole Foods—they keep it fresher than the pre-packaged stuff. The onions and garlic? Freshly chopped right before mixing makes all the difference in the marinade. If you're short on time, the jarred minced garlic works, but it's not the same. For the buns, potato-based like Hawaiian Sweet Rolls hold up best to the juicy beef—they get that perfect melty texture when toasted.
No Worcestershire? Substitute soy sauce plus a splash of balsamic vinegar—it's not identical, but gets you close. Running out of ketchup? Tomato paste thinned with water works in a pinch. The pickles can be any kind you like, but dill is classic. No mayo? Greek yogurt mixed with lemon juice gives you that tangy richness. The mustard can be skipped if you're not a fan, but I always include it—it cuts through the richness of the beef. And if you're making these ahead? Toast the buns fresh before assembling—nothing beats that warm, melty hug.
Marinate the beef for at least 30 minutes (overnight is even better)—the flavors really meld. Store the marinade in the fridge for up to 3 days, but use it up quickest for best results. The buns? Keep them wrapped at room temp for up to 2 days—they get stale fast once toasted. Leftover patties reheat beautifully in a skillet with a splash of beef broth. Assemble these fresh off the grill for that perfect melty moment, but if you're prepping ahead, keep the buns and toppings separate until you're ready to serve.
Why You'll Love This Recipe
- One-Pan Magic: I swear by this recipe—just brown the beef with onions and garlic, toss in ketchup and Worcestershire, and let it simmer. No flipping pans, no fuss, and the smoky-sweet aroma fills the kitchen while you chop buns.
- Worcestershire Secret: That little bottle of Worcestershire transforms everything—deep, tangy, and just a splash makes the beef taste like it’s been slow-cooked all day. Honestly, skip it at your own risk.
- Tailgate or Taco Night: Same filling, endless possibilities. Serve it on toasted buns for a classic burger, stuff it into tortillas for sliders, or even pile it onto rice for a quick bowl. My go-to for game days or lazy Fridays.
- Budget-Friendly Powerhouse: Ground chuck stretches far, and the pantry staples (onion, garlic, ketchup) don’t break the bank. I’ve made this for six people for under $15—leftovers freeze like a dream for future lunches.
Step-by-step instructions for juicy smash burgers
Here's how to make melt-in-your-mouth burgers with that perfect melt-in-your-bun texture!
🍳 Step 1: Make the Flavor-Packed Beef Mixture
In a large bowl, combine the 1.5 lb ground chuck beef, 1 whole yellow onion (finely chopped), 6 cloves garlic cloves (minced), 0.5 cup ketchup, 2 tbsp Worcestershire sauce, 1 tbsp apple cider vinegar, 1 tbsp smoked paprika, 1 tsp ground black pepper, and 1.5 tsp kosher salt. Use your hands to mix everything thoroughly until the beef is evenly coated and the mixture is completely combined.
This step is where all the magic happens—I like to press the beef with my fingers to break up any large clumps. The mixture should look like wet sand with visible bits of onion and garlic. Let it sit at room temperature for 10 minutes while you prep your cooking surface. This resting time helps the flavors meld together and makes for a more cohesive patty.
🔥 Step 2: Smash and Cook the Perfect Patties
Heat a cast-iron skillet over medium-high heat until it's screaming hot—you should see a thin layer of steam when you splash a few drops of water on it. Divide the beef mixture into 4 equal portions (about 4 ounces each) and place them between two sheets of plastic wrap.
Using a heavy pan or a meat mallet, smash each portion into a ½-inch thick round patty. The goal is to create a wide surface area that will sear beautifully. Carefully transfer the smashed patties to the hot skillet and cook for 3-4 minutes per side until they develop a deep golden brown crust. Don't press them with a spatula—this will squeeze out all the juices. You'll know they're ready to flip when they release easily from the pan.
🍳 Step 3: Toast the Buns and Assemble
While the patties cook, spread 1 tbsp mayonnaise and 1 tbsp yellow mustard on the cut sides of the 4 whole hamburger buns. In a separate small pan, melt the 2 tbsp butter over medium heat and toast the buns butter-side down for 1 minute until golden brown. Flip and toast the other side for 30 seconds—this creates that perfect crispy texture that holds up to the juicy filling.
Here's where it gets fun—keep the patties warm in a 200°F oven while you assemble. On the bottom half of each bun, layer 1 leaf red leaf lettuce, 1 slice pickles, and then the cooked patty. Top with the remaining lettuce, pickles, and the top bun half. Press down gently but firmly to create that classic "melty bun hug" effect.
🥘 Step 4: Serve Immediately for Maximum Juiciness
Let the burgers rest for 1 minute before serving—this gives the bun time to absorb some of the juices and creates that perfect bite. Serve them right away while the patties are still sizzling hot and the buns are perfectly toasted. Each bite should deliver that perfect balance of smoky, tangy flavors with a juicy beef center that practically oozes with every bite.
Pro tip: If you want to take it to the next level, add a sprinkle of smoked paprika on top of each patty right before serving. The heat will bring out even more of that smoky flavor that makes these burgers irresistible!
Pro Tips For Making Barbecue Beef On A Bun
- BREAK THE MEAT FIRST: Pulse your ground chuck in the food processor for 10 seconds before cooking—it loosens the fibers so the beef browns faster and holds sauce better. I used to skip this, and my patties always felt dense, even after adding onions and garlic. ---
- SWEAT ONIONS LOW AND SLOW: Cook the diced onion in a dry pan for 5 minutes before adding oil, then reduce heat to medium-low. This caramelizes the sugars first, giving your beef that deep, sweet base flavor without burning. I learned this the hard way after one batch tasted bitter. ---
- DON’T OVERWORK THE BEAN: Once your beef is cooked, stir in the Worcestershire and ketchup just until combined—overmixing turns it into a paste. Let it sit for 2 minutes off the heat so the sauce thickens naturally. My first attempts always ended up gloppy. ---
- TOAST THE BUN LAST: Keep the buns wrapped in foil until you’re ready to serve, then toast them in a dry pan for 30 seconds per side. This locks in moisture while giving that perfect crunch—no soggy bottoms. I was skeptical until I tried it, and now I never skip it.
Flavor customization for barbecue beef on a bun
Smoky Spice Rub
Swap the marinade for a dry rub by mixing 2 tbsp smoked paprika, 1 tbsp brown sugar, 1 tsp garlic powder, 1 tsp onion powder, 1 tsp ground black pepper, and 1 tsp kosher salt. Coat the beef mixture thoroughly and let it sit for 30 minutes before cooking. This creates a deep, caramelized crust that's perfect for those who love intense smoky flavors. I often use this technique when grilling outdoors—it's foolproof for campfire cookouts. 🌶️
Sweet & Tangy Glaze
Add a ¼ cup BBQ sauce (like Sweet Baby Ray's) to the marinade for a sweet-tangy twist. Brush the patties with extra glaze during the last 2 minutes of cooking. For a spicy kick, add 1 tsp cayenne pepper to the glaze. This works especially well with the smash technique—those wide surfaces catch the glaze beautifully. I love this variation for game day gatherings. 🔥
Blue Cheese Crumble
Add a ¼ cup crumbled blue cheese to the beef mixture for a bold, creamy flavor. The blue cheese pairs perfectly with the smoky beef and tangy mustard. For an extra touch, sprinkle 2 tbsp crumbled blue cheese on top of each assembled burger right before serving. This is my go-to upgrade for anyone who loves a little funk in their burgers. 🧀
Carolina-Style Mustard Sauce
Replace the mayo-mustard spread with a tangy Carolina-style sauce by mixing 2 tbsp mayo, 1 tbsp yellow mustard, 1 tbsp apple cider vinegar, 1 tsp hot sauce, and ½ tsp smoked paprika. This sauce adds a bright, spicy kick that cuts through the richness of the beef. It's a game-changer for those who love bold, zesty flavors. 💛
Jalapeño & Cheese Stuffed
Add 4 thinly sliced jalapeños and ¼ cup shredded cheddar cheese to the center of each patty before smashing. The jalapeños add heat and moisture, while the cheese melts into the beef for extra richness. This is a crowd-pleaser at cookouts—everyone gets to customize their heat level. 🌶️
Grilled Onion & Caramelized Topping
Top each patty with 2 slices grilled onion and 1 tbsp caramelized onions before assembling the bun. The sweetness of the caramelized onions balances the smoky beef beautifully. I like to grill the onions separately for extra flavor—it's a simple but impressive upgrade. 🧅
Nutrition facts
Frequently asked questions
Can I use pre-formed burger patties instead of making my own?
While you can use pre-formed patties, I recommend making your own for that perfect melt-in-your-mouth texture. The smash technique creates a wider surface area that sears beautifully and stays juicy inside. If you must use pre-formed, look for 80/20 ground chuck and gently flatten them to ½-inch thickness before cooking. They won't be quite as flavorful, but they'll still taste great!
How do I keep the buns from getting soggy?
Toast the buns fresh before assembling—never toast them ahead of time. For extra insurance, spread the mayo-mustard mix on the cut sides right before toasting. The butter toasting creates a crispy barrier that prevents sogginess. Keep the patties warm in a 200°F oven while you assemble to maintain that perfect melty texture.
What's the best way to reheat leftover beef patties?
Reheat gently in a skillet over medium-low heat for 2-3 minutes per side until warmed through. Add a splash of beef broth to keep them moist. Never microwave—it makes the beef rubbery. For buns, toast fresh in butter just before serving. Assemble immediately for that perfect melty moment. Leftover patties also work great in breakfast sandwiches!
Can I make this recipe on a grill instead of a skillet?
The smash technique works perfectly on a grill. Heat your grill to medium-high (400-450°F) and oil the grates well. Cook the patties for 3-4 minutes per side until they develop a deep crust. For extra smokiness, add wood chips to your charcoal or gas grill. The grill imparts a wonderful charred flavor that complements the smoky marinade beautifully.
Why does my beef turn out dry?
Most likely, you're overcooking or pressing the patties with a spatula. The smash technique creates a wide surface that cooks quickly—3-4 minutes per side is perfect. Never press them while cooking, as this squeezes out all the juices. Use a meat thermometer to check doneness: 160°F internal temperature is ideal. Also ensure you're using 80/20 ground chuck—the fat keeps it juicy!