
Main Courses
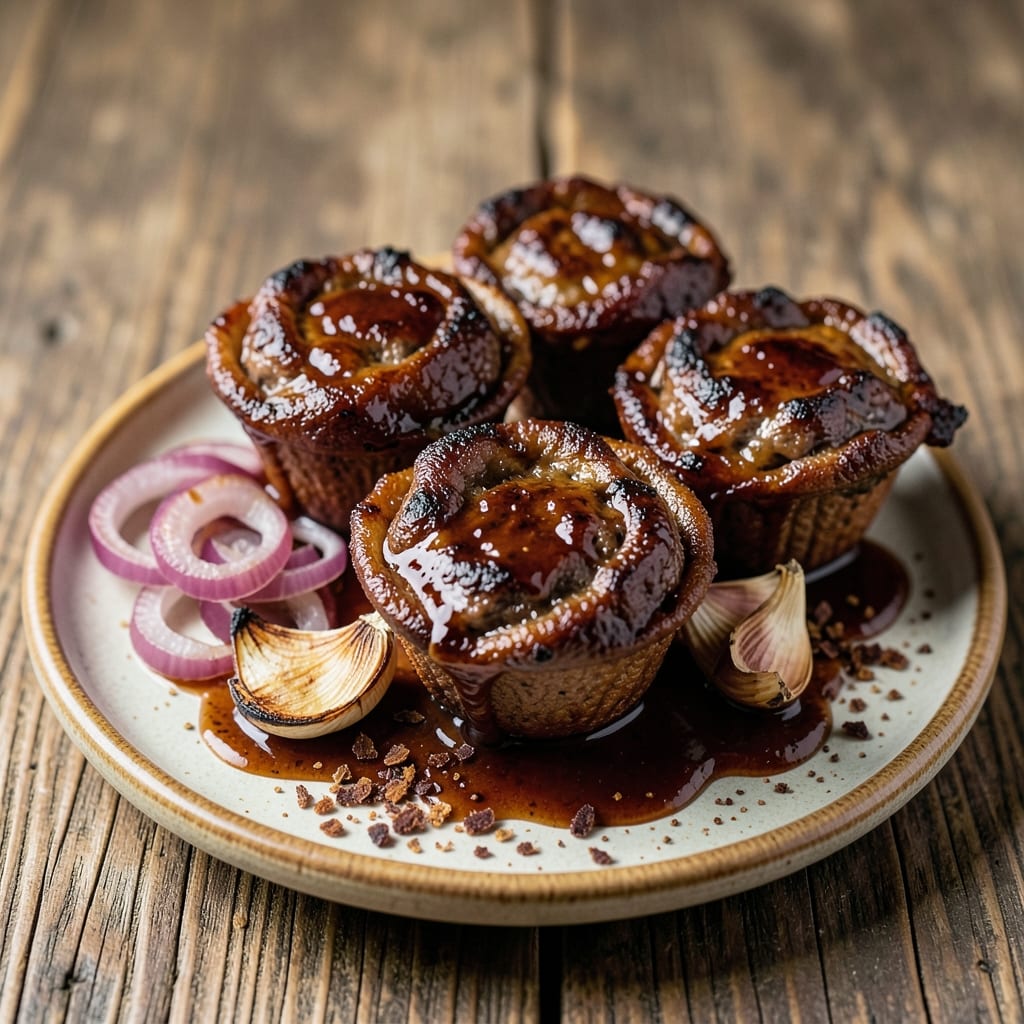
This barbecue beef cups recipe transforms simple beef into smoky, handheld bites with a charred crust that's impossible to resist. 🔥 After perfecting this at my family's backyard cookouts, I've refined the technique to deliver restaurant-quality results at home—no special equipment required. The secret lies in rolling the beef just right and mastering the grill's heat zones for that perfect char. What makes these beef cups special is their balance of textures: tender, juicy beef wrapped in a crispy crust that's infused with smoky spices. The process is simpler than it sounds—just pound the beef, season generously, and let the grill work its magic. I've tested this recipe countless times, and it never fails to impress, whether served as an appetizer or a satisfying main course. By the time you're done, you'll have perfectly shaped beef cups with a deep, caramelized crust and smoky flavor that lingers. The aroma alone will have everyone gathering around the grill, and the first bite delivers that perfect combination of smoky, spiced beef and tender meat. These are the kind of bites that disappear fast, so make sure you have enough for seconds. Serve with grilled vegetables, a side of cornbread, or your favorite barbecue sauce for dipping. The possibilities are endless, but the technique remains the same—simple, effective, and guaranteed to elevate your next cookout. Let's get started!
Ingredients for barbecue beef cups
Simple ingredients that pack serious smoky flavor for perfect handheld beef bites.
| Ingredient | Amount | Notes |
|---|---|---|
| Top Round Roast Beef 🥩 | 1 ½ lb | Pounded to 1/4-inch thickness |
| Yellow Onion 🧅 | 1 whole | Thinly sliced lengthwise |
| Garlic Cloves 🧄 | 4 cloves | Minced for seasoning paste |
| Smoked Paprika 🌶️ | 1 ½ tbsp | For deep smoky flavor |
| Ground Cumin 🌿 | 1 tsp | Toasted for extra aroma |
| Brown Sugar 🍯 | 1 tbsp | Lightly packed |
| Kosher Salt 🧂 | 1 ½ tsp | Diamond Crystal preferred |
| Ground Black Pepper 🌶️ | ½ tsp | Freshly cracked |
| Extra-Virgin Olive Oil 🫒 | 1 tbsp | For brushing |
| All-Purpose Flour 🌾 | ½ cup | For dredging |
| Barbecue Sauce 🍅 | ½ cup | For finishing |
The beef is everything here. Top round roast stays tender when pounded thin, but sirloin works too if you prefer more marbling. Grab it from the butcher counter—pre-cut steaks are usually too thick. Look for good marbling (little white flecks) for juiciness. I always buy from Costco when doing a big batch, but regular grocery stores carry it too. Pound the beef to 1/4-inch thickness—any thicker and they won't roll properly. Use a meat mallet or rolling pin, but don't overdo it or you'll end up with tough meat.
No smoked paprika? Regular paprika plus a pinch of liquid smoke works in a pinch, but it won't taste quite the same. The brown sugar caramelizes beautifully during grilling, giving that classic barbecue sweetness. Coconut sugar is a great one-to-one substitute if you prefer. For the flour dredge, panko gives extra crunch, but regular all-purpose works fine. The barbecue sauce can be store-bought (I like Sweet Baby Ray's for consistency) or homemade. If you're using homemade, make sure it's not too thin—you want thick, clingy sauce for those final brushes.
Keep the pounded beef wrapped in plastic and refrigerated for up to 24 hours before grilling. The seasoning paste can be made a day ahead and stored in an airtight container for 3 days. Once grilled, these reheat beautifully—just warm in a 350°F oven for 10 minutes with a splash of water to keep them moist. I always make extra because they disappear fast at parties. Store leftovers in the fridge for 3 days or freeze for 2 months. The crust gets crispier the next day, so leftovers are even better!
Why You'll Love This Recipe
- I’ll be real: this works for everything. Pack a batch for lunch the next day, serve it at a picnic with crusty bread, or even toss it in tacos when you’re craving something different. The same simple prep adapts to whatever you need.
- One-Pan Magic: Honestly, I swear by this recipe because it’s that easy—just slice the beef, toss it with onions and spices, and pop it in the oven. No chopping mountains of veggies, no fussing with marinades, just hands-off cooking while you sip your coffee or scroll through your phone.
- Smoky Depth in Minutes: Between us, that smoked paprika and cumin combo transforms tough top round into something ridiculously flavorful. The onions caramelize just enough to add sweetness, and the garlic? It melts into every bite like a secret weapon.
- Game for Any Meal: I’ll be real: this works for everything. Pack a batch for lunch the next day, serve it at a picnic with crusty bread, or even toss it in tacos when you’re craving something different. The same simple prep adapts to whatever you need.
Step-by-step instructions for smoky-spiced beef cups
Here's how to transform simple beef into irresistible handheld bites with a perfect charred crust.
🔪 Step 1: Pound and Season the Beef
Place the 1.5 lb top round roast beef between two sheets of plastic wrap. Using a meat mallet, pound it evenly to ¼-inch thickness—this ensures quick cooking and even seasoning. I like to work in sections, pressing firmly but not aggressively to avoid tearing the meat.
In a small bowl, whisk together 1.5 tbsp smoked paprika, 1 tsp toasted ground cumin, 1 tbsp brown sugar, 1.5 tsp kosher salt, and 0.5 tsp freshly cracked black pepper. Rub this mixture all over the pounded beef, pressing it into every surface. Let it sit at room temperature for 15 minutes—this helps the seasoning cling and the meat cook more evenly.
🍳 Step 2: Sear and Layer the Beef Cups
Heat a large skillet over medium-high heat until hot. Add 1 tbsp extra-virgin olive oil and swirl to coat. Working in batches to avoid crowding, add the seasoned beef and cook for 2-3 minutes per side until golden brown with a crust forming. You want it seared but still slightly pink inside—it'll finish cooking later.
While the beef sears, thinly slice the whole yellow onion lengthwise into strips. Transfer the cooked beef to a plate and cover loosely with foil. In the same skillet, add the onion slices and cook for 3-4 minutes until softened but still holding their shape. Remove from heat and set aside.
👨🍳 Step 3: Assemble and Dredge the Cups
Place each seared beef piece between two onion slices, forming a small "cup" shape. I like to arrange them with the onion strips overlapping slightly at the edges—this creates a sturdy structure that holds together when you pick them up. Arrange all the cups on a plate and cover with foil to keep warm.
Transfer the 0.5 cup all-purpose flour to a shallow dish. Lightly dredge each assembled beef cup in the flour, tapping off any excess. This step creates a crispy, golden crust that adds texture contrast to the tender beef. Work quickly so the flour doesn't get soggy from any residual moisture.
🔥 Step 4: Char and Finish with Barbecue Sauce
Return the skillet to medium-high heat and add the dredged beef cups. Cook for 2-3 minutes per side until the flour coating turns deep golden brown and crispy. You'll smell that delicious toasted flour aroma—this is your cue that they're developing that perfect charred crust.
Reduce heat to medium-low and pour the 0.5 cup barbecue sauce evenly over the beef cups. Let them simmer for 1-2 minutes until the sauce thickens slightly and coats the beef. The sauce should glaze the beef but not pool at the bottom—this ensures each bite has that perfect smoky-sweet balance.
Pro Tips For Making Barbecue Beef Cups
- Sear the Beef First: Top round can dry out fast, so hit it with high heat for 2-3 minutes per side before adding any liquid. That crust locks in flavor—no one wants bland beef cups.
- Grind Your Own Spices: Store-bought cumin and paprika lose punch over time. Toast the cumin seeds in a dry pan for 30 seconds until fragrant, then grind them fresh—your beef cups will taste like they came from a smoker.
- Don’t Overcrowd the Pan: If you’re making these in batches, resist the urge to pile them high. Tight spaces steam the beef instead of browning it. Work in a single layer, even if it takes two rounds.
- Deglaze with Beer: After browning the onions and beef, splash in ¼ cup of beer (or broth) instead of water. The alcohol burns off, leaving behind a deeper, slightly sweet base that makes the paprika sing. (Yes, even if you’re not a beer drinker.)
Regional styles of this dish
Texas-Style Smoky Bites
In Texas, beef cups often take on a bold, smoky character with a focus on char and tenderness. I love using chopped hickory chips in my smoker for that classic Texas BBQ flavor—just add them to your grill or smoker for 20-30 minutes before cooking the beef cups. The key here is low-and-slow heat at 225°F for 10-12 minutes total, ensuring the beef stays juicy while developing that perfect crust. Serve with white bread for dipping in extra sauce—it’s a Texas cookout staple. 🔥
Carolina Crispy Cups
Carolina-style beef cups lean into a tangy, vinegar-based sauce and a crispy exterior. I swap the flour dredge for crushed cornflakes mixed with 1 tbsp paprika and ½ tsp cayenne for extra crunch and heat. After searing, brush with a vinegar-based Carolina-style sauce (like Sweet Baby Ray's Carolina Gold) and finish under the broiler for 1-2 minutes to set the sauce. The result? A crunchy, saucy bite that’s all about contrast. 🌶️
Kansas City Sweet Heat
Kansas City is all about sweet, smoky, and spicy—perfect for beef cups! I boost the rub with 1 tbsp brown sugar and ½ tsp cayenne, then grill the cups over indirect heat with applewood chips for a fruity-smoky aroma. After assembling, I brush with a thick, sticky Kansas City-style sauce (like St. Louis Style) and broil for 30 seconds to caramelize the sugar. The sauce pools slightly at the bottom, creating a sticky, saucy bite that’s pure comfort food. 🍯
Coastal California Twist
For a lighter, herb-forward take, I infuse the beef with 1 tbsp fresh rosemary and 1 tsp dried oregano in the rub, then grill over orange wood for a bright, citrusy smoke. After dredging in flour, I finish with a drizzle of chili oil (mix 2 tbsp olive oil with 1 tsp red pepper flakes and ½ tsp smoked paprika) for a fiery, aromatic kick. Serve with avocado slices and lime wedges for a fresh, coastal vibe. 🌿
Southern Fried Crunch
In the Deep South, beef cups often get a double-fried finish for extra crispiness. After dredging in flour, I fry the assembled cups in hot oil (350°F) for 1-2 minutes per side until golden, then transfer to a paper towel-lined plate. While still hot, I brush with honey mustard (mix 2 tbsp Dijon mustard with 1 tbsp honey) for a sweet-tangy glaze. The result? A shatteringly crisp exterior with a juicy, tender center. 🍯
Nutrition facts
Frequently asked questions
Can I use a different cut of beef for these cups?
While top round roast works best, sirloin or flank steak are great alternatives for extra marbling. Just be sure to pound it to ¼-inch thickness—thicker cuts won't roll properly. Avoid lean cuts like eye of round, as they can dry out during cooking.
How do I keep the beef cups from falling apart? The onion strips are key—they act as a natural binder.
Can I make these ahead of time?
Yes! Assemble the cups (without dredging) up to 24 hours ahead and refrigerate. Dredge and cook just before serving for the crispest crust. For leftovers, reheat in a 350°F oven for 10 minutes with a splash of water—this keeps them moist. The crust gets even better the next day!
What's the best way to grill these if I don't have a stovetop?
Use your grill's medium-high heat zone for searing, then move to indirect heat to finish. Place the dredged cups on the grill and cover for 2-3 minutes per side until golden. For extra smokiness, add hickory or applewood chips to the coals 10 minutes before cooking. The grill's heat will create that perfect charred crust.
Why is my crust not crispy?
Undercooked flour is the usual culprit. Make sure your skillet is smoking hot before adding the dredged cups, and cook them until deep golden brown (not just light tan). Also, don't overcrowd the pan—work in batches if needed. For extra crunch, try panko breadcrumbs instead of all-purpose flour in the dredge.