
Main Courses
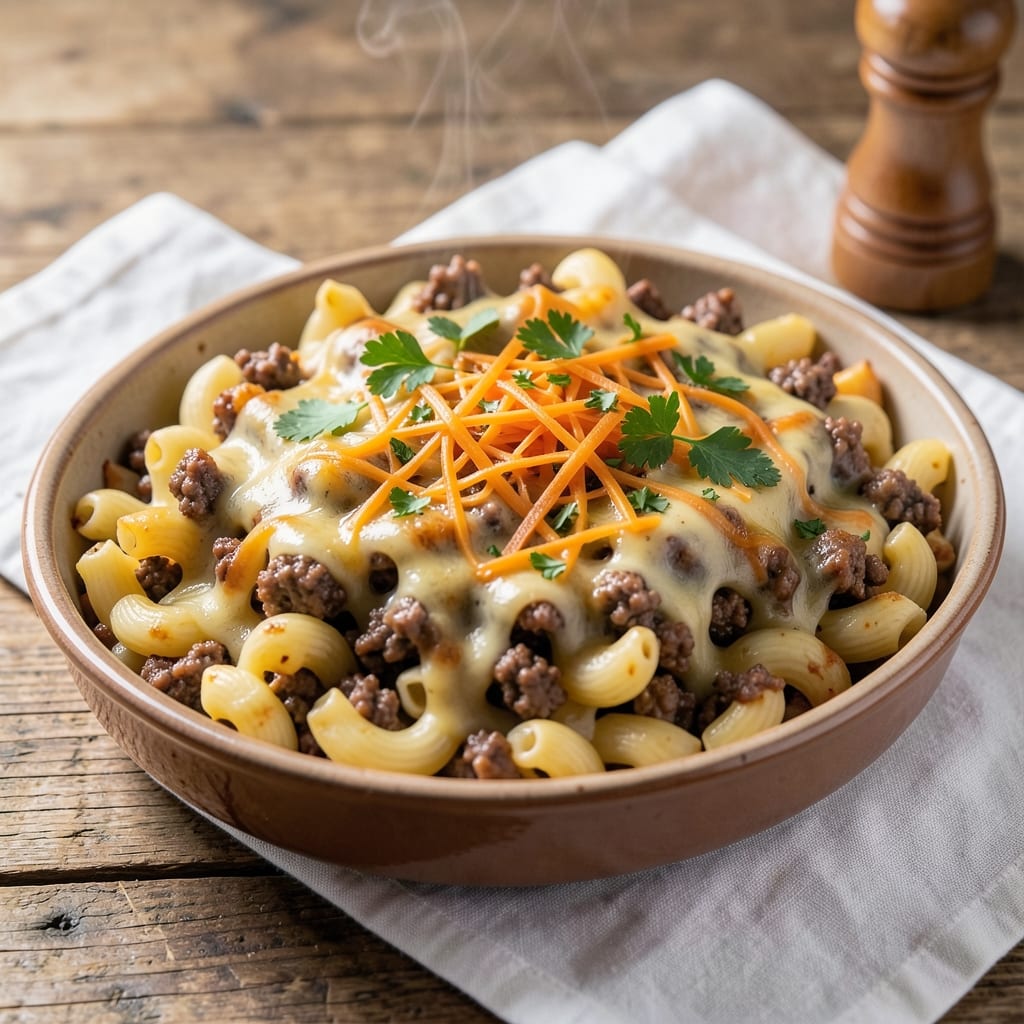
This baked macaroni with ground beef recipe delivers the ultimate comfort food experience in a single pot, combining rich, savory beef with creamy, melty cheese. The secret lies in browning the ground beef first to develop deep, meaty flavors before combining it with al dente pasta and a velvety cheese sauce. Every bite delivers that perfect balance of tender beef, chewy pasta, and crispy, golden cheese topping.
What sets this recipe apart is the one-pot convenience, which means minimal cleanup and maximum flavor. You'll start by cooking the ground beef until fully browned, then add elbow macaroni and broth to create a flavorful base. The cheese sauce comes together quickly, and the final baking step transforms everything into a bubbling, golden masterpiece. This method ensures even cooking and a sauce that's impossibly creamy.
The result is a hearty, satisfying dish that's perfect for family dinners or meal prep. The beef stays juicy and flavorful, the pasta achieves that ideal al dente texture, and the cheese topping becomes irresistibly crispy. This recipe is designed to be foolproof, with clear instructions that guide you through each step to achieve restaurant-quality results at home.
Serve this baked macaroni with a simple side salad or steamed vegetables for a balanced meal. The rich, cheesy goodness makes it a standout dish that will become a regular in your rotation. Let's get started on creating this comforting classic in your kitchen.
Ingredients for baked macaroni with ground beef
One-pot magic with just 13 ingredients—rich beef, chewy pasta, and that perfect crispy cheese topping.
| Ingredient | Amount | Notes |
|---|---|---|
| Ground Beef 🥩 | 1 ½ lb | 80% lean for best flavor |
| Elbow Macaroni 🍝 | 1 ½ cups | Uncooked, dry pasta |
| Beef Broth 💧 | 2 cups | Low-sodium preferred |
| Heavy Cream 🥛 | 1 cup | Full-fat for creaminess |
| Sharp Cheddar Cheese 🧀 | 2 cups | Shredded, block preferred |
| Milk 🥛 | ½ cup | Whole milk for richness |
| Butter 🧈 | 3 tbsp | Unsalted, cubed |
| All-Purpose Flour 🌾 | 2 tbsp | For thickening sauce |
| Yellow Onion 🧅 | 1 whole | Diced, about 1 cup |
| Garlic Cloves 🧄 | 3 cloves | Minced, fresh preferred |
| Salt 🧂 | 1 ½ tsp | Kosher or sea salt |
| Ground Black Pepper 🌶️ | ½ tsp | Freshly ground preferred |
| Dried Parsley 🌿 | 1 tbsp | For garnish, optional |
The beef is non-negotiable here—80% lean ground beef gives you that perfect balance of juiciness and flavor. Costco or Walmart usually have it pre-packaged in 1.5 lb bags, which is exactly what you need. Avoid anything with fillers or preservatives. For the cheese, Kraft or Cabot shredded cheddar works in a pinch, but block cheese grated fresh melts way better. Pro tip: Toast your flour in a dry pan for 30 seconds before adding to the sauce—eliminates that raw flour taste and adds depth. The elbow macaroni should be medium or small size—it cooks faster and doesn't get mushy.
No beef broth? Chicken broth with 1 tsp soy sauce works in a bind, but beef is ideal. Heavy cream too expensive? Half-and-half or whole milk will work, though the sauce won't be quite as rich. Short on cheddar? Monterey Jack or Colby blends beautifully. The onion and garlic are flavor anchors—don't skip browning them with the beef. Pre-minced garlic from the jar is fine, but fresh has way more punch. For the pasta, if you can't find elbow macaroni, penne or rotini will work, but they might not fit as neatly in the baking dish. And yes, you can use whole wheat pasta, but it'll need an extra 2 minutes of baking time.
This reheats like a dream—5 minutes at 350°F with a splash of milk makes it just as good as fresh. Keeps in the fridge for 4 days (though it won't last that long) and freezes beautifully for 3 months. I always make a double batch—one for dinner, one for lunches. Portion into individual containers before freezing so you can grab and reheat just what you need. The cheese topping gets extra crispy if you broil it for the last 2 minutes, but watch it like a hawk—it burns fast. Leftovers are even better the next day, honestly.
Why You'll Love This Recipe
- One-Pot Magic: I swear by this recipe because it’s literally one bowl, one pan, and done. No measuring cups flying everywhere—just dump the cooked macaroni and beef into the same dish, mix in the broth and cream, and bake. The cheese melts into a golden blanket while you’re still wiping your hands.
- Rich, Cheesy Hug: Between us, that heavy cream and sharp cheddar combo is next-level comfort. The beef broth deepens the flavor without tasting like soup, and the creamy sauce clings to every noodle like it’s been waiting for you. Honestly, I’ve made this for guests who swore they hated mac and cheese—and they came back for seconds.
- Weeknight Workhorse: This feeds my family of four (or turns into leftovers for three more meals) without a second thought. Double the recipe for game day or potlucks, or make half for a lazy Tuesday when you’re not up for fussing. The baked texture holds up better than stovetop versions, so it’s my go-to for busy nights.
Step-by-step instructions for baked macaroni with ground beef
This one-pot wonder delivers cheesy, meaty perfection with minimal cleanup—every bite is pure comfort.
Brown the Ground Beef and Sauté the Aromatics
Heat a large Dutch oven or deep skillet over medium-high heat. Add the 1.5 lb ground beef and cook, breaking it apart with a wooden spoon, until it's no longer pink and the edges are deep brown—about 6-8 minutes. This browning creates deep flavor, so don't rush it.
Drain all but 2 tablespoons of the fat from the skillet (you'll have more than enough—this is your one-pot magic). Add the 1 whole yellow onion and 3 cloves garlic cloves (minced), cooking for 3-4 minutes until the onions are translucent and the garlic is fragrant. You'll smell that rich, savory aroma building—this is where the foundation of your dish begins.
Build the Sauce Base with Flour and Milk
Lower the heat to medium and sprinkle the 2 tablespoons all-purpose flour over the beef mixture. Stir vigorously for 1-2 minutes until the flour is fully incorporated and the mixture looks slightly thickened. This creates a roux that will help thicken your sauce beautifully.
Pour in the 0.5 cup milk and stir constantly for another 2 minutes until smooth. The mixture should look like a creamy paste—this is your sauce starter. If it's too thick, add a splash of beef broth to loosen it slightly. Here's the thing—this step prevents a watery final dish, so don't skip it.
Add Broth, Cream, and Pasta for Perfect Texture
Pour in the 2 cups beef broth and 1 cup heavy cream, stirring well to combine. Bring the mixture to a gentle simmer, then add the 1.5 cups elbow macaroni and stir to coat the pasta in the rich sauce. Let it cook for 8-10 minutes, stirring occasionally, until the pasta is tender but still slightly firm—you want it to finish cooking in the oven.
This is where the one-pot magic happens. The pasta absorbs the flavorful sauce while the beef and aromatics continue to cook gently. If the mixture looks too thick before the pasta is done, add a splash more broth to keep it saucy. The goal is a creamy, cheesy consistency that clings to every noodle.
Finish with Cheese and Bake to Melty Perfection
Sprinkle the 2 cups sharp cheddar cheese evenly over the pasta mixture. Stir gently just until the cheese begins to melt—about 1 minute. Then, season with the 1.5 teaspoons salt and 0.5 teaspoon ground black pepper, stirring well to distribute everything evenly. The cheese should look glossy and slightly melted, but not fully combined yet.
Transfer the Dutch oven to a 375°F preheated oven and bake uncovered for 15-20 minutes. You're looking for a golden, bubbly top with the cheese fully melted and slightly crisped in spots. The pasta should be tender and the sauce thick and creamy. If the top browns too quickly, tent loosely with foil for the last 5 minutes to prevent over-browning.
Garnish and Serve with Fresh Herbs
Remove the dish from the oven and let it rest for 5 minutes before serving. This resting time lets the cheese set slightly and the flavors meld together. Sprinkle the 1 tablespoon dried parsley over the top for a pop of color and freshness—it's optional but adds a nice finishing touch.
Serve immediately while the cheese is still melty and the pasta is piping hot. The combination of tender pasta, rich beef, and gooey cheese creates a dish that's hearty enough for a weeknight dinner but special enough for company. Each bite delivers that perfect balance of cheesy crunch and melty magic—exactly what makes this one-pot wonder so irresistible.
Pro Tips For Making Baked Macaroni With Ground Beef
- CRACK THE PASTA FIRST: Dry pasta straight from the fridge? Bad idea. Toss the elbow macaroni in a bowl with a teaspoon of oil and salt—this prevents sticking and helps it absorb flavors better. I learned this the hard way after scraping a pot full of glued-together noodles off the bottom.
- DRAIN AND SHOCK THE NOODLES: Don’t just dump drained pasta into the baking dish—run it under cold water for 10 seconds first. This stops cooking and keeps the texture firm instead of mushy when it bakes. (Yes, even if you’re impatient like me.)
- BROWN THE BEEF WELL: Skip the quick sear and let the ground beef cook until it’s actually brown, not just pink. Break it apart with a spoon while it cooks—this ensures even seasoning and deeper flavor. My grandmother swore by this, and she was right: undercooked beef makes the whole dish taste bland.
- LAYER CHEESE LIKE A PRO: Don’t just sprinkle shredded cheddar on top—mix half of it into the sauce first, then layer the rest in between pasta and sauce in the baking dish. This guarantees melty, gooey pockets instead of a sad, dry crust. (And yes, resist the urge to skip this step.)
Make-ahead tips for baked macaroni with ground beef
Prep Ahead for Easier Cooking
I always start by prepping the beef mixture the night before. Brown the 1.5 lb ground beef with onions and garlic, then drain most of the fat. Store this flavorful base in an airtight container in the fridge. The next day, just add the flour, milk, broth, and pasta—it cuts your cooking time by 20 minutes! The flavors actually deepen overnight, making it even more delicious. 💪
Freeze for Future Meals
This dish freezes beautifully for up to 3 months. After baking, let it cool completely, then portion into quart-sized freezer bags or airtight containers. When ready to eat, thaw overnight in the fridge, then reheat in the oven at 350°F for 15-20 minutes with a splash of milk to restore creaminess. I make double batches because it reheats better than most casseroles!
Cheese Prep Shortcut
Save time by grating your own cheese ahead. Use a box grater for 2 cups sharp cheddar, then store it in a sealed container in the fridge for up to 5 days. Pre-grated cheese works too, but it loses moisture faster. For extra flavor, mix in ¼ cup grated Parmesan with the cheddar before baking—it adds a nice umami depth. ✨
Pasta Pre-Cooking Hack
For even better texture, partially cook the pasta before assembling. Boil 1.5 cups elbow macaroni for 4 minutes (until al dente), drain, and rinse with cold water. Then mix it with the beef sauce before baking. This ensures perfectly cooked pasta every time and prevents a mushy final dish. Trust me, this small step makes a big difference!
Make-Ahead Baking Tip
If you're baking ahead, cover the assembled casserole with foil and refrigerate for up to 24 hours before baking. When ready, bake at 375°F for 25-30 minutes (5 minutes longer than fresh). The cold start helps create that perfect crispy cheese crust. I love making this for Sunday dinners—just bake and serve while everything else is prepped! 🍽️
Nutrition facts
Frequently asked questions
Can I use ground turkey or chicken instead of beef?
Ground turkey or chicken works perfectly, but adjust the cooking time slightly—these leaner meats cook faster. Use 1 lb instead of 1.5 lb for similar portion sizes, and add 1 extra tablespoon flour to help thicken the sauce. For extra flavor, season the meat with 1 tsp Italian seasoning or smoked paprika before browning.
Why did my cheese sauce turn out watery?
Watery sauce usually means the roux wasn't cooked long enough or too much liquid was added. Always cook the flour and milk mixture for 2-3 minutes until thickened before adding broth. If it's still too thin after baking, stir in 1 tbsp cornstarch mixed with 1 tbsp cold water and bake 5 more minutes. The key is patience with that roux step!
Can I make this dish in a slow cooker?
Yes! Brown the beef first, then transfer everything to a 5-6 quart slow cooker on LOW for 3-4 hours or HIGH for 1.5-2 hours. Stir in the cheese at the end and cover with a lid (leave slightly ajar) until melted. The texture will be creamier but less crispy on top. For extra browning, broil for 2-3 minutes at the very end.
How do I prevent the pasta from getting mushy?
Undercooking the pasta slightly before baking is the secret! Cook it for 1 minute less than package instructions, then finish in the oven. Also, use medium elbow macaroni (not small) as it holds up better. If using whole wheat pasta, add 2 extra minutes to the baking time. Never overfill the baking dish—this gives the sauce room to circulate properly.
What's the best way to reheat leftovers?
Reheat covered in the oven at 350°F for 15-20 minutes with 2 tbsp milk or broth sprinkled on top to restore creaminess. Microwave reheating works too (2 minutes on high, stirring halfway), but it won't get that crispy cheese top. For extra flavor, add 1 tbsp butter while reheating. Leftovers actually taste better the next day!