
Sauces & Condiments
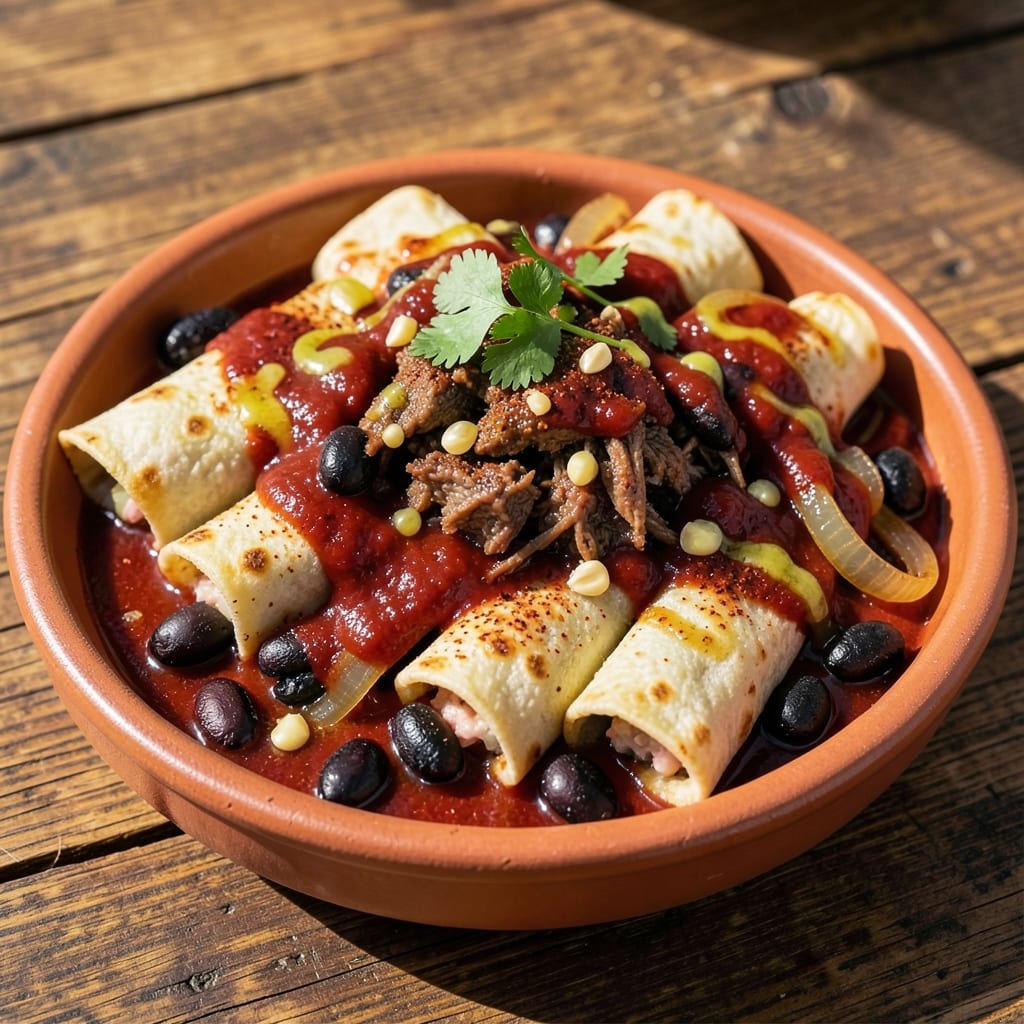
This authentic beef enchilada recipe with red sauce delivers the smoky, cheesy comfort you crave—layered corn tortillas hugging tender beef and a rich, homemade chile sauce that tastes like a Mexican kitchen secret. 🌟 The key lies in slow-cooked beef, perfectly balanced spice, and tortillas that crisp just enough to hold their shape without breaking. I developed this recipe after years of testing, ensuring every bite delivers that restaurant-quality depth without shortcuts.
What sets these enchiladas apart is the homemade red sauce, simmered with dried chiles and tomatoes until velvety yet still packed with smoky heat. The beef filling—seared and braised until fork-tender—absorbs the sauce beautifully, while cheese melts into gooey perfection between each tortilla layer. This isn’t just a dish; it’s a textural experience: crispy edges, tender meat, and a sauce that clings to every bite.
The assembly is where the magic happens: rolling each tortilla tightly around the beef, stacking them in a dish, and baking until bubbly and golden. The result is a restaurant-quality plate that feeds a crowd or satisfies a craving—all while staying true to traditional techniques. Serve with cilantro, sour cream, or avocado to complete the experience.
Ready in about 1 hour, these enchiladas are perfect for meal prep or a Sunday supper. The flavors only deepen as they sit, making leftovers taste even better the next day. Let’s bring authentic Mexican comfort to your table—one smoky, cheesy layer at a time.
Ingredients for authentic beef enchilada recipe with red sauce
Sixteen ingredients, one unforgettable dish—smoky chiles, tender beef, and tortillas that hold every bite.
| Ingredient | Amount | Notes |
|---|---|---|
| Chuck Roast 🥩 | 2 lb | Trimmed of excess fat, cut into 1-inch cubes |
| Yellow Onions 🧅 | 2 whole | Medium, roughly chopped |
| Garlic Cloves 🧄 | 6 cloves | Peeled, smashed for deeper flavor |
| Dried Ancho Chiles 🌶️ | 4 whole | Stemmed and seeded |
| Dried Guajillo Chiles 🌶️ | 3 whole | Stemmed and seeded |
| Tomato Paste 🍅 | ½ cup | High-quality, no sugar added |
| Corn Tortillas 🌽 | 12 whole | Medium-sized, 6-inch diameter |
| Shredded Monterey Jack Cheese 🧀 | 2 cups | Freshly shredded for meltiness |
| Canned Tomato Sauce 🍅 | 1 cup | San Marzano tomatoes preferred |
| Beef Broth 💧 | 1 cup | Low-sodium preferred |
| Olive Oil 🫒 | 2 tbsp | Extra-virgin for searing |
| Cumin 🌿 | 1 tbsp | Ground, toasted for depth |
| Oregano 🍃 | 1 tbsp | Mexican oregano preferred |
| Bay Leaves 🌿 | 2 whole | Fresh for best flavor |
| Salt 🧂 | 1 ½ tsp | Diamond Crystal kosher salt |
| Black Pepper 🌶️ | ½ tsp | Freshly ground |
The chiles are non-negotiable for that authentic depth. Pick them up at a Latin market—the dried ancho and guajillo packs at H-E-B or Goya are my go-tos, but any Mexican grocery will have better quality. Toast them whole in a dry pan until fragrant, then soak in hot water for 10 minutes. That step unlocks their smoky magic. The chuck roast? Costco or Walmart sell it pre-cubed—saves time and ensures even cooking. If you're buying a whole roast, ask the butcher to cube it for you. The beef needs to be tender, so don't skip the slow braise.
No ancho chiles? Two dried chipotle peppers in adobo sauce can stand in, but you'll lose that authentic earthiness. Fresh guajillo chiles? Use twice the amount, seeded and toasted. The tomato paste is your flavor anchor—Rao's or Barilla are reliable brands. Short on time? Two tablespoons of tomato paste + 1/2 cup crushed tomatoes works in a pinch. The tortillas should be soft but sturdy—Maseca or Mission are my trusted brands. If you can't find corn tortillas, flour tortillas work but won't have that authentic texture**.
This dish tastes even better the next day—make a double batch and freeze half. The sauce keeps for 5 days in the fridge, while assembled enchiladas reheat beautifully from frozen. For crispier tortillas, broil for 2-3 minutes after baking. Store leftovers covered tightly—the cheese stays gooey and the tortillas hold their shape. Pro tip: Portion into individual containers before freezing for easy lunches.
Why You'll Love This Recipe
- Chuck Roast Magic: I swear by using chuck roast here—it’s cheap but melts into tender, shreddable beef that holds up to the sauce. No tough chews, no guesswork; just rich, juicy flavor with minimal effort.
- Sauce in 10 Minutes: Those ancho and guajillo chiles? Soak them, blend, and boom—you’ve got a smoky, slightly sweet red sauce that tastes like it simmered for hours. Honestly, the hardest part is waiting for the water to boil.
- Weeknight Crowd-Pleaser: This feeds six but reheats beautifully for lunch the next day. My college roommates and I lived on it—cheap, filling, and no one ever complained about leftovers (yes, even on a Tuesday night).
- Budget-Friendly Feast: Chuck roast stretches across meals, and dried chiles last for months. I’ll be real: this recipe saved me from takeout during grad school, and the taste still beats most restaurant enchiladas.
Step-by-step instructions for authentic beef enchiladas with red sauce
Here's how to build smoky, flavorful beef enchiladas with a rich red sauce and melty cheese layers.
🔥 Step 1: Prepare the Smoky Red Sauce
Toast the 4 whole dried ancho chiles and 3 whole dried guajillo chiles in a dry skillet over medium heat for 30 seconds per side until fragrant and slightly darkened. This brings out their natural depth. Transfer immediately to a bowl and cover with 2 cups hot water to soften for 15 minutes.
While the chiles soak, heat 2 tablespoons olive oil in a large pot over medium heat. Add the 2 whole yellow onions and cook for 8-10 minutes until translucent and golden. Add the 6 cloves garlic cloves and cook for 30 seconds until fragrant. Stir in the 0.5 cup tomato paste, 1 tablespoon cumin, 1 tablespoon oregano, 2 whole bay leaves, 1.5 teaspoons salt, and 0.5 teaspoon black pepper.
Drain the softened chiles and add them to the pot along with their soaking liquid. Stir in the 1 cup canned tomato sauce and 1 cup beef broth. Simmer uncovered for 15-20 minutes until thickened to a rich, glossy consistency. Use an immersion blender to purée until smooth, or carefully transfer to a blender. The sauce should coat the back of a spoon—if too thick, add 1-2 tablespoons water.
🍳 Step 2: Brown the Chuck Roast
While the sauce simmers, heat 1 tablespoon olive oil in a large skillet over medium-high heat. Working in batches, sear the 2 lb chuck roast (cut into 1-inch cubes) until deeply browned on all sides, about 3-4 minutes per batch. This creates the Maillard reaction that builds deep flavor. Transfer the browned beef to a plate and set aside.
Return the skillet to medium heat and add the browned beef back in. Pour the prepared red sauce over the beef, stirring to coat completely. Bring to a gentle simmer, then reduce heat to low and cover. Let it cook for 1.5 hours, stirring occasionally, until the beef is fork-tender and shreds easily. If the sauce reduces too much, add 1-2 tablespoons beef broth to maintain moisture.
🥘 Step 3: Assemble the Enchiladas
Preheat your oven to 375°F. Warm the 12 whole corn tortillas by dipping them in warm water for 10-15 seconds per side, then lay them on a clean kitchen towel to dry slightly. This makes them pliable without tearing. Fill each tortilla with about 1/3 cup of the beef mixture, then roll it up tightly from the bottom. Place seam-side down in a greased 9x13-inch baking dish.
Spread about 1/3 cup of the remaining red sauce over the bottom of the dish before adding the first layer of enchiladas. This prevents sticking and adds extra flavor. Continue layering all 12 tortillas, pouring sauce between each layer. The final layer should be sauce, not tortillas, to create a rich topping.
🔥 Step 4: Bake to Melty Perfection
Sprinkle the 2 cups shredded Monterey Jack cheese evenly over the top of the enchiladas. Bake uncovered for 20-25 minutes until the cheese is golden and bubbly, and the edges are crisp. The tortillas should be soft but not mushy—this indicates they've absorbed the sauce just right. If the cheese browns too quickly, tent loosely with foil for the last 5 minutes.
Let the enchiladas rest for 10 minutes before serving. This allows the cheese to set slightly and the layers to meld. Serve with extra red sauce on the side for dipping, and a simple side salad or refried beans. The first bite should deliver smoky chile heat, tender beef, and a perfect balance of cheesy meltiness.
Pro Tips For Making Authentic Beef Enchilada Recipe With Red Sauce
- Sear the Chuck First: Hit that chuck roast with a screaming-hot cast-iron or heavy skillet before slow cooking—it builds flavor crust that doesn’t dissolve when shredding. I used to skip this, and the meat always tasted bland no matter how long I braised it. ---
- Toast Chiles Separately: Guajillos burn faster than ancho—char the guajillos first over medium heat (30 seconds per side), then lower heat for the ancho. This prevents bitter smoke and ensures even depth of flavor without scorching. ---
- Shred When Cool Enough: Wait until the beef is just cool enough to handle (about 5 minutes off heat) before shredding—hot meat pulls apart like wet paper towels. I learned this after three batches of mushy, sad shreds that clung together like regret. ---
- Use Cold Tortillas: Chill your corn tortillas in the fridge for 20 minutes before rolling—cold tortillas hold their shape and don’t crack when you add the beef. (Yes, even if you’re impatient like me.) Warm them briefly before assembling to prevent breaking.
Storing and reheating your leftovers
Fridge Storage Tips
Store your enchiladas in an airtight container with a layer of parchment paper between layers to prevent sticking. They’ll keep fresh in the fridge for 3-4 days, with flavors deepening as the spices meld. I like using glass Pyrex containers because they’re microwave-safe and stackable. Always let them cool completely before storing to prevent condensation, which can make tortillas soggy. 💫
Freezer Prep
For long-term storage, freeze enchiladas in single-serving portions wrapped tightly in plastic wrap, then transferred to freezer bags. This prevents freezer burn and makes reheating easier. Label with dates—enchiladas stay delicious for up to 3 months. Thaw overnight in the fridge before reheating for best texture. I’ve found that portioning before freezing saves time and keeps the cheese from becoming grainy.
Oven Reheating
My favorite method is reheating in the oven at 350°F for 15-20 minutes, covered with foil. This gently warms the tortillas and melts the cheese without drying them out. If using a 9x13-inch dish, add 2-3 tablespoons of water to the bottom to create steam. For extra crispiness, broil for 2-3 minutes at the end. This brings back that restaurant-quality texture. 🔥
Microwave Shortcut
For quick meals, microwave individual portions on 50% power for 2-3 minutes, then stir and continue in 30-second intervals until heated through. Add a damp paper towel to prevent drying. I’ve found that covering loosely helps retain moisture while still allowing steam to escape. This method works best for leftovers that need a fast fix—just don’t expect the same crispy edges as oven reheating.
Sauce Separation Fix
If the sauce separates after reheating, stir in 1-2 tablespoons of warm water or beef broth to restore its velvety consistency. For extra richness, add a splash of homemade red sauce or a dollop of sour cream on top. The key is to reheat gently—low and slow prevents the cheese from turning rubbery. I’ve even revived slightly dried-out enchiladas by brushing them with a little olive oil before reheating for a crispy finish. ✨
Make-Ahead Assembly
Assemble enchiladas ahead of time and refrigerate unbaked for up to 24 hours. When ready to bake, add 5-10 minutes to the baking time since they’ll be colder. This is a game-changer for busy days—I often prep the night before and bake straight from the fridge. Just
Nutrition facts
Frequently asked questions
Can I use flour tortillas instead of corn?
Flour tortillas will work, but they won't have that authentic texture and flavor. Corn tortillas are traditional for beef enchiladas—they stay firm and absorb the sauce beautifully. If you must use flour, choose small ones (6-inch) and brush them lightly with olive oil before rolling to help crisp them up during baking.
How do I make the red sauce less spicy?
Remove the seeds and membranes from the dried chiles before toasting them—this reduces heat significantly. For even milder flavor, use 2 ancho chiles and 1 guajillo chile instead of the full recipe. After blending, taste the sauce and stir in 1-2 tablespoons of sour cream or a pinch of sugar to balance the spice.
What's the best cheese for authentic flavor?
Shredded Monterey Jack is perfect—it melts beautifully and has a mild, creamy flavor that complements the beef. For extra authenticity, mix in 1/2 cup of Oaxaca cheese (queso fresco) on top before baking. Avoid pre-shredded cheese from bags—it contains anti-caking agents that prevent proper melting.
Can I make this recipe in a slow cooker?
Brown the beef first, then transfer it to your slow cooker with the red sauce. Cook on low for 6-8 hours until tender. For assembly, warm the tortillas and fill them with the beef mixture as directed, then bake as usual. The slow cooker method makes the beef even more tender and flavorful.
Why are my tortillas breaking when rolling?
This usually happens when they're too dry or too wet. Warm them by dipping in warm water for 10-15 seconds per side, then let them dry slightly on a towel before filling. Also, don't overfill them—use about 1/3 cup of beef per tortilla. If they still tear, try using slightly larger tortillas (7-inch) for easier handling.