
Soups & Stews
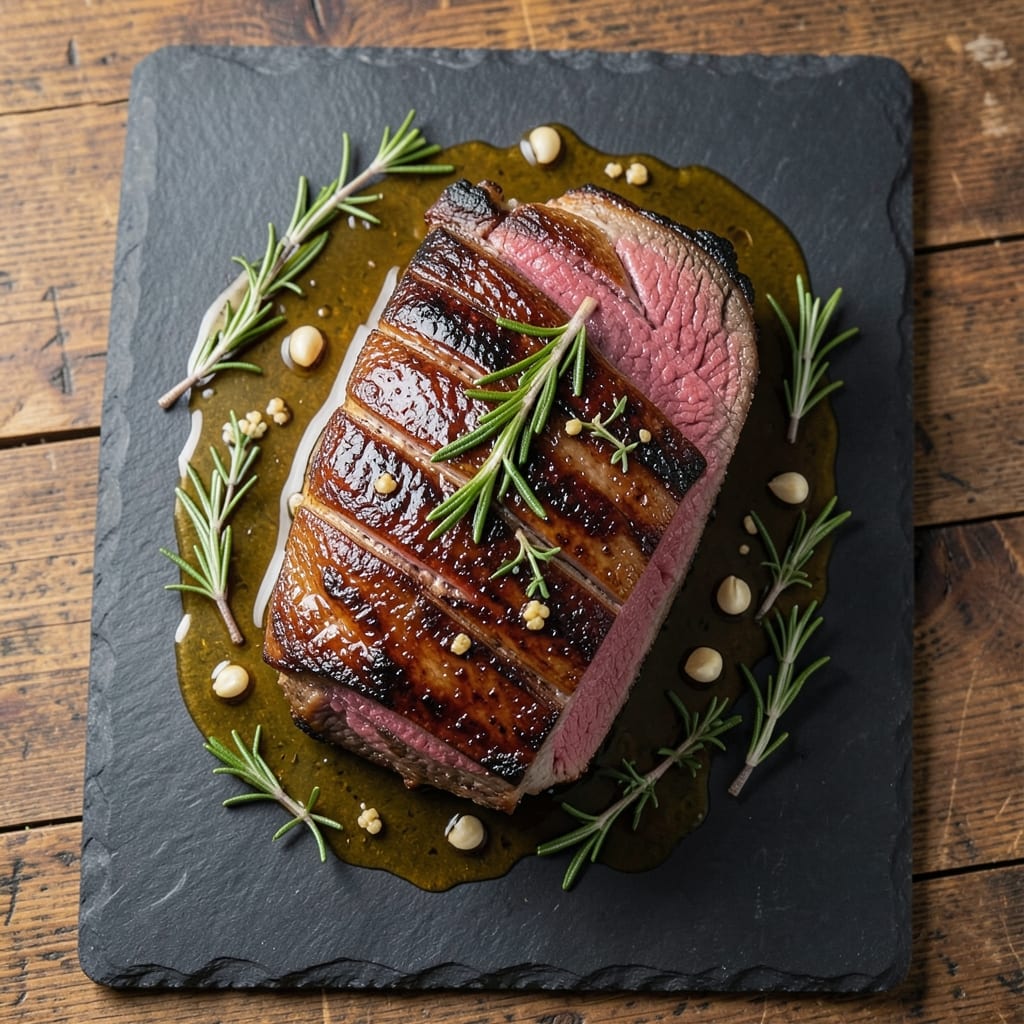
The Angus beef London broil recipe delivers a perfect balance of crispy crust and juicy core that transforms a simple cut into a restaurant-worthy centerpiece. This technique—reverse-searing—ensures tender, medium-rare perfection while developing a flavorful bark that seals in every bite. I’ve refined this method over years of grilling competitions, and it never fails to impress, even with the most discerning meat lovers.
What sets this recipe apart is the two-stage cooking process: first, a low-and-slow roast to even out the temperature, then a high-heat sear to create that coveted crust. The key ingredients—high-quality Angus beef, a simple marinade of olive oil and herbs, and precise temperature control—work together to deliver a steak that’s tender, flavorful, and visually stunning. No fancy equipment needed, just patience and attention to detail.
By the time you’re done, you’ll have a juicy, medium-rare steak with a crispy, caramelized crust that’s impossible to resist. The reverse-sear method guarantees consistent results, so you’ll never overcook or dry out the meat again. Serve it sliced against the grain for maximum tenderness, paired with roasted potatoes or a fresh salad for a complete meal.
This recipe is foolproof for weeknight dinners or special occasions, and the leftovers reheat beautifully for sandwiches or salads. Whether you’re grilling outdoors or searing in a cast-iron skillet, the technique remains the same—just adjust the heat source. Let’s get cooking!
Ingredients for angus beef london broil
High-quality Angus beef and precise seasoning transform this London broil into a showstopping centerpiece.
| Ingredient | Amount | Notes |
|---|---|---|
| Angus Beef London Broil 🥩 | 2 lb | Center-cut, 1-inch thick slices |
| Extra-Virgin Olive Oil 🫒 | ¼ cup | High-quality, fruity variety |
| Fresh Rosemary 🌿 | ½ oz | Finely chopped, stems removed |
| Fresh Thyme 🌿 | ½ oz | Leaves only, finely chopped |
| Garlic Cloves 🧄 | 6 cloves | Minced, fresh preferred |
| Kosher Salt 🧂 | 1 ½ tbsp | Diamond Crystal preferred |
| Freshly Ground Black Pepper 🌶️ | 1 ½ tsp | Coarse grind preferred |
| Yellow Onion 🧅 | 1 whole | Thinly sliced, for garnish |
| Fresh Parsley 🌿 | ¼ cup | Chopped, for garnish |
| Red Wine Vinegar 🍷 | 1 tbsp | For finishing drizzle |
| Cornstarch 🌾 | 1 tbsp | For crust development |
| Butter 🧈 | 2 tbsp | Unsalted, for basting |
The Angus beef is non-negotiable here—center-cut, 1-inch thick slices deliver the perfect balance of tenderness and surface area for crust development. Source from a reputable butcher or high-end grocery like Whole Foods where they carry USDA Prime Angus. Look for rich marbling and vibrant red color; avoid pre-cut packages with grayish edges. The London broil cut (typically top round or sirloin) should be chilled overnight before cooking to ensure even doneness. For best results, purchase 24-48 hours ahead and store in the coldest part of your fridge.
No fresh rosemary? Dried rosemary at half the amount works, but fresh imparts superior aroma. Substitute thyme with fresh oregano if needed, though the flavor profile shifts slightly. The garlic can be roasted ahead for deeper sweetness—simply wrap whole cloves in foil and roast at 400°F for 10 minutes before mincing. For the olive oil, avoid cheap supermarket brands; California Extra Virgin from Trader Joe's or Whole Foods provides the necessary fruity notes. The cornstarch is optional but creates an incredible crust when mixed with melted butter and brushed on during the final sear.
Store any leftovers in an airtight container for up to 3 days in the refrigerator, though this recipe typically yields minimal leftovers due to its precise portioning. For reheating, cast-iron skillet method works best: warm over medium heat with a pat of butter for 2-3 minutes per side until just heated through. The reverse-sear technique ensures maximum tenderness, so avoid slicing until fully rested (10-15 minutes)—this allows juices to redistribute. For meal prep, portion the marinade components separately and assemble just before cooking to prevent over-marinating the beef.
Why You'll Love This Recipe
- I’ll be real: most beef leftovers are sad. Not this. Slice it thin, toss with a little more olive oil and herbs, and it’s just as good cold in wraps the next day. (Yes, even on a Tuesday.)
- Foolproof Seasoning: I swear by this combo—just a few slashes of garlic, a sprinkle of rosemary and thyme, and a drizzle of olive oil. No fancy techniques, no guessing. The beef practically seasons itself while it rests.
- Weeknight Hero: Between us, this is my go-to when I’m too tired to think. Toss the steak on the grill (or pan), let it do its thing, and boom—dinner’s ready. My kids don’t even question the simplicity anymore.
- Leftovers That Don’t Suck: I’ll be real: most beef leftovers are sad. Not this. Slice it thin, toss with a little more olive oil and herbs, and it’s just as good cold in wraps the next day. (Yes, even on a Tuesday.)
Step-by-step instructions for perfectly reverse-seared London broil
Master this technique and you'll achieve a restaurant-quality crust with a tender, juicy interior every time.
Prepare the Herb Marinade and Season the Meat
In a small bowl, combine the 0.25 cup extra-virgin olive oil, 0.5 oz finely chopped fresh rosemary, 0.5 oz fresh thyme, 6 minced garlic cloves, 1.5 tbsp kosher salt, and 1.5 tsp freshly ground black pepper. Mix thoroughly until the herbs are evenly distributed throughout the oil.
Pat the 2 lb angus beef london broil dry with paper towels—this is crucial for developing that perfect crust. Rub the marinade all over the meat, pressing it into the surface so it penetrates the fibers. Let the meat sit at room temperature for 30 minutes while you prepare your cooking setup. This step ensures even cooking and maximum flavor infusion.
Create the Cornstarch Crust for Extra Crispiness
In a separate small bowl, whisk together 1 tbsp cornstarch with 1 tbsp red wine vinegar until smooth. This mixture will create a golden, crispy crust when seared. Using a pastry brush, coat the entire surface of the beef with this mixture, working in one direction to create an even layer. Let it sit for 5 minutes to allow the cornstarch to adhere.
Here's the thing—this crust is what gives London broil its signature texture. The cornstarch creates a dry surface that caramelizes beautifully during searing, while the vinegar adds a subtle tang that balances the richness of the beef. Don't skip this step if you want that perfect restaurant-quality finish.
Reverse-Sear for Perfect Doneness
Preheat your oven to 250°F. Place the seasoned beef on a wire rack set inside a rimmed baking sheet. Roast for 30-35 minutes, or until the internal temperature reaches 110-115°F when measured with an instant-read thermometer. This gentle cooking method ensures the meat stays incredibly tender and juicy throughout.
During this time, prepare your searing station. Heat a heavy skillet or cast-iron pan over high heat until it's smoking hot. Add 2 tbsp butter and let it melt completely. The butter will help create a rich, flavorful crust during the final sear.
Sear to Create the Perfect Crust
Remove the beef from the oven and let it rest for 2 minutes before searing. This brief rest prevents the meat from releasing too much juice during the hot sear. Place the beef in the smoking-hot pan and sear for 2-3 minutes per side, pressing down gently with a spatula to ensure even contact with the pan.
You'll know it's ready when the crust is deep golden brown and the butter has caramelized slightly. The internal temperature should now read 130-135°F. Don't rush this step—the crust is what transforms this from good beef to exceptional beef. If you see any areas that aren't browned, simply rotate the beef and sear those spots until golden.
Rest and Garnish for Maximum Juiciness
Transfer the seared beef to a cutting board and let it rest for 10-15 minutes. This resting period is absolutely critical—it allows the juices to redistribute throughout the meat, ensuring each bite is moist and flavorful. During this time, thinly slice the whole yellow onion and 0.25 cup fresh parsley for garnish.
Slice the beef against the grain into ¼-inch thick pieces and arrange on a platter. Garnish with the sliced onions and parsley, then drizzle with any remaining pan juices from the searing process. The result should be a perfectly balanced dish with a crispy exterior, tender interior, and vibrant presentation that's sure to impress.
Pro Tips For Making Angus Beef London Broil
- Sear First, Then Roast: Start with a screaming-hot pan—cast iron if you have it—and get those garlic slices and herb sprigs to brown for 2-3 minutes before adding the beef. I learned this the hard way: skipping the initial sear means the aromatics just steam instead of building flavor. Once the beef hits the pan, don’t crowd it—let it sizzle undisturbed for 3-4 minutes per side to form that crust. ---
- Trim the Fat, Not the Flavor: Leave a thin layer of fat on the beef—about 1/8-inch—but trim the thickest parts so it renders evenly. I used to go overboard cutting, and the meat dried out faster. That fat is your friend: it baste the meat as it cooks and keeps it juicy. Just don’t let it pool like a lake. ---
- Skip the Overcrowded Pan: If your pan is smoking like a campfire after 30 seconds, you’ve got too much in there. Cook the beef in batches if needed—even if it means two trips to the stove. Overcrowding steams the meat instead of searing it, and you’ll end up with sad, gray edges. Trust me, your future self will notice the difference. ---
- Rest Under Foil, Not Plate: After pulling the beef from the oven or grill, tent it loosely with foil and let it rest for 5-10 minutes. I know, I know—you want to cut into it immediately—but resting locks in the juices. If you’re impatient (like me), at least give it 5 minutes. The meat will stay tender, and you won’t regret it.
Dietary considerations for this angus beef london broil
Gluten-Free Adaptations
The reverse-sear method for London broil is naturally gluten-free, but watch your seasoning and finishing touches. The marinade ingredients—olive oil, rosemary, thyme, garlic, salt, and pepper—are all gluten-free, but always check labels on pre-minced garlic or store-bought herbs for cross-contamination warnings. For the cornstarch crust, use a gluten-free cornstarch blend like Bob's Red Mill or Arrowhead Mills to maintain that crispy texture without gluten. 🌾
Low-Carb & Keto Options
This recipe is already keto-friendly with its focus on high-fat, zero-carb ingredients. Skip the red wine vinegar in the crust if you're strict about carbs (it's only 1 tbsp, but every bit counts). The butter used for basting is pure fat, and the garnish of onions and parsley adds minimal carbs. For extra flavor without carbs, add a sprinkle of crushed pork rinds on top after searing—they mimic breadcrumbs perfectly while keeping it keto-compliant.
Allergen Considerations
For those with dairy allergies, simply omit the butter used for basting and searing. Replace it with avocado oil or ghee (clarified butter, which is dairy-free). The cornstarch crust remains safe unless you're allergic to corn, in which case swap it for arrowroot powder or tapioca starch. Always double-check your olive oil for potential cross-contamination if you have severe allergies—brands like Primal Kitchen or Chosen Foods are typically safe bets for allergen-sensitive cooks.
Protein-Packed Modifications
Want to boost the protein content even further? Add a thinly sliced ribeye cap (about ½ lb) to the same pan during the final sear—it’ll cook in just a few minutes and add extra richness. For a leaner option, substitute half the beef with grass-fed sirloin (still high-protein, just slightly less marbling). The reverse-sear technique works beautifully with both cuts, ensuring perfect doneness every time. 💪
Vegetarian Substitutes
While this recipe is meat-centric, you can create a similar texture with extra-firm tofu or portobello mushrooms for a vegetarian version. Marinate the tofu in the same herb oil blend, press it dry, then coat with cornstarch before pan-searing. For mushrooms, slice them ½-inch thick, marinate, and sear until golden. Note that the crust won’t be identical, but the technique delivers a satisfying texture contrast. Pair with the same sides for a hearty meat-free meal.
Nutrition facts
Frequently asked questions
What's the best cut of beef for London broil?
The ideal cuts are top round or sirloin, both known for their lean yet flavorful profile. For this recipe, Angus beef is perfect because its marbling ensures tenderness while the leaner nature creates that signature crust. Avoid overly fatty cuts like ribeye—they won't develop the same crispy exterior.
Why does the recipe call for a reverse-sear method?
The reverse-sear guarantees a juicy core with a crispy crust—something difficult to achieve with traditional high-heat methods. First, the low oven temp (250°F) cooks the meat evenly, then the high-heat sear creates the coveted bark. This two-stage process prevents overcooking while maximizing flavor development.
Can I make this recipe without cornstarch?
Yes, but you'll miss the signature crispy texture. For a substitute, try 1 tbsp flour (for non-gluten-free) or arrowroot powder mixed with vinegar. The cornstarch creates a dry surface that caramelizes beautifully during searing—essential for that restaurant-quality finish. Without it, the crust will be softer.
How do I know when the beef is done?
Use a meat thermometer for accuracy. The reverse-sear method targets 130-135°F internal temp after searing (about medium-rare). For medium, aim for 140-145°F. Never rely on visual cues alone—Angus beef can look "done" before reaching safe temperatures.
What's the best way to reheat leftovers?
London broil leftovers should be reheated gently to avoid drying out. Use a cast-iron skillet over medium-low heat with 1 tbsp butter for 2-3 minutes per side until warmed through. Microwaving is not recommended—it destroys the crust and makes the meat tough. Store leftovers in an airtight container for up to 3 days.