
Main Courses
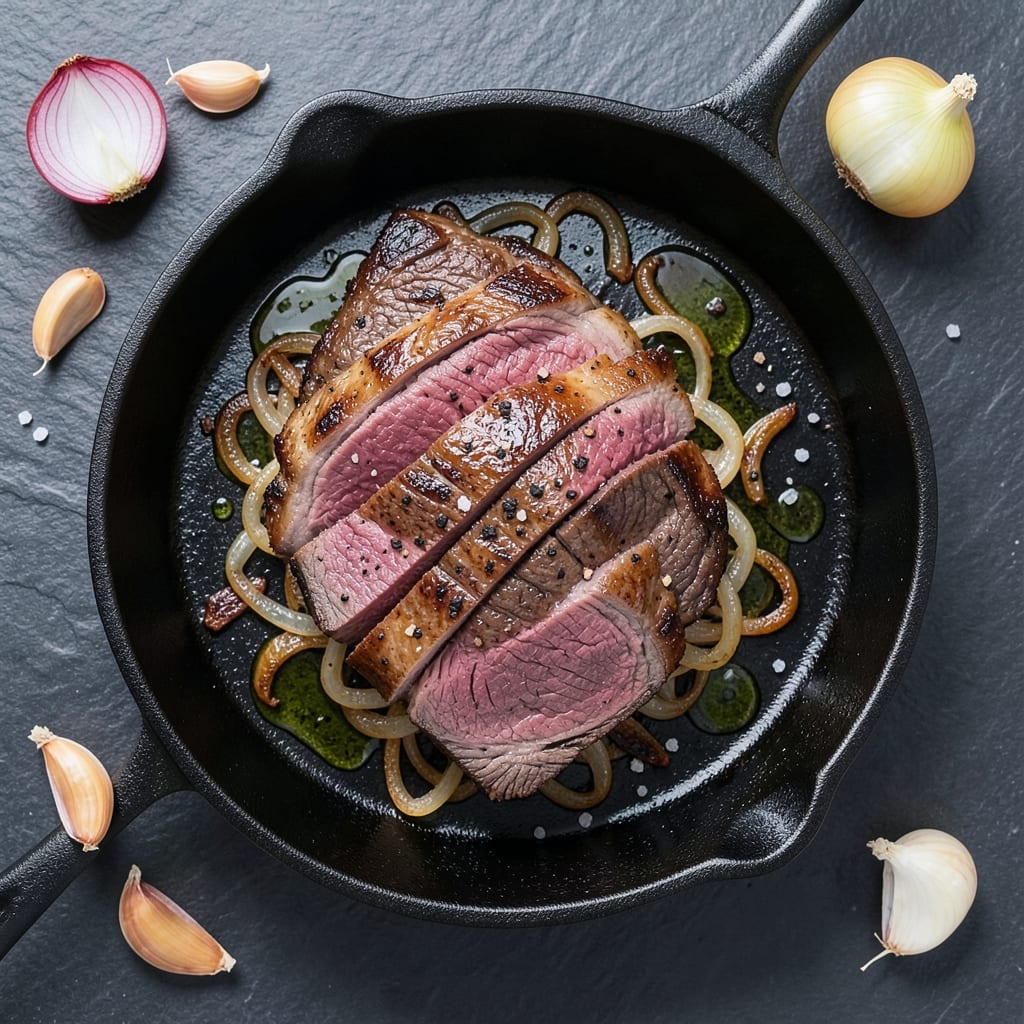
This angus beef chuck steak recipe transforms tough cuts into melt-in-your-mouth perfection through a dry-brine technique that guarantees juicy results. The secret lies in proper seasoning and slow cooking, which breaks down connective tissue while preserving flavor. Unlike quick sears, this method delivers restaurant-quality tenderness without requiring special equipment.
Start with a simple dry brine—just salt and time—to enhance flavor penetration, then use a combination of searing and braising for even cooking. The crust develops a deep, caramelized richness while the interior remains fork-tender. This approach works equally well for grilling, oven-braising, or stovetop methods, making it versatile for any kitchen.
What you’ll achieve is a steak with a perfectly balanced crust and core—no dry edges, no tough fibers, just pure beef satisfaction. The technique ensures every bite delivers maximum flavor, making it ideal for special occasions or weeknight dinners when you want to impress. Pair with roasted vegetables or a rich red wine reduction for a complete meal.
The best part? This method requires minimal effort beyond the initial seasoning and timing. Whether you're cooking for two or feeding a crowd, the results are consistently restaurant-quality without the fuss. Let’s get started on creating your most tender chuck steak yet.
Ingredients for angus beef chuck steak
Center-cut Angus chuck roast and premium seasonings create melt-in-your-mouth tenderness with a restaurant-quality crust.
| Ingredient | Amount | Notes |
|---|---|---|
| Angus Beef Chuck Roast 🥩 | 3 lb | Center-cut for even tenderness |
| Kosher Salt 🧂 | 2 tbsp | Diamond Crystal preferred |
| Freshly Ground Black Pepper 🌶️ | 1 tbsp | Coarse grind for texture |
| Extra-Virgin Olive Oil 🫒 | ¼ cup | For searing and basting |
| Yellow Onion 🧅 | 1 whole | Large, thinly sliced |
| Garlic Cloves 🧄 | 6 cloves | Smashed, not minced |
| Fresh Thyme Leaves 🌿 | ¼ cup | Stems removed, chopped |
| Fresh Rosemary Sprigs 🌿 | 4 whole | Fronds separated, chopped |
| Red Wine 🍷 | 1 cup | Bold Cabernet Sauvignon |
| Beef Broth 🍲 | 1 cup | Low-sodium preferred |
| Tomato Paste 🍅 | 1 tbsp | Squeeze tube preferred |
| Balsamic Vinegar 🍶 | 1 tbsp | Aged minimum 12 years |
| Fresh Parsley 🌿 | ⅛ cup | Chopped, for garnish |
The Angus beef chuck roast is non-negotiable for this recipe—center-cut pieces deliver superior marbling and tenderness. Look for USDA Choice or Prime grades at specialty butchers like Snake River Farms or your local high-end grocer. If buying whole, trim excess fat to ¼-inch thickness for even cooking. The dry-brine method requires Diamond Crystal kosher salt (it dissolves faster than Morton), which you'll apply 24 hours ahead for maximum flavor penetration. Fresh herbs are critical here—Trader Joe's carries excellent thyme and rosemary bundles, or source from your local farmers market for peak freshness.
No red wine? Substitute with beef broth plus 1 tbsp balsamic vinegar—the acidity mimics wine's depth. Fresh herbs unavailable? Dried thyme and rosemary work at half the amount, but fresh delivers that bright, aromatic punch. For the tomato paste, squeeze tubes from Trader Joe's are ideal—they're pre-portioned and last indefinitely. The balsamic vinegar should be aged 12+ years for that rich, caramelized depth (look for Colavita or Di Martino brands). If you're short on time, pre-sliced onions from the salad bar section work fine—just pat them dry before cooking to prevent steaming.
Store the dry-brined steak uncovered in the fridge for 24 hours—this isn't a mistake, it's the secret to juiciness. Once seared, transfer to a glass baking dish and refrigerate for up to 3 days before finishing. The braising liquid keeps for 5 days in the fridge or 3 months frozen in ice cube trays. For meal prep, portion the cooked steak into vacuum-sealed bags with a splash of beef broth—reheats beautifully in the oven at 325°F for 20 minutes, covered with foil.
Why You'll Love This Recipe
- Here’s what sold me: a single chuck roast stretches to feed four (or five if someone’s extra hungry). It’s way more affordable than ribeye but just as satisfying—especially when you’re hosting or just trying to avoid takeout. Plus, the onions? They’re the cheap hero we all need.
- Four Reasons You’ll Keep Making This: Minimal Prep, Maximum Payoff
- Rich, Buttery, Unforgettable: That chuck roast? It’s got layers—tender, juicy, with a crust so good you’ll want to eat it with a spoon. The onions add this sweet, jammy depth, and the pepper? Just enough to make every bite sing without overpowering. It’s the kind of flavor that sticks with you.
- Leftovers That Don’t Suck: Between us, most beef leftovers turn into sad, dry mystery meat. Not this. Slice it up the next day, toss it in a pan with a splash of broth, and boom—you’ve got a filling, hearty lunch. My kids actually ask for it, and I’ll take that win.
Step-by-step instructions for perfectly dry-brined Angus beef chuck roast
Master this technique for a crust so crisp it shatters and a core so tender it melts.
Dry-Brining for Maximum Flavor and Texture
Remove the 3 lb Angus Beef Chuck Roast from packaging and pat it completely dry with paper towels—this is critical for that signature crust. Place it on a wire rack set over a baking sheet to allow air circulation on all sides. In a small bowl, combine the 2 tbsp kosher salt and 1 tbsp freshly ground black pepper, then rub this mixture all over the roast, pressing firmly into the meat. Work the seasoning into the crevices and fat cap.
Cover loosely with plastic wrap and refrigerate for 24 hours—this dry-brine transforms the meat by drawing out moisture while allowing the salt to penetrate deeply. The result? A roast that sears beautifully and stays impossibly juicy during cooking. Real talk: Don't skip this step. I've tried rushing it, and the crust never develops that perfect shatter.
Sear to Develop Deep Flavor and Crust
Remove the roast from the fridge and let it sit at room temperature for 30 minutes before cooking. Preheat your oven to 425°F and heat a large Dutch oven over medium-high heat. Add the 0.25 cup extra-virgin olive oil and let it get smoking hot—this ensures maximum contact for that golden crust. Place the roast fat-side down in the pan and sear undisturbed for 8-10 minutes, pressing down gently with a metal spatula during the first minute to prevent curling.
Flip the roast and continue searing for another 6-8 minutes until all sides develop a deep mahogany crust. The fat should render beautifully, creating a flavorful pool in the pan. Here's the thing—if you rush this step, you'll lose that perfect crust. Patience now means restaurant-quality results later.
Build the Aromatic Base for the Braising Liquid
Remove the roast from the Dutch oven and set it aside. In the same pan, add the 1 whole yellow onion (thinly sliced) and cook for 3-4 minutes until softened. Add the 6 cloves garlic (smashed, not minced) and cook for 30 seconds until fragrant. Stir in the 0.25 cup fresh thyme leaves and 4 whole fresh rosemary sprigs (fronds separated and chopped), cooking for another 1 minute to release their essential oils.
Deglaze the pan with the 1 cup red wine, scraping up all those flavorful browned bits from the bottom. Let it simmer for 2-3 minutes until reduced by half. This step is where all the magic happens—those browned bits contain concentrated meat flavor that we're capturing for our braising liquid.
Braise to Perfection with Flavorful Liquid
Return the roast to the Dutch oven and add the 1 cup beef broth, 1 tbsp tomato paste, and 1 tbsp balsamic vinegar. The liquid should come about halfway up the sides of the roast. Bring everything to a gentle simmer, then transfer to a 350°F oven. Cover with a tight-fitting lid and braise for 2.5-3 hours, until the meat is fork-tender and the internal temperature reaches 200-205°F.
Check the roast after 2 hours—it should be falling apart easily when tested with a fork. If it's not quite there, add ¼ cup hot water to the pan and continue cooking. The balsamic vinegar adds a subtle tang that cuts through the richness of the beef, while the tomato paste gives us that classic braising depth.
Rest and Garnish for Maximum Juiciness
Remove the roast from the oven and transfer it to a cutting board. Tent loosely with foil and let it rest for 20-30 minutes—this crucial step allows the juices to redistribute throughout the meat. Don't skip this, or you'll end up with dry slices. During this time, skim excess fat from the braising liquid and reduce it by half on the stovetop if you want a thicker sauce.
Once rested, slice the roast against the grain into ½-inch thick slices. Garnish each serving with 0.125 cup fresh parsley and spoon the reduced braising liquid over the top. Each bite should deliver that perfect combination of crispy crust and melt-in-your-mouth tenderness, with layers of herbaceous, wine-infused flavor.
Pro Tips For Making Angus Beef Chuck Steak
- Sear First, Then Slice: I learned this the hard way—skipping the initial sear makes the chuck feel like it’s still tough after cooking. Hit a screaming-hot pan with olive oil, then sear the steak 2-3 minutes per side until deep brown before adding onions. That crust locks in flavor and makes all the difference when you slice against the grain later.
- Pat Dry, Then Salt Generously: Moisture is your enemy here—wet beef steams instead of searing. Grab paper towels and dry the chuck thoroughly before seasoning, then hit it with kosher salt heavily (about 1.5 teaspoons per pound). Let it sit 20 minutes uncovered—yes, even if you’re impatient like me—so the salt works its magic.
- Skip the Overcrowded Pan: I used to toss everything in at once, and the onions would just sit there soggy while the steak cooked unevenly. Sear the chuck first, then remove it, add onions in the same pan, and cook them separately until caramelized. Only return the steak to finish together—this keeps the texture crisp where it counts.
- Use a Meat Thermometer: Guessing doneness with chuck is a fool’s game—it’s leaner than ribeye and needs precision. Pull it at 130°F for medium-rare (it’ll rest to 135°F), and never go by visual cues alone. I’ve had chuck that looked perfect but tasted like shoe leather because it was overcooked. Trust the thermometer, not your eyes.
Perfect pairings for this angus beef chuck steak
Classic Side Dishes
Roasted garlic mashed potatoes elevate every bite—creamy yet sturdy enough to hold up against rich beef. I use 4 large Yukon Gold potatoes boiled until tender, then mashed with ½ cup unsalted butter, ½ cup whole milk, 4 cloves roasted garlic, and ½ cup sour cream. Season with 1 tsp kosher salt and ½ tsp white pepper for that velvety texture. 🥔
For a fresh contrast, sautéed green beans with almonds add crunch. Toss 1 lb trimmed green beans in 2 tbsp olive oil, 3 minced garlic cloves, and 1 tsp red pepper flakes. Roast at 425°F for 12 minutes, then finish with ¼ cup toasted sliced almonds and a squeeze of lemon. The nutty crunch cuts through the beef's richness beautifully.
Rich Sauces
A red wine reduction made from the braising liquid is non-negotiable. After removing the roast, strain the liquid through a fine-mesh sieve, then reduce it on medium-high heat until syrupy. Finish with 1 tbsp cold butter and a pinch of salt. This sauce adds depth without overwhelming the steak's natural flavors. 🍷
For a tangy twist, try a horseradish cream—whisk ½ cup sour cream with 1 tbsp prepared horseradish, 1 tbsp Dijon mustard, and 1 tsp lemon juice. Drizzle over sliced steak for a sharp, creamy contrast that cleanses the palate.
Beverage Pairings
A bold Cabernet Sauvignon mirrors the dish's depth—look for Napa Valley or Bordeaux varieties with 14% ABV or higher. The wine's tannins complement the beef's richness while its acidity brightens the dish. I love Caymus Vineyards or Château Margaux for special occasions. 🍷
For beer lovers, a Belgian-style dubbel like Westmalle Dubbel offers malty sweetness and caramel notes that harmonize with the caramelized crust. Avoid heavy IPAs—they clash with the dish's delicate balance.
Global Variations
For a French bistro twist, serve with duchesse potatoes and a red wine jus. The potatoes' fine texture contrasts the steak's heartiness, while the jus ties everything together. 🇫🇷
In Texas-style, swap the red wine for bourbon in the braising liquid and serve with cornbread and collard greens. The smoky, sweet notes of bourbon add a Southern flair that pairs perfectly with the steak's depth.
Nutrition facts
Frequently asked questions
Why does this recipe call for a 24-hour dry brine?
The dry brine is the secret weapon for transforming tough chuck roast into melt-in-your-mouth perfection. The salt penetrates deeply during this time, breaking down proteins and enhancing flavor while the surface dries slightly for that coveted crust. Skipping this step means you'll miss out on maximum tenderness and depth of flavor—it's worth the wait!
Can I use a different cut of beef instead of chuck roast?
While chuck roast is ideal for this braising method, you could substitute with chuck eye steak or flat iron steak for a quicker cook time. However, these leaner cuts won't benefit as much from the long braise. For best results, stick with chuck roast—its marbling and connective tissue make it perfect for this technique.
What's the best way to check doneness without a meat thermometer?
For perfect tenderness, look for these visual cues: the meat should pull apart easily with two forks, and the juices should run clear (not pink or bloody). A good rule of thumb is 2.5-3 hours of braising for a 3 lb roast. If you're unsure, cut into a small section—it should feel tender like pulled pork.
Can I make this recipe in a slow cooker?
After searing the roast, transfer it to your slow cooker with all the braising ingredients. Cook on Low for 8 hours or High for 5-6 hours until fork-tender. The slow cooker method works especially well if you're preparing this for a crowd—just be sure to check the internal temperature reaches 200-205°F.
How far ahead can I prepare the braising liquid?
You can make the braising liquid up to 3 days ahead and store it in the refrigerator. For best flavor, reduce it slightly before using—simmer uncovered on the stovetop for 10-15 minutes to concentrate the flavors. If storing long-term, freeze it in ice cube trays for easy portioning.