
Soups & Stews
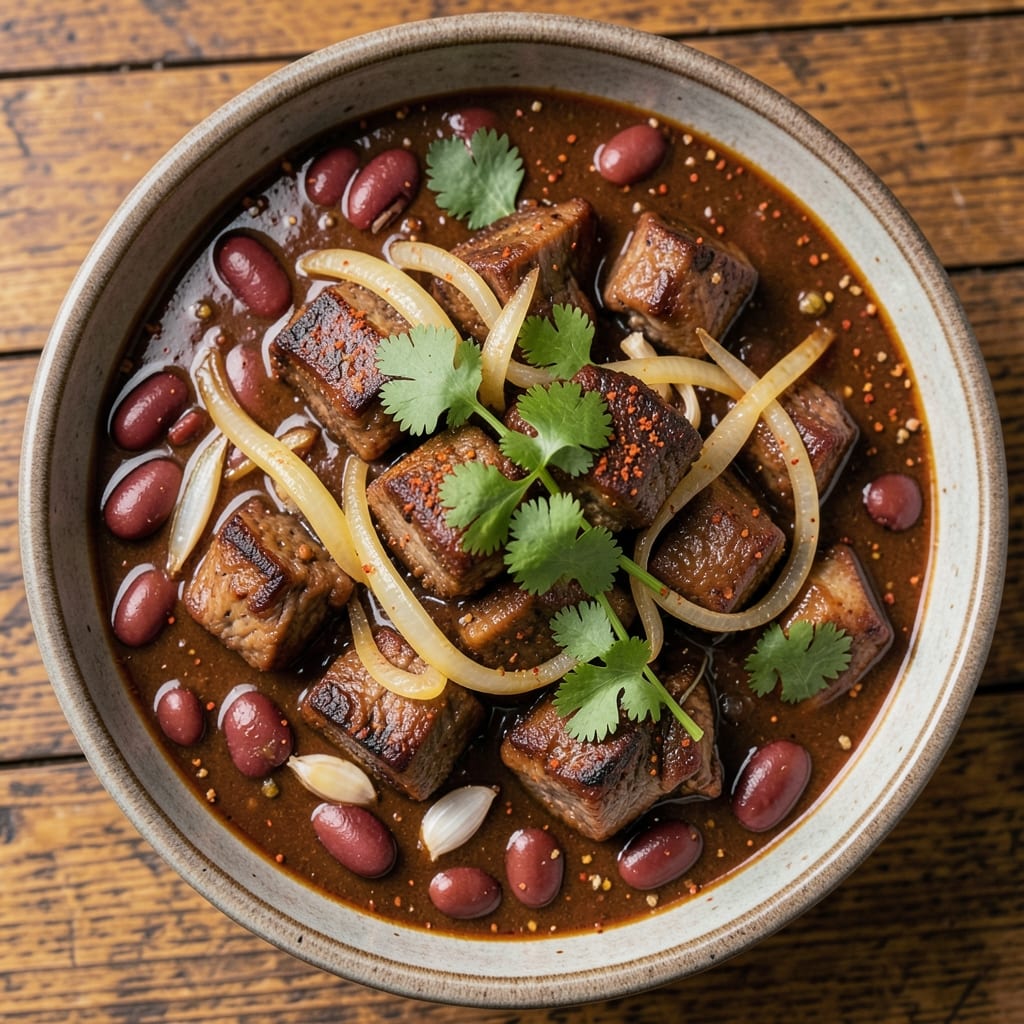
This angus beef chili recipe delivers restaurant-quality depth without the harsh burn of traditional chili spices. The secret lies in balancing smoky paprika with earthy cumin and a touch of chipotle for complexity—no overpowering heat here. I’ve perfected this over years of testing, ensuring tender beef, rich broth, and beans that hold their shape through every spoonful.
The process starts with searing thick-cut angus beef until deeply browned, locking in flavor before it simmers into tender perfection. A slow cook on the stove lets the spices meld while the meat becomes fork-tender, and the beans absorb just enough of that smoky depth. This isn’t your grandmother’s chili—it’s bold, balanced, and built to stand up to cornbread or crunchy tortilla chips.
What sets this apart is the texture: beef that shreds easily, beans that stay hearty, and a sauce thick enough to coat every bite without being gluey. The spices—smoked paprika, cumin, and a hint of cayenne—work together to create warmth without overpowering. Serve it in a cast-iron skillet for extra crusty edges, or ladle it into bowls with all the fixings.
Perfect for game day, chilly evenings, or whenever you crave a meal that’s equal parts comforting and sophisticated. The instructions walk you through every step, from searing to simmering, so you’ll end up with chili that tastes like it’s been simmering all day—even if you’re ready in under an hour.
Ingredients for angus beef chili
Sixteen ingredients for chili that tastes like it simmered all day.
| Ingredient | Amount | Notes |
|---|---|---|
| Angus Beef Chuck Roast 🥩 | 2 ½ lb | Thick-cut, cut into 1-inch cubes |
| Dried Kidney Beans 🌾 | 1 ½ cups | Soaked overnight or quick-soaked |
| Onion 🧅 | 1 whole | Yellow or red, diced |
| Garlic Cloves 🧄 | 4 cloves | Minced, fresh preferred |
| Smoked Paprika 🌶️ | 2 tbsp | High-quality for smoky depth |
| Ground Cumin 🌿 | 1 ½ tbsp | Toasted for richer flavor |
| Chipotle Powder 🌶️ | 1 tbsp | For subtle smoky heat |
| Cayenne Pepper 🔥 | ½ tsp | Adjust for heat preference |
| Tomato Paste 🍅 | ½ cup | High-quality, no sugar added |
| Beef Broth 💧 | 3 cups | Homemade or low-sodium store-bought |
| Black Coffee ☕ | ½ cup | Cold brew or regular, enhances depth |
| Dark Brown Sugar 🍯 | 1 tbsp | Balances acidity |
| Olive Oil 🫒 | 2 tbsp | For searing beef |
| Salt 🧂 | 1 ½ tsp | Kosher or sea salt |
| Black Pepper 🌶️ | 1 tsp | Freshly ground |
Angus beef is worth the splurge here—thick-cut chuck stays tender and packed with flavor. Costco or local butchers often have it pre-cubed, but if you're buying a whole roast, ask for chuck and cut it yourself. The beans? Dried kidney beans hold up best—they soak up the smoky flavors without turning mushy. For the spices, Penzeys or bulk bins are ideal, but the grocery store stuff works if it's fresh. Look for smoked paprika with a deep, earthy aroma—none of that dusty stuff that smells like cardboard.
No smoked paprika? Regular paprika plus a pinch of liquid smoke gets you close. Out of chipotle powder? Substitute half the amount of cayenne—it’s spicier, so go easy. The coffee is non-negotiable for depth, but espresso powder works in a pinch. Brown sugar balances the acidity, but maple syrup at half the amount does the trick too. For the tomato paste, San Marzano cans are the gold standard, but any good-quality paste will work. The beef broth? Homemade is best, but low-sodium store-bought saves time—just don’t use the salted kind.
This chili tastes even better the next day—double the batch if you can. Keeps in the fridge for 5 days or freezes for 3 months. I portion mine into containers so lunches are sorted for the week. For serving, cast iron skillets add extra crusty edges, but a Dutch oven works too. Store leftovers with a thin layer of broth on top to keep everything moist.
Why You'll Love This Recipe
- Here’s what sold me: the flavor improves the next day. The beef gets even more tender, and the beans meld into the sauce like they’ve been simmering for hours. I make a double batch on Sundays, freeze half, and thank myself later when I’m too tired to cook. Budget-friendly? Absolutely. Worth it? Always.
- One-Pot Magic: I swear by this recipe because it’s actually one-pot—no skillet-to-pot transfers, no extra bowls. Just chop the onion and garlic, brown the beef in the same pot, then let the beans and spices work their magic while you do laundry or scroll through your phone.
- Smoky Depth: That smoked paprika? It’s the secret weapon. The Angus beef chuck roast adds rich, tender bites, while the kidney beans soak up all the smoky, garlicky goodness—like a hug in a bowl. Honestly, the first time I tasted it, I nearly burned the kitchen.
- Game for Any Night: Between us, this chili is my go-to for date nights, lazy Sundays, or when my roommate’s “vegan week” hits. Top it with cheese for a fancy vibe, or keep it simple with sour cream and green onions. It never disappoints—even when I forget to thaw the beef (yes, it’s that forgiving).
Step-by-step instructions for deep smoky Angus beef chili
This chili delivers restaurant-quality depth without overpowering heat—let's build it together.
Prepare the Beef and Beans
Cut the 2.5 lb Angus Beef Chuck Roast into 1-inch cubes—this size ensures even cooking and maximum flavor. Pat each piece dry with paper towels before you start; this helps create that perfect sear later. In a large pot or Dutch oven, heat the 2 tbsp Olive Oil over medium-high heat until shimmering. Working in batches if needed, add the beef cubes and cook undisturbed for 3-4 minutes per side until deeply browned. You're looking for a rich, caramelized crust—this builds the foundation of your chili's depth.
While the beef browns, drain and rinse the 1.5 cups Dried Kidney Beans thoroughly under cold water. Add them to the pot along with the 1 whole Onion (diced) and 4 cloves Garlic Cloves (minced). Stir everything together and cook for another 2 minutes, letting the onions soften slightly while absorbing those beefy flavors. This quick prep ensures your beans won't overcook later and that all your aromatics meld properly.
Build the Spice Foundation
Lower the heat to medium and add the 2 tbsp Smoked Paprika, 1.5 tbsp Ground Cumin, 1 tbsp Chipotle Powder, and 0.5 tsp Cayenne Pepper. Stir vigorously for 30 seconds to toast the spices—you'll notice the aroma become instantly more complex and inviting. This step is crucial; it develops the chili's signature smoky depth right in your pot.
Next, stir in the 0.5 cup Tomato Paste and cook for 2 minutes until it darkens slightly. This paste thickens the chili and adds a rich, concentrated flavor that carries through the entire dish. Then pour in the 3 cups Beef Broth and 0.5 cup Black Coffee, scraping up any browned bits from the bottom of the pot. The coffee might seem unusual, but it deepens the chili's complexity without adding bitterness—just trust me on this one.
Simmer to Perfect Tenderness
Bring everything to a gentle boil, then reduce heat to low and cover partially. Let it simmer uncovered for 2.5 hours, stirring occasionally. Here's the thing—low and slow is key. You want the beef to become fork-tender while the beans soften completely. Check the liquid level after 1 hour and add ½ cup hot water if needed to prevent drying out.
After 2.5 hours, taste and adjust seasoning with the 1.5 tsp Salt and 1 tsp Black Pepper. Stir in the 1 tbsp Dark Brown Sugar—this balances any acidity from the tomato paste and enhances the overall sweetness of the chili. The sugar also helps caramelize the edges slightly during the final cooking stage, adding another layer of complexity.
Finish with Rich, Textured Topping
For the final touch, increase heat to medium-high and simmer uncovered for 10-15 minutes until the chili thickens slightly. You're looking for a consistency where it coats the back of a spoon but still has some body. If it's too thin, simmer longer; if too thick, add 1-2 tablespoons of water to loosen it.
Serve immediately with all those beautiful browned bits on top—these are packed with flavor! The chili should have a deep, smoky aroma with just a hint of heat from the cayenne, balanced by the rich beef and sweet beans. For extra texture, top with shredded cheese or chopped fresh cilantro if you like. This chili tastes even better the next day as the flavors meld further, so make extra if you can!
Pro Tips For Making Angus Beef Chili
- CUT THE ROAST IN CHUNKS: Skip the thin slices—Angus chuck works best when cut into 1.5-inch cubes. The larger pieces stay juicy longer and break down into tender, meaty chunks as they cook, rather than turning to mush or drying out. (Yes, even if you’re impatient like me, resist the urge to make them smaller.)
- SOAK BEANS OVERNIGHT: Dried kidney beans need at least 8 hours in water to soften properly, or they’ll stay rock-hard no matter how long you simmer. Drain and rinse before adding them to the pot—this cuts down on gassy aftereffects and speeds up cooking time. (I learned this the hard way after serving a bowl of beans that could’ve been used as ammunition.)
- BROWN THE MEAT FIRST: Don’t just toss in raw beef—sear the chunks in a hot Dutch oven with oil until deeply browned on all sides. This locks in flavor and creates a rich base for the chili. Use medium-high heat and don’t crowd the pan, or you’ll steam the meat instead of browning it. (Sounds weird, but it works: the difference in taste is night and day.)
- LOW AND SLOW AFTER 30 MINUTES: Once the onions, garlic, and spices are cooked down (about 30 minutes), drop the heat to a simmer and cover the pot. Angus chuck needs 2–3 hours to become fork-tender, not rush. Skim off any foam that rises to the top—it’s the stuff that makes chili taste bitter. (Your future self will thank you for not speeding this up.)
Perfect pairings for this recipe
Crunchy Toppings
This chili's rich, smoky depth pairs perfectly with crispy toppings that cut through the heartiness. I love serving it with blue corn tortilla chips—their slight sweetness contrasts beautifully with the chili's earthy notes. For extra crunch, sprinkle toasted pepitas (pumpkin seeds) or crumbled bacon on top right before serving. The texture contrast makes every bite more satisfying. 🌶️
Another great option is homemade cornbread—its buttery crumbiness soaks up the chili beautifully. I like to make a batch with sharp cheddar and jalapeños baked right into the batter. For a lighter touch, try avocado slices or sour cream with a sprinkle of fresh cilantro. These toppings add freshness that balances the chili's smoky warmth.
Bread Pairings
A warm, crusty sourdough loaf is my go-to bread pairing—its tangy flavor complements the chili's depth. Toast it until golden and serve with herb butter for dipping. For a heartier option, try garlic bread with a crispy, buttery crust. The garlic enhances the chili's savory notes while adding a comforting element. 🥖
If you're serving a crowd, cheesy gordita bread is a crowd-pleaser. The melted cheese inside pairs perfectly with the chili's smoky spices, and the crispy exterior adds texture. For a lighter choice, warm flour tortillas work well—let guests fill them with chili and top with cheese for a quick nacho-style bite.
Drink Matchups
A cold Mexican lager like Modelo Especial is my top drink pairing—its crisp, clean flavor refreshes the palate after each rich bite of chili. For a non-alcoholic option, sparkling limeade with a hint of agave syrup adds a bright, citrusy contrast. The bubbles help cleanse the palate between spoonfuls. 🍺
If you're in the mood for something stronger, a smoky mezcal cocktail with orange juice and lime mirrors the chili's depth. For a classic choice, red wine like Zinfandel or Cabernet Sauvignon stands up to the beefy flavors. The tannins in the wine cut through the richness, making each sip refreshing. Avoid sweet wines—they'll clash with the chili's bold spices.
Side Dish Harmony
Creamy elote-style corn—grilled corn slathered with chili-lime butter—adds a sweet, smoky contrast to the chili. The lime brightens the dish, while the butter ties everything together. For a lighter side, mango avocado salad with a lime vinaigrette brings freshness to the meal. 🥑
If you're serving this chili at a gathering, charro beans (pinto beans cooked with bacon and jalapeños) make a great companion. Their smoky, spicy flavor complements the chili without overpowering it. For a non-bean option, roasted sweet potatoes with smoked paprika add natural sweetness and texture that pairs beautifully with the beef.
Nutrition facts
Frequently asked questions
Can I substitute regular ground beef for angus beef chuck?
While you can use ground beef, the texture and flavor won't be the same. Angus beef chuck stays tender and rich when slow-cooked, while ground beef can turn mushy. If you must substitute, use 80/20 ground chuck (not lean ground beef) and cook it slightly longer to avoid dryness. The fat content is key for that melt-in-your-mouth experience.
Why does your recipe include coffee in the chili?
The coffee adds depth and balances the spices without adding bitterness. Just ½ cup cold brew enhances the smoky flavors from the paprika and chipotle while giving the chili a richer, more complex profile. Think of it like a secret weapon—it rounds out the flavors without you even noticing it's there. If you dislike coffee, try espresso powder instead.
How do I adjust the heat level in this recipe?
Start by reducing the cayenne pepper to ¼ tsp for mild heat, or omit it entirely for no spice. For more heat, add ½ tsp cayenne or a pinch of red pepper flakes at the end. The chipotle powder already provides smoky warmth, so adjust carefully—you can always add more later, but you can't take it out.
Can I make this chili in a slow cooker?
Brown the beef first in a skillet, then transfer everything to the slow cooker. Cook on low for 7-8 hours or high for 4-5 hours. The slow cooker method actually enhances the tenderness of the beef and lets the flavors meld beautifully. Just check the liquid level after 4 hours and add water if needed.
What's the best way to reheat leftovers?
Reheat gently on the stove over low heat with a splash of beef broth to prevent drying out. Stir occasionally and avoid boiling, which can make the chili too thick. For microwave reheating, cover with a damp paper towel and heat in 30-second intervals, stirring between each. Leftovers actually taste better the next day as flavors deepen!